Last updated on June 7th, 2026
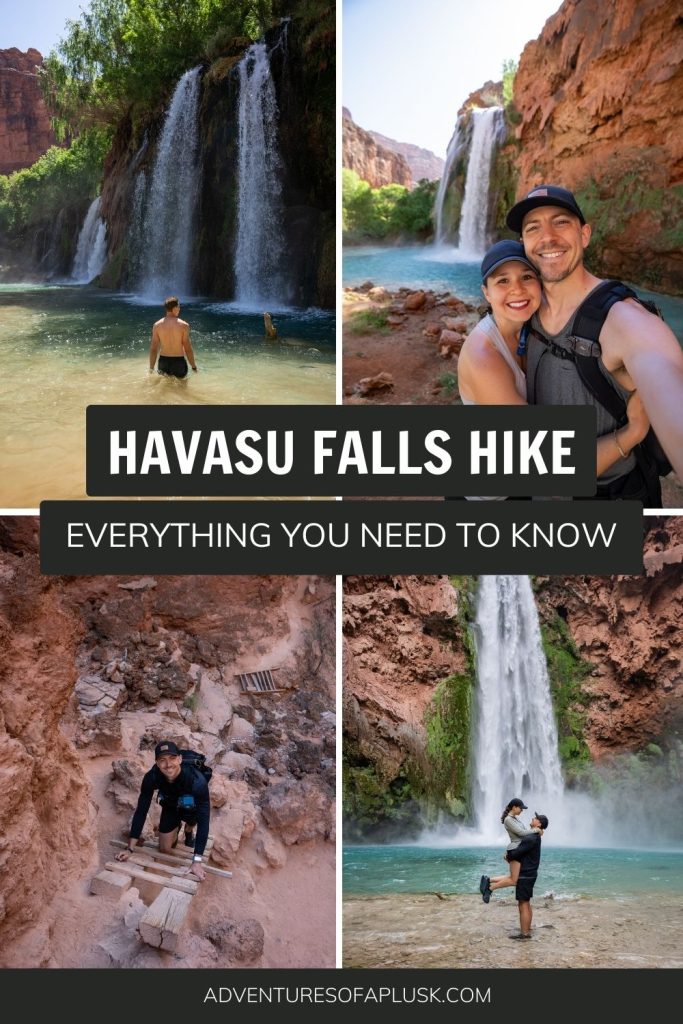
Hiking the Havasu Falls trail is one of the ultimate bucket list adventures in the USA! We’re sharing everything you need to know, plus our top tips, for both before and during your trip.
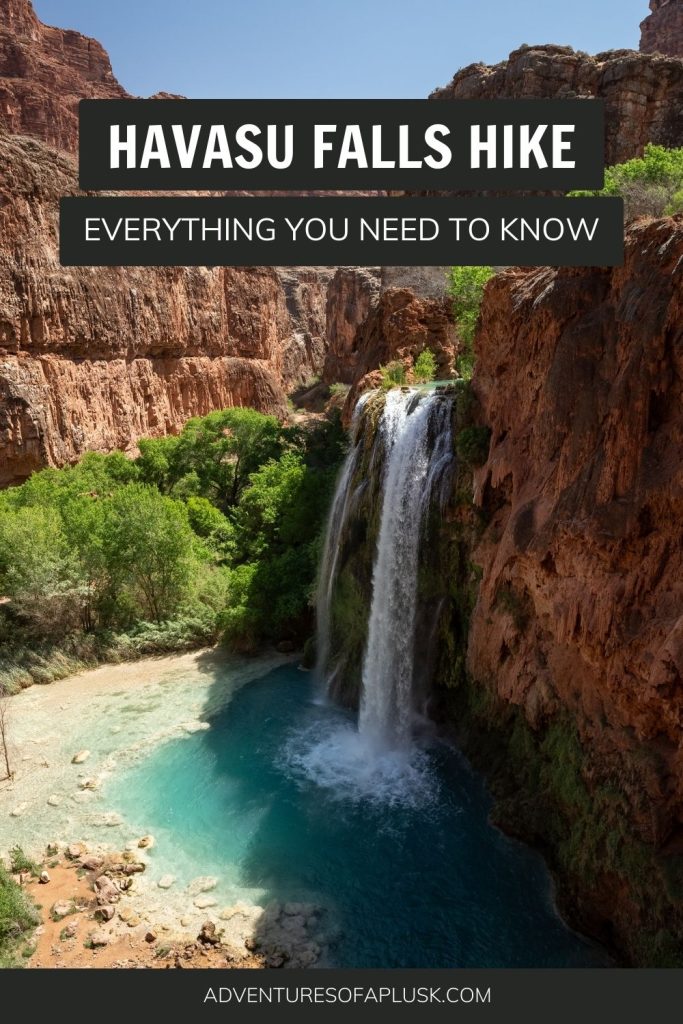
With vibrant, crystal clear blue waters, contrasted against lush, green plantlife and the towering orange walls of the Grand Canyon, Havasu Falls (and its neighboring waterfalls) are a magical oasis!

For years we had admired photos of these raging waterfalls and it instantly became a part of our backpacking bucket list. And in May 2024, we finally got to check it off the list and let’s just say, it more than lived up to the hype. We spent four magical days soaking up the sunshine, swimming in its beautiful waters, hiking down to the Colorado River, and camping under the stars. It was an absolutely perfect trip and is hands down one of the best places to visit in Arizona.
Dying to visit this piece of paradise for yourself? It’s not as simple as showing up and hiking. There is a lot to know beforehand. And if you’re like us, you may have some questions like: How hard is it to get permits? (yes, you are required to have a permit) Wait, the permits cost HOW MUCH!? Is the Havasu Falls trail difficult? What is the campground like? Will it be crowded?
But we’re here to help! We’re sharing a step by step guide to everything you need to know to hike the Havasu Falls trail. We’ll cover all the logistics, the permit process, a detailed trail guide, a rundown of all 5 major waterfalls, what the camping is like, different itinerary options, and so much more!
Check out these other resources for Havasu Falls:
- How to get a permit for Havasupai Falls (2026)
- A complete guide to camping at Havasu Falls
- The ULTIMATE Havasupai Packing List
- How to hike to Mooney Falls and Beaver Falls in Havasupai, AZ
- How to hike to the Confluence (Havasu Creek and the Colorado River)
- Watch our experience at Havasu Falls (YouTube video)
- About Havasu Falls
- Where is Havasu Falls?
- Permits for Havasu Falls
- Rules for visiting Havasu Falls & the Havasupai Reservation
- When is the best time to go to Havasu Falls?
- What to bring to Havasu Falls
- Check in process for the Havasu Falls hike
- Where to stay the night before your Havasu Falls hike
- Getting to the Havasupai Trailhead
- Havasu Falls Hiking Guide
- Other ways to experience Havasu Falls
- Havasu Falls Itinerary Options
- Frequently Asked Questions about the Havasu Falls Hike
- Our top tips for hiking Havasu Falls
- Final thoughts: Is hiking Havasu Falls worth it?
About Havasu Falls
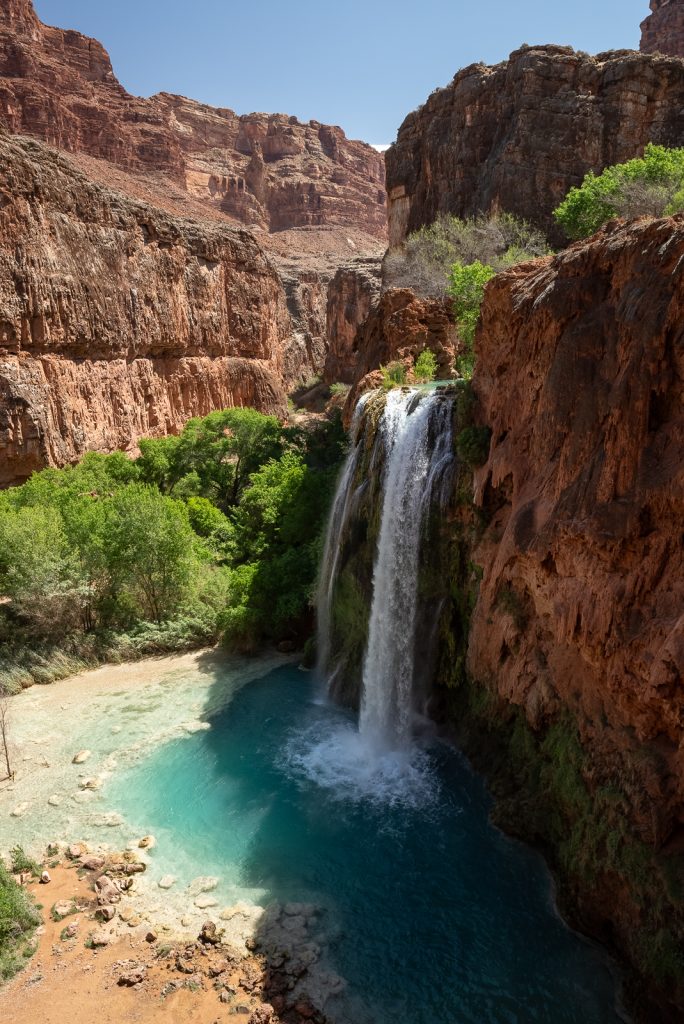
Havasu Falls is located on the Havasupai Reservation in the Grand Canyon in Arizona, right on the border of the National Park.
The Havasuw `Baaja (Havasupai), which means “people of the blue-green waters,” have lived in this area for centuries. As America expanded west in the 1800s and mining and land policies encroached on the Havasupai land, the tribe was forced off the high plateau and into the canyon. The reservation was officially established in 1880 and originally only included about 500 acres. But in 1975, the reservation was expanded to 188,077 acres, which is the same size it is today.
And today, the Havasupai land is home to one of the most iconic hikes in the Southwest: the Havasu Falls trail. However, while the hike is typically called “Havasu Falls,” after its most famous waterfall, the hike actually includes four other major waterfalls, Fifty Foot Falls, Navajo Falls, Mooney Falls, and Beaver Falls.
Havasu Falls trail at a glance
Permit required?: Yes! You MUST have a permit to do this hike. We share some information about this below, plus more detail in this blog post.
Miles: 20+ miles. Your total distance will depend on where you camp. Plus if you hike to some of the further waterfalls and the Confluence.
Elevation gain: 2,500+ feet, depending on where you hike.
Trail map & recent reviews
Where is Havasu Falls?
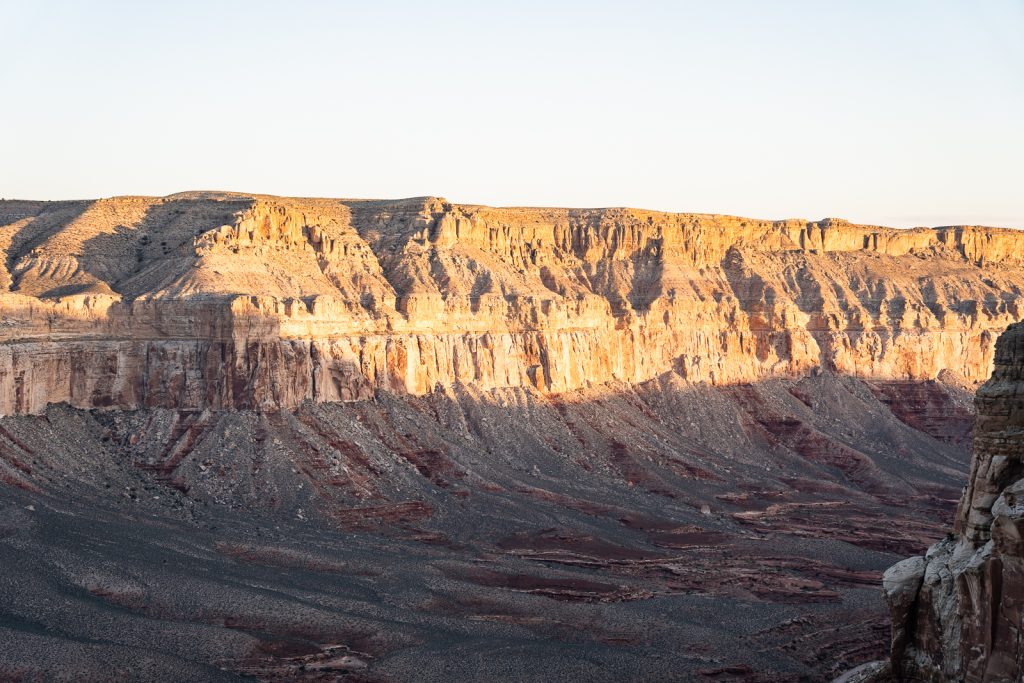
The Havasu Falls trail is located on the Havasupai Reservation in northern Arizona. Although located in the Grand Canyon, it’s still several hours from the main visitor areas of the South Rim. To reach the trailhead, you’ll drive Route 66 to near Peach Springs, where you’ll then turn onto Indian Road 18 for 1.5 hours.
Driving to Havasu Falls
If driving to the Havasu Falls hike, here’s how long you can expect to drive from nearby larger cities:
Flagstaff, AZ: 3 hours (166 miles)
Las Vegas, NV: 4 hours (225 miles)
Phoenix, AZ: 4 hours, 45 minutes (259 miles)
Flying to Havasu Falls
If you’re flying to hike the Havasu Falls trail, the closest and most popular airport is the Harry Reid International Airport (LAS) in Las Vegas. This is still about a 3 hour and 45 minute drive to the trailhead though, so you will need to rent a car. There are no buses or ride share options that can take you to the trailhead. You could also fly into the Phoenix Sky Harbor International Airport (PHX), which is around a 4.5 hour drive to the trailhead.
Note: Havasupai is on Arizona Time and does not follow Daylight Savings. So depending on your visit, may be the same as Mountain Time or Pacific Time. Make sure to understand what timezone it coincides with in advance!
Permits for Havasu Falls
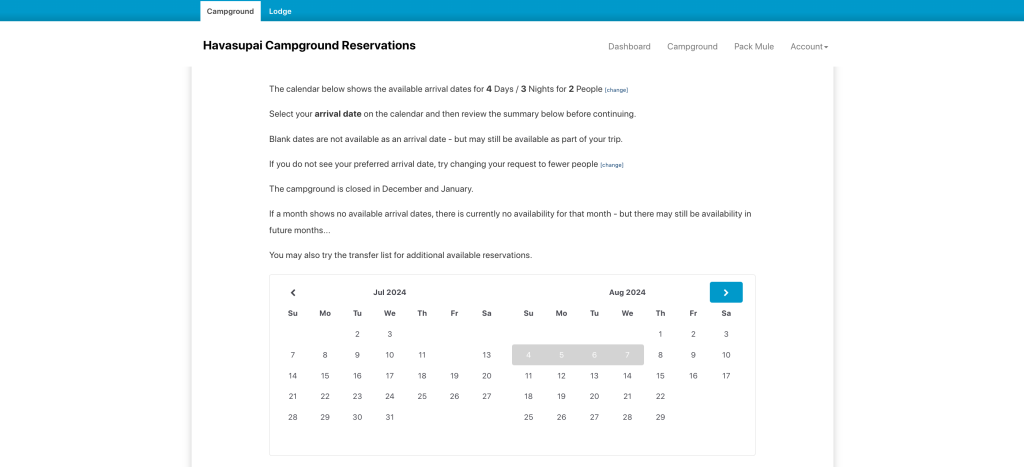
You are required to have a permit when hiking Havasu Falls, which can be very competitive to get. We got lucky and scored one our first attempt, but it doesn’t always happen like that. Some people try for years to get permits!
We have outlined the entire step by step process (+ tips!) for getting a Havasu Falls permit in this guide. Plus what to do if you don’t get one. But here’s a quick rundown below!
How do I get a permit to hike Havasu Falls?
To get a permit to hike Havasu Falls, you’ll need to create an account on the Havasupai Campground Reservation website. You will have the choice of booking either a campground permit or a lodge permit. It is important to make your account in advance and add your credit card information, before permits go on sale.
When do permits go on sale?
Regular permits for Havasu Falls go on sale on February 1 at 8 AM Arizona Time (which is the same as Mountain Time during February). We will warn you right now, it is CHAOS getting one of these. The website crashed and it took us (and others) over an hour to get the website to work. Once it did work, we were able to book pretty easily, but it required a lot of patience.
However, in addition to the general sale in February, there are also early access permits (NEW for 2026!) that runs from January 21, 2026 at 8 AM Arizona Time until 5 PM Arizona Time on January 31, 2026. Unlike past years, where advance permits were a lottery system, this is a guaranteed permit. You will be able to choose the date and number of permits you want and pay right away. There is an additional $40 per permit fee to do an early access permit.
How much do permits cost?
Alright, prepare yourself for this one. In 2026, the permits for Havasu Falls, which are for 4 days and 3 nights, cost $455 per person for the campground. And $2,277 for one room at the lodge, which is up to 4 people.
Seeing this beautiful spot does NOT come cheap! And this doesn’t even include gear you may need to buy, fuel costs, lodging the night before, pet boarding (if you travel with your dog like we do), and a possible rental car. We contemplated if it was worth spending this much for one hiking experience. But in our opinion, it was 100% worth it! And since the cost seems to go up every year, we’d suggest trying to do this hike sooner rather than later.
Tip: Get travel insurance
Havasupai can close unexpectedly due to flash floods or other natural events. If your trip is canceled due to Havasupai being closed, your only option is to reschedule. But if you need to cancel last minute and are not eligible for the 50% refund (90 days before your trip), travel insurance is the only way to recoup the costs. We suggest getting travel insurance right after booking your ticket. Not only will it be the only way to recoup your costs, but it will also cover any emergencies while out there, including an unexpected helicopter ride out.
Allianz is one option that has come recommended from past Havasupai hikers. If you have a travel credit card, they may cover you in case of any cancelations as well, including flights and hotel costs.
Important: You must get this insurance BEFORE your trip. And you will need to have it before any type of event (like flash flooding) occurs. You cannot get insurance after a flash flood.
Rules for visiting Havasu Falls & the Havasupai Reservation
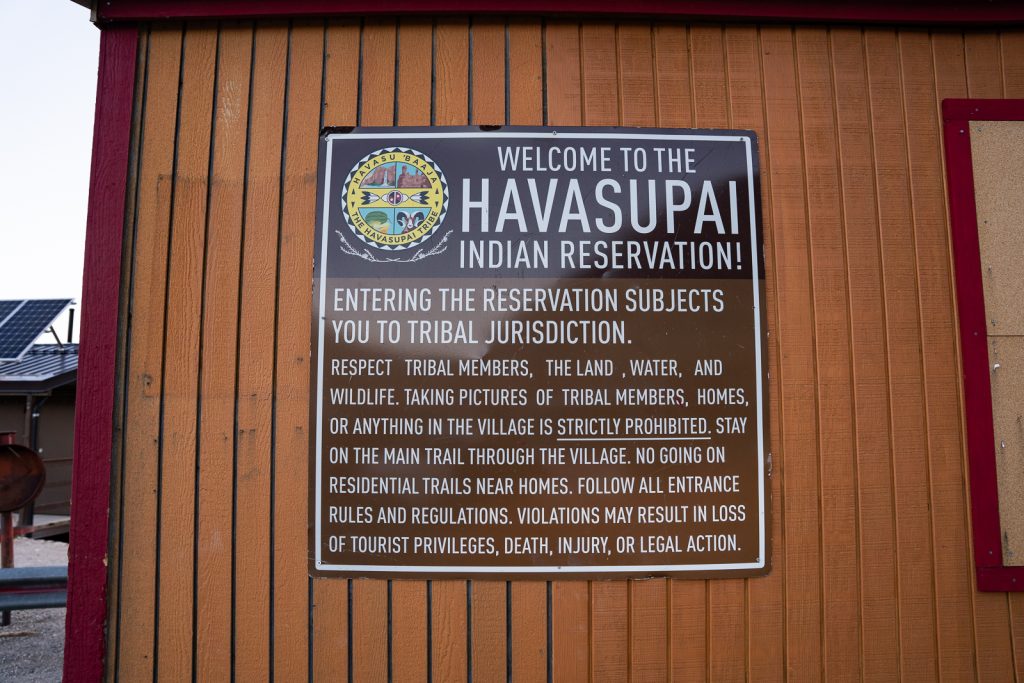
It is a privilege to be able to visit the Havasupai Reservation. And before you decide to get a permit and hike the Havasu Falls trail, it is very important that you agree to respect their land and follow the rules for visiting. You can read all of the rules on their website, but here are a few that we think are extra important to point out.
First off, you must pack out all of your trash and belongings. If you brought something in, like food, camping gear, clothes, etc, it MUST come back out with you. There has been a huge issue in the past with people leaving camping chairs, fuel canisters, and other items behind. The tribe is now fining people $1,000 if you do this.
Besides this major rule, a few others to know of are:
- No alcohol
- No drugs
- No smoking
- No nudity
- No fishing
- No drones
- No weapons
- No floaties
- No speakers
- No campfires, although small cooking stoves are allowed.
Dogs are also not allowed on the Havasu Falls trail. We travel full time with our dog Kona and during this trip she was boarded in Las Vegas. If you’re worried about missing dogs on this trip, you’ll likely come across some cute Havasupai pups to keep you company.
When is the best time to go to Havasu Falls?
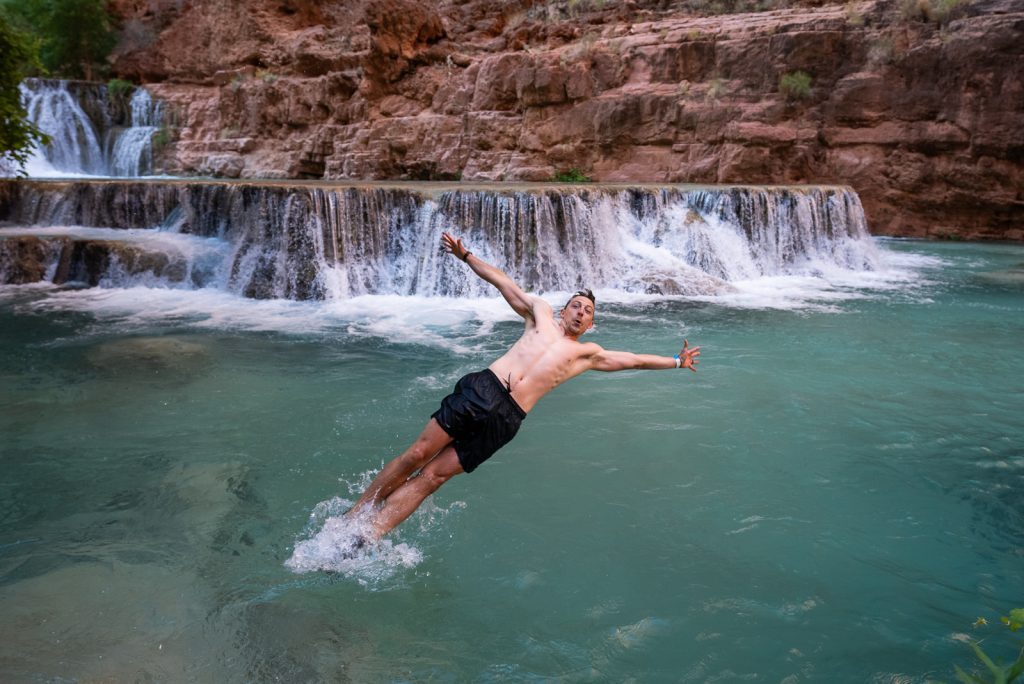
First off, it’s important to know that the Havasu Falls trail and campground are closed in December and January. Camping permits are only available from February 1 until November 30. And lodge reservations are available from April 1 until November 30.
But within that time frame, there are definitely months that are much better to visit than others. In our opinion, the best time to hike the Havasu Falls trail is either the spring or fall. This is when the temperatures will be mild. For the best experience, we suggest choosing late April, May, late September, or October. These months are a tad warmer during the day, making it perfect for swimming, but still cool at night.
We personally hiked Havasu Falls from May 1-4. And the weather was just about PERFECT! While we didn’t have cell service to check the weather during our visit, if we had to guess the temperatures were in the low 80s during the day and upper 50s at night. It was just warm enough to swim, although if it was about 10 degrees warmer, the chilly water would have felt even more spectacular. And sleeping was fantastic!
So when should you NOT hike Havasu Falls? We highly suggest avoiding hiking from June through August. Not only will it be extremely hot with average temperatures over 100º, but July and August are the monsoon season. This means that heavy rain storms can occur, which can turn the falls brown and cause dangerous flash flooding. In August 2024, a major flash flood occurred, causing hundreds of hikers to be helicoptered out and closing Havasupai due to damage. And unfortunately, resulted in the death of a hiker who got swept away.
Weather forecasts tend to not be super accurate for the canyon, but you can see historical weather data (and check the future forecast) here.
What to bring to Havasu Falls
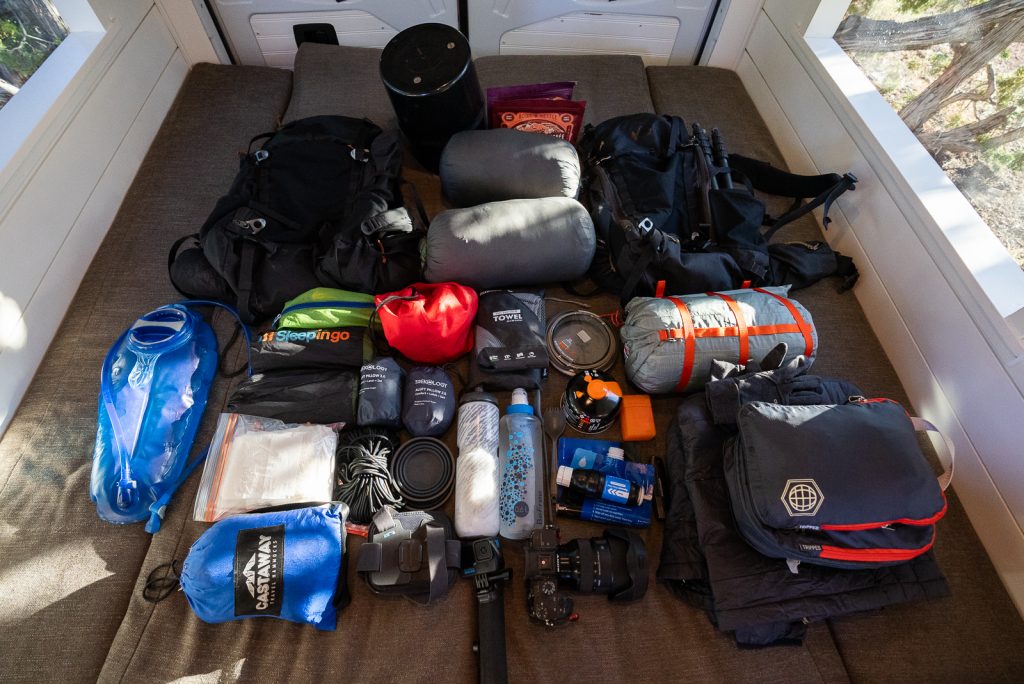
Whether the Havasu Falls hike is your first backpacking trip or you have quite a few under your belt, there are some specific items you need to bring on the hike. Such as a rat sack or bear can, plenty of water, appropriate shoes, and more. In order to not make this guide too long, we created a full Havasupai packing list. Which includes a downloadable list that you can save to your phone or print.
Check in process for the Havasu Falls hike
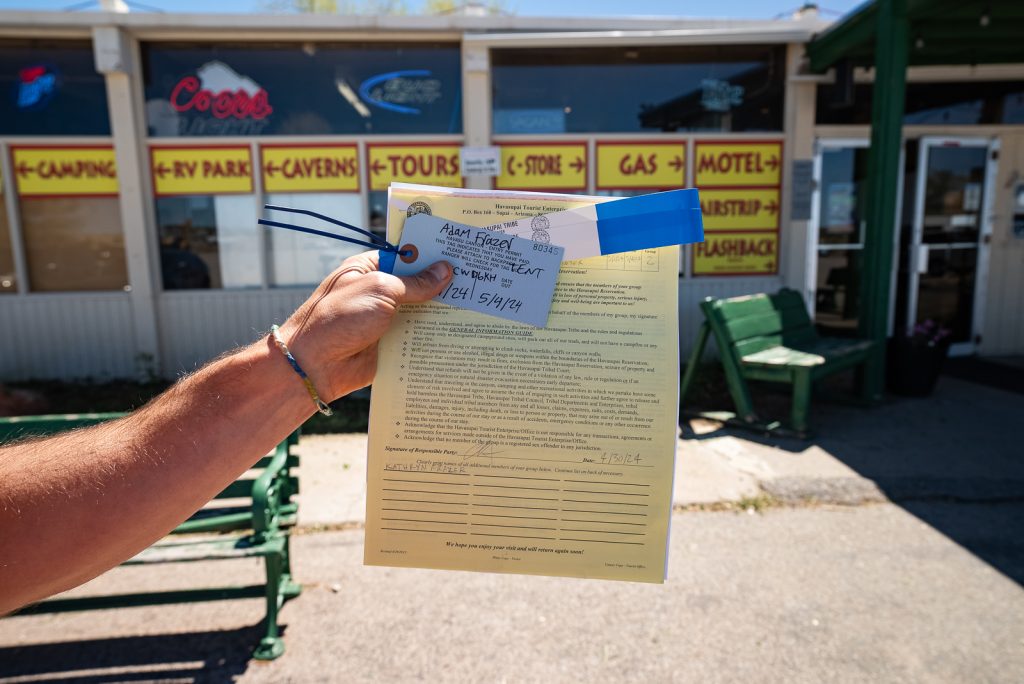
Alright, you’ve secured your permits to Havasu Falls and it’s time for your hike! Before you can start the Havasu Falls trail, you must check in at the Tourist Check-In Office at the Grand Canyon Caverns Inn to get your required documents and bag tags.
You can check in either the day before, which we highly recommend, or the morning of, before 12 PM, otherwise your reservation will be canceled. The check in hours can vary by month and you can see the current hours here. One important thing to know is that only the trip leader needs to check in.
When you show up to the Grand Canyon Caverns Inn, you will want to go to the left of the check in desk to a side room. To check in, you will need the following items:
- Photo ID of the Trip Leader
- Printed copy of your camping/lodge confirmation. You are required to put this on your vehicle windshield as well when parking.
After filling out some paperwork, you will get a copy of your permit, your tent tag, and wristbands to wear during the entire hike.
Every member of your group is also required to make an account in advance and have a copy of their proof of account. This shows that you have accepted all of the rules for the hike. To find this, go to your Account -> Profile and then at the top, you will see “your proof of account is here.”
Make sure to hang on to all the paperwork given to you. All members of the party will be required to show required paperwork at the Havasupai Reservation checkpoint boundary 5 miles away from the trailhead.
Where to stay the night before your Havasu Falls hike
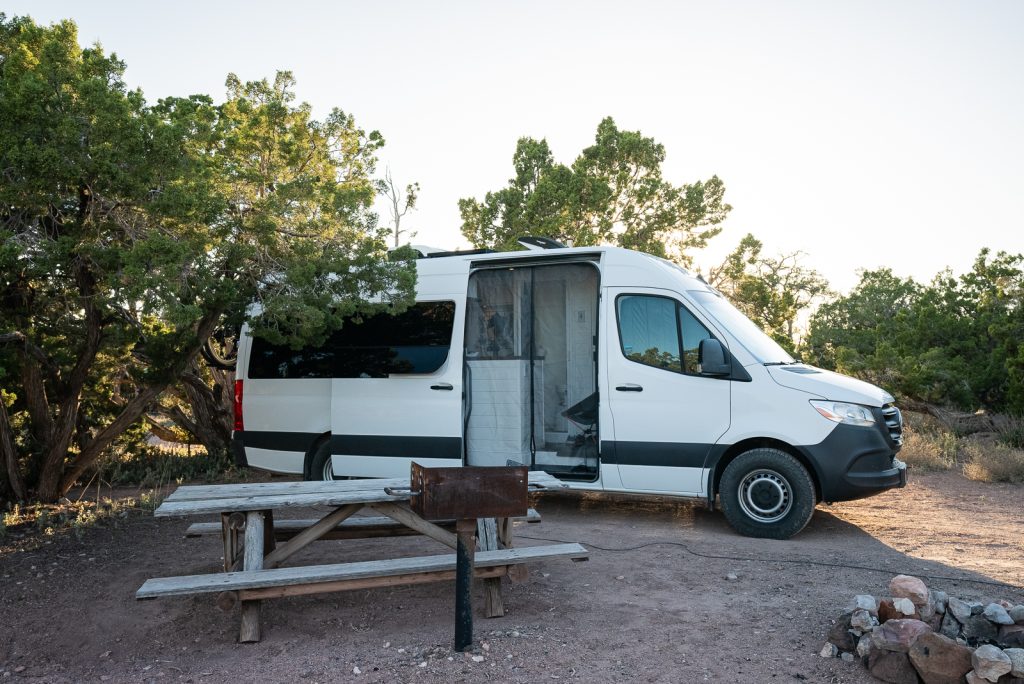
We highly recommend checking in the day before your hike, so you can get an early start. But you may be wondering, “where can I stay the night before?”
First off, it’s important to know that there is NO camping allowed in the parking lot and that includes sleeping in your vehicle/campervan/RV. There is a checkpoint 5 miles before the trailhead, so you wouldn’t be able to sneakily try this.
Unfortunately there are no options right by the trailhead. All will require a 1.5 hour drive down the main road the hike is on. But there are a few options close to Peach Springs and Seligman, near the check in area. Before our Havasu Falls hike we camped at the Grand Canyon Caverns Inn Campground, which is the closest campground option.
The campground was surprisingly very empty when we stayed. There were maybe 4 other campers and lots of campsites available. It was only $20 plus tax for the night at a tent site with no amenities. And while there were bathrooms and showers, they were a far walk away, with new ones being built closer to the sites (but were locked at the time).
You can also stay at the Grand Canyon Caverns Inn itself or at the nearby Hualapai Lodge or Supai Motel. Just be warned, none of these spots have raving reviews, so keep your expectations low.
Have more time to spend in the area? We highly recommend checking out Sedona, Page, or the south rim of the Grand Canyon!
Getting to the Havasupai Trailhead
The drive to the trailhead
The Havasupai trailhead (also called the Hilltop Trailhead) is located just under 1.5 hours, from the Grand Canyon Caverns Inn. And if you’re driving in the dark, make sure to pay close attention to the road. There are not only bunnies darting out, but also cows and elk hanging out on the shoulder and in the road. We headed to the trailhead just before 4:30 AM and the majority of our drive was in the dark, which was very stressful with all of the animals around.
5 mile checkpoint
When you get about 5 miles from the trailhead, there will be a security checkpoint. Here they will check your wristband, permit, and other paperwork. We have heard that sometimes they search cars to make sure you aren’t bringing any forbidden items.
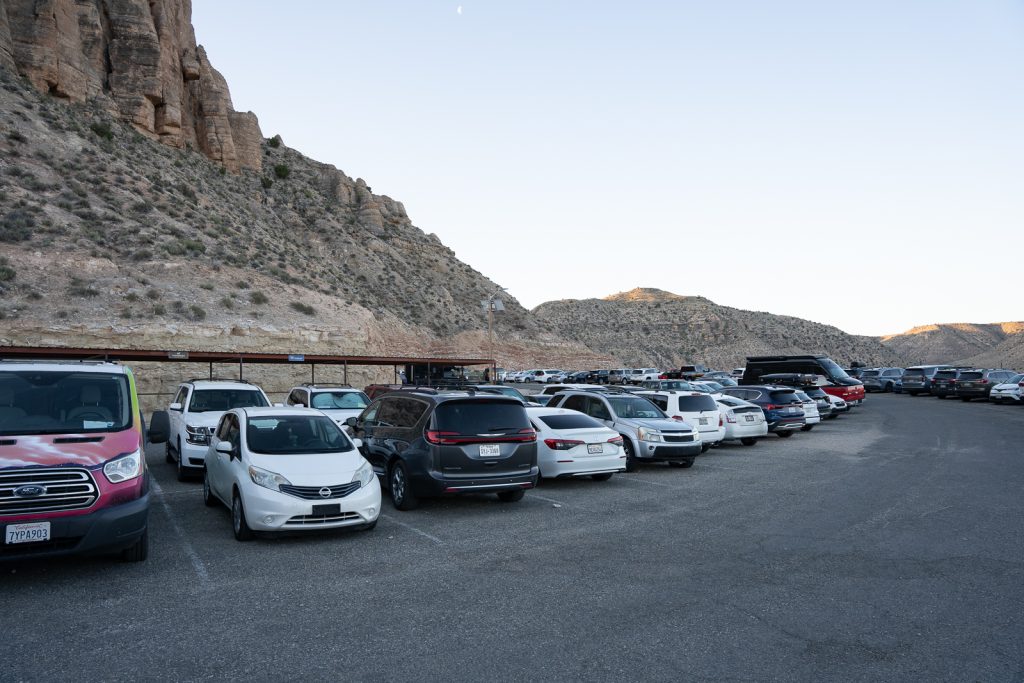
Parking lot
The parking lot is rather small, with room for 50 cars at the most. And it is basically always full, so you will likely have to park along the road instead.
You can park on either side of the road, but we recommend parking on the opposite side of the rock wall. We have heard horror stories of people coming back to rocks smashing part of their car.
If you have to park far away, you can leave your gear at the trailhead before parking, to save some time carrying your heavier pack.
Havasu Falls Hiking Guide
Above is a map that shows the main landmarks along the trail, including the trailhead, Supai Village, campground, and all five waterfalls. In the next section of this guide, we’re going to breakdown the Havasu Falls trail by each of these landmarks, sharing what to expect along the way. Plus our top tips!
Note: Due to the hike being in a canyon, finding a GPS signal is tough. People tend to record different mileages, so all mileage is approximate.
Hilltop Trailhead
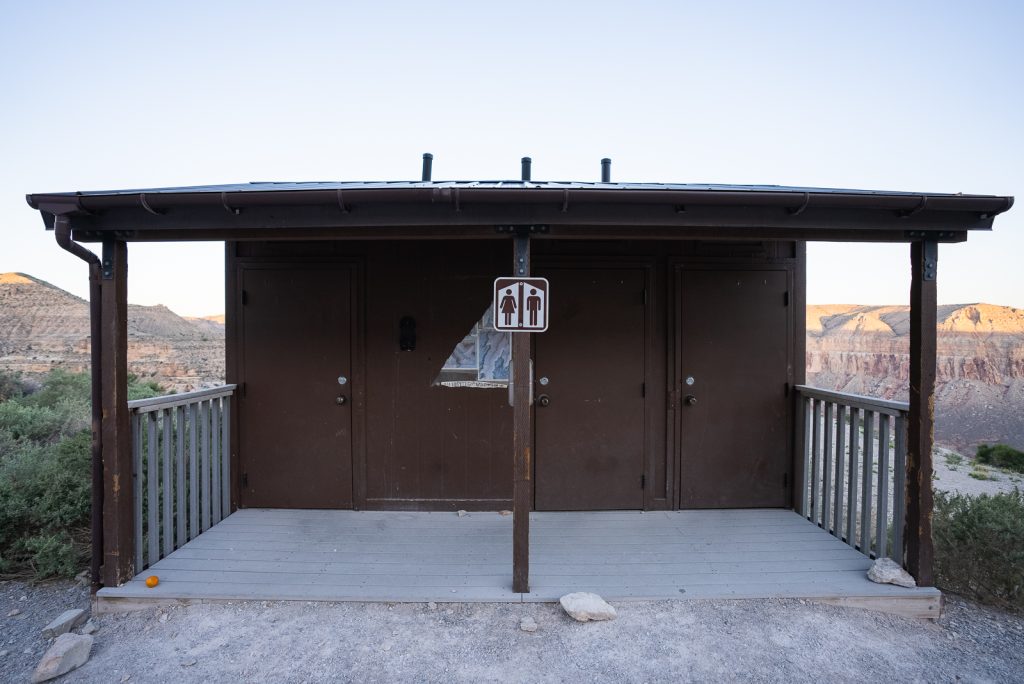
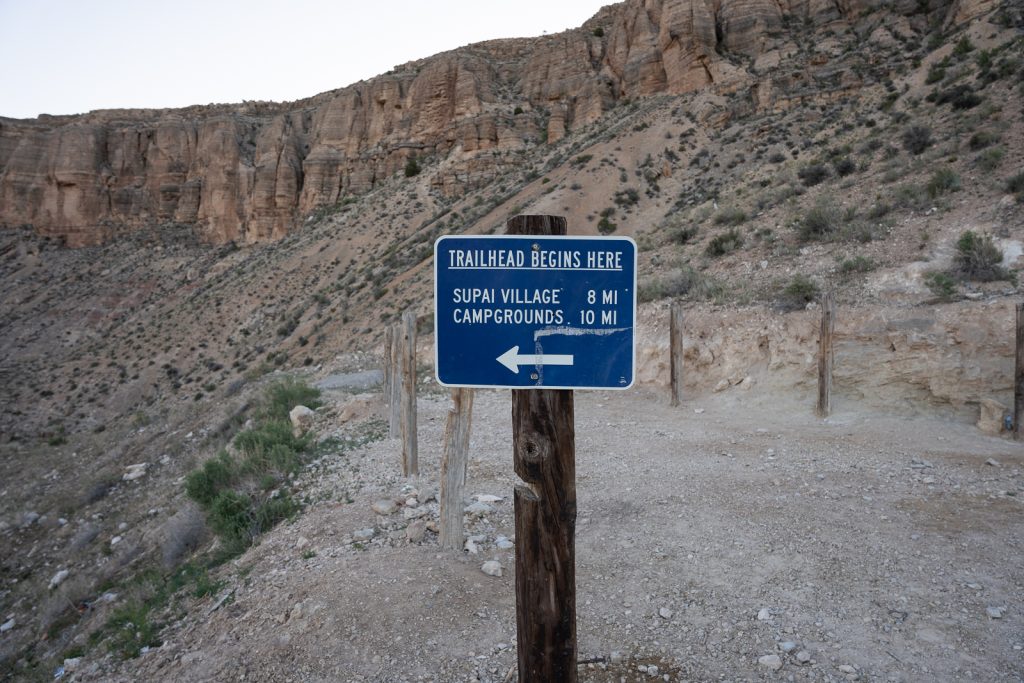
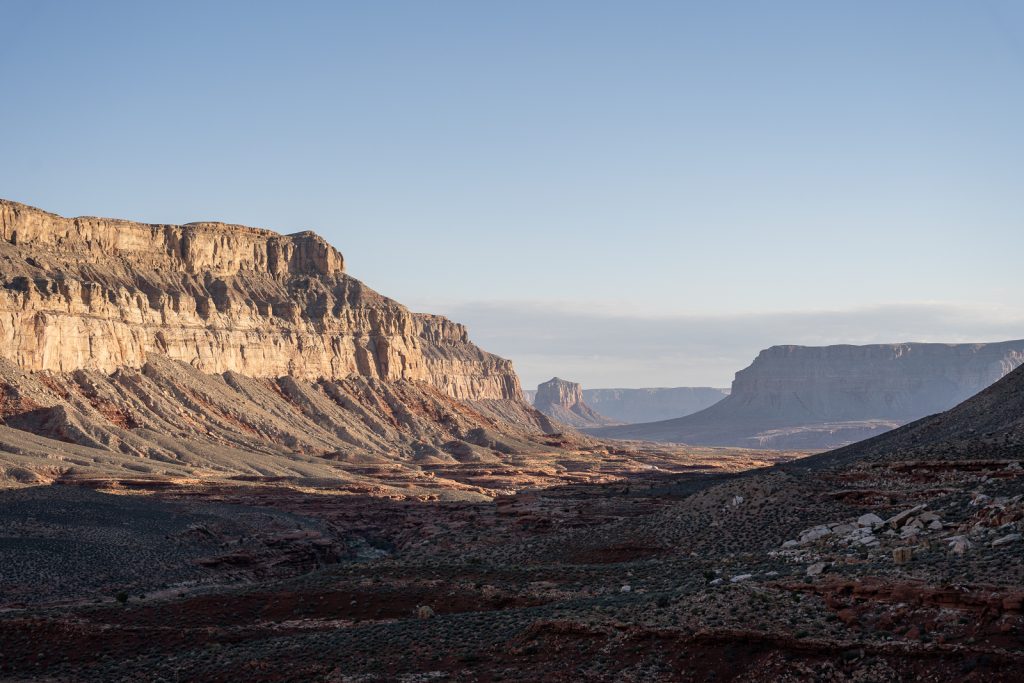
When you reach the trailhead, you’ll instantly be blown away by the views! The drive out to the trailhead is relatively flat, but once you arrive, you will have amazing views of the Grand Canyon.
At the trailhead you’ll find some pit toilets, which is the last toilet option until the campground, plus the helipad, if you decide to take the helicopter in or out (more on that later). There is NO water here, so make sure you have all of your water filled up beforehand!
Later in the mornings and afternoons, vendors may be set up here to sell fry bread, cold drinks, and other treats. Which would be a nice reward after the hike back up!
Hilltop Trailhead to Supai Village (Miles 0-8)
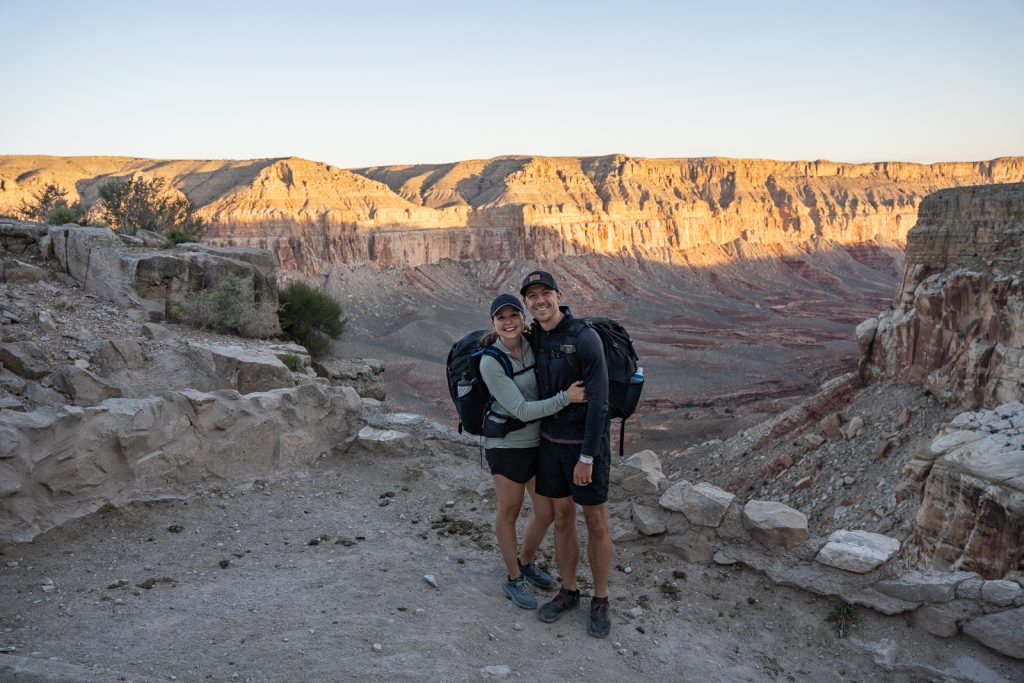
It’s time to hit the trail! To beat the heat, avoid too much sun, and get the best campsite, we highly suggest starting very early. We started just after sunrise, shortly before 6 AM. And while we did encounter sun on the hike, the first part was a lot cooler and we didn’t have direct sunlight on us.
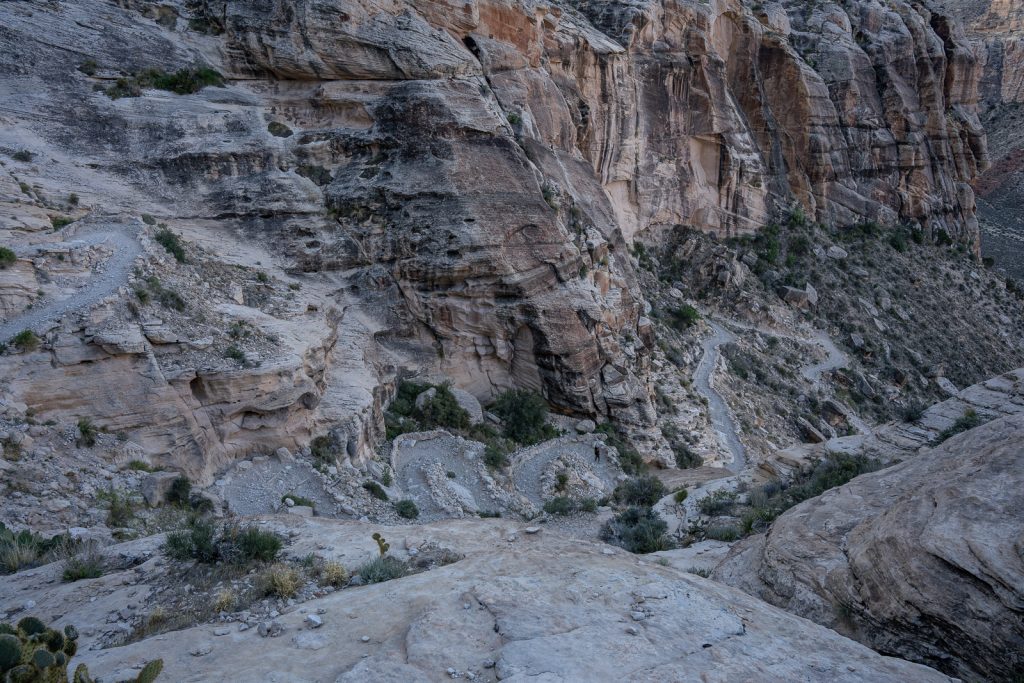
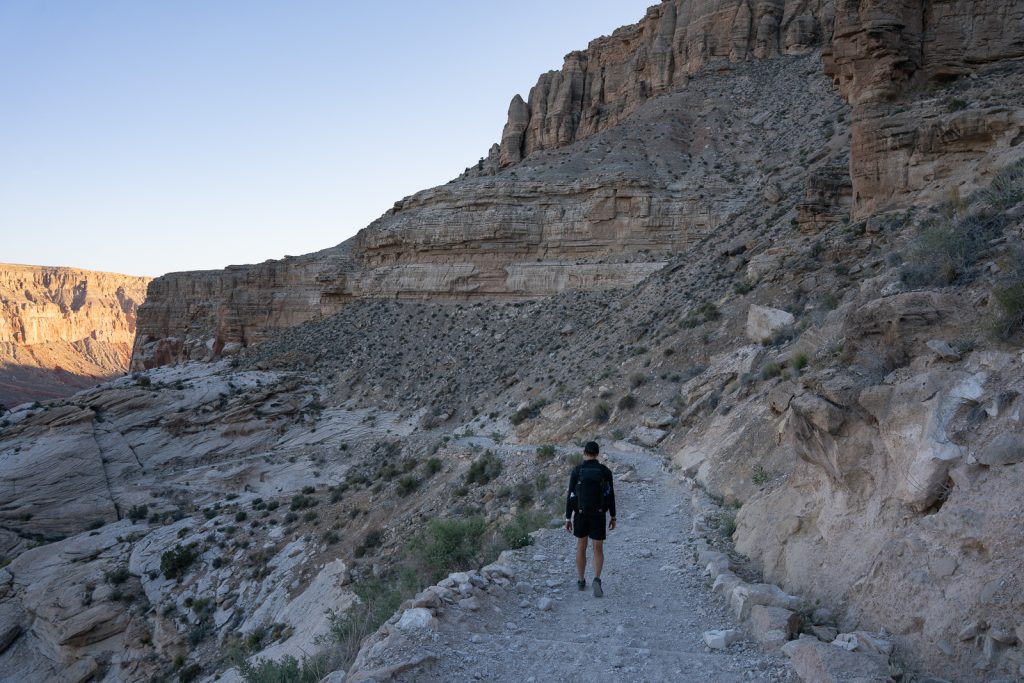
Right after starting the trail, you will instantly descend on the trail’s famous switchbacks. These will take you far down into the bottom of the canyon. Keep in mind that on your hike out, you’ll be climbing back up these to get to the trailhead! We personally did not find the switchbacks to be difficult, but when descending, make sure you keep an eye on the ground, as it is pretty slick and we did slip a couple times.
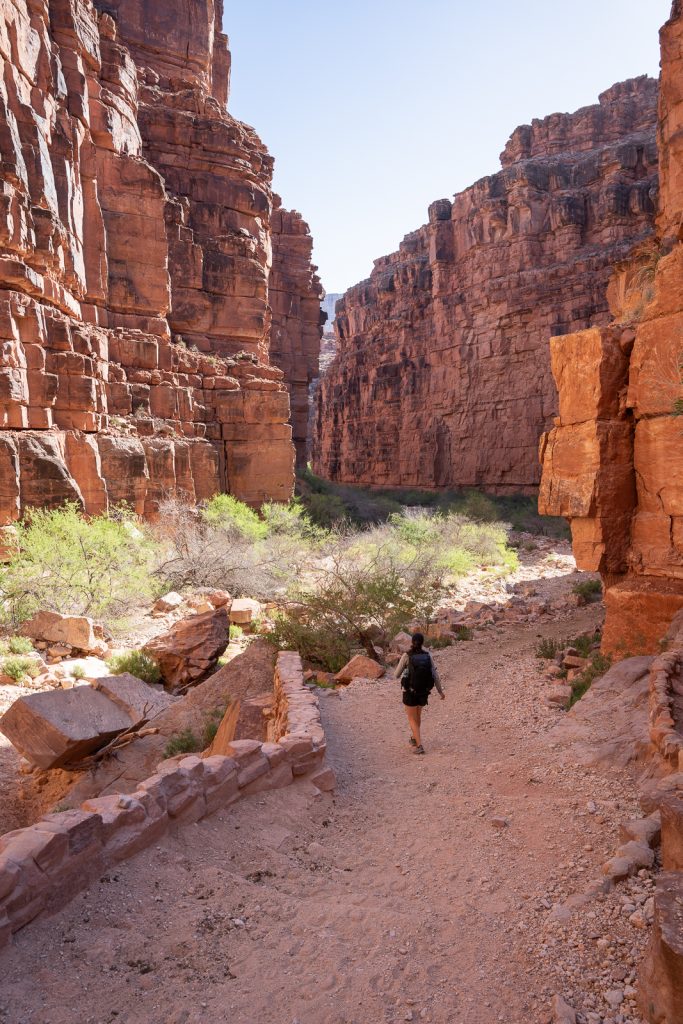
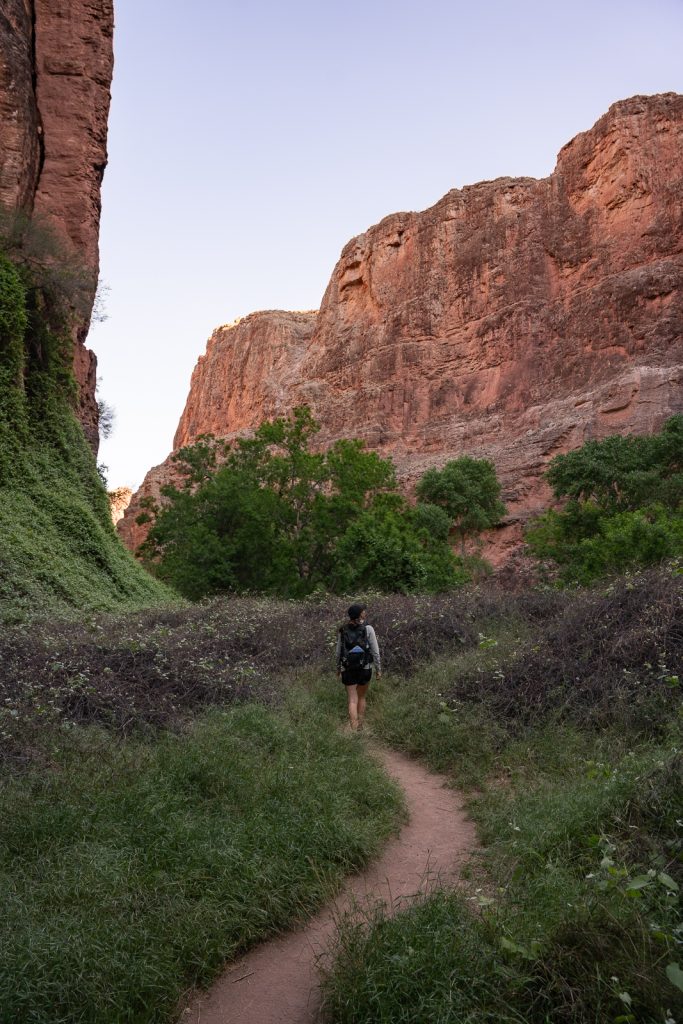
After the switchbacks, the trail levels out quite a bit and is very easy. The trail will take you through a more wide open area before you enter the canyon itself and walk in a wash for miles. You’ll have glowing canyon walls towering above you, plus greenery mixed in. If you hike early enough, these canyon walls will act as protection from the sun.
Throughout the canyon there are many spots you can stop and enjoy a snack. Plus some secluded areas to go to the bathroom, if nature calls. If you have any solid waste, you MUST pack this out! Same for toilet paper!
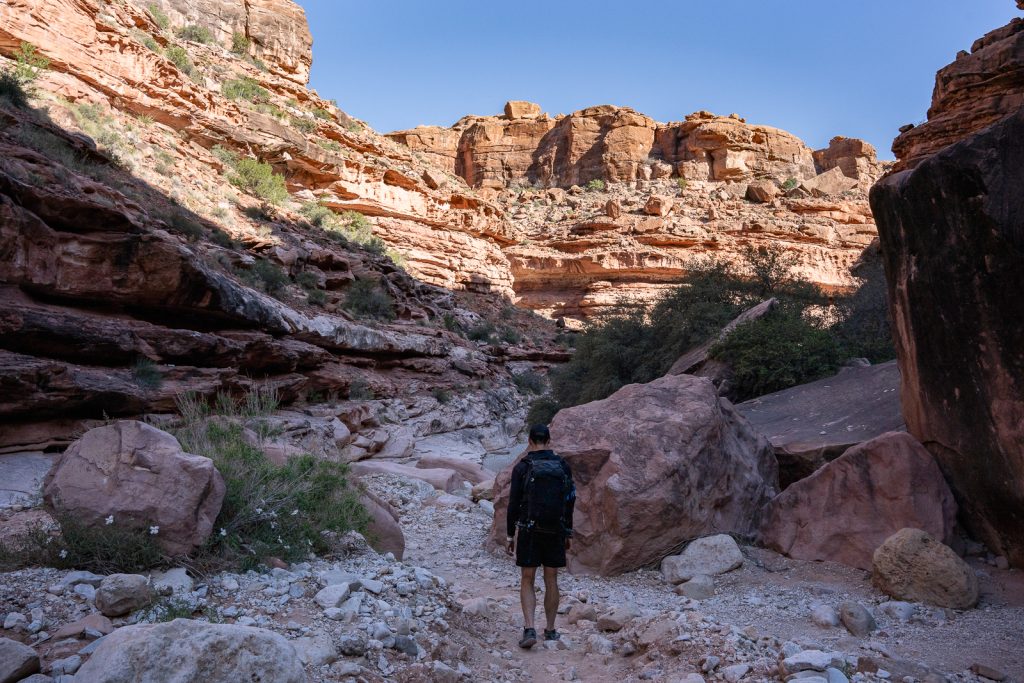
Shortly before you reach Supai Village you will turn left out of the wash and begin hiking in a much more tree covered area, with Havasu Creek nearby. This will be your first glimpse at how crystal clear the water is!
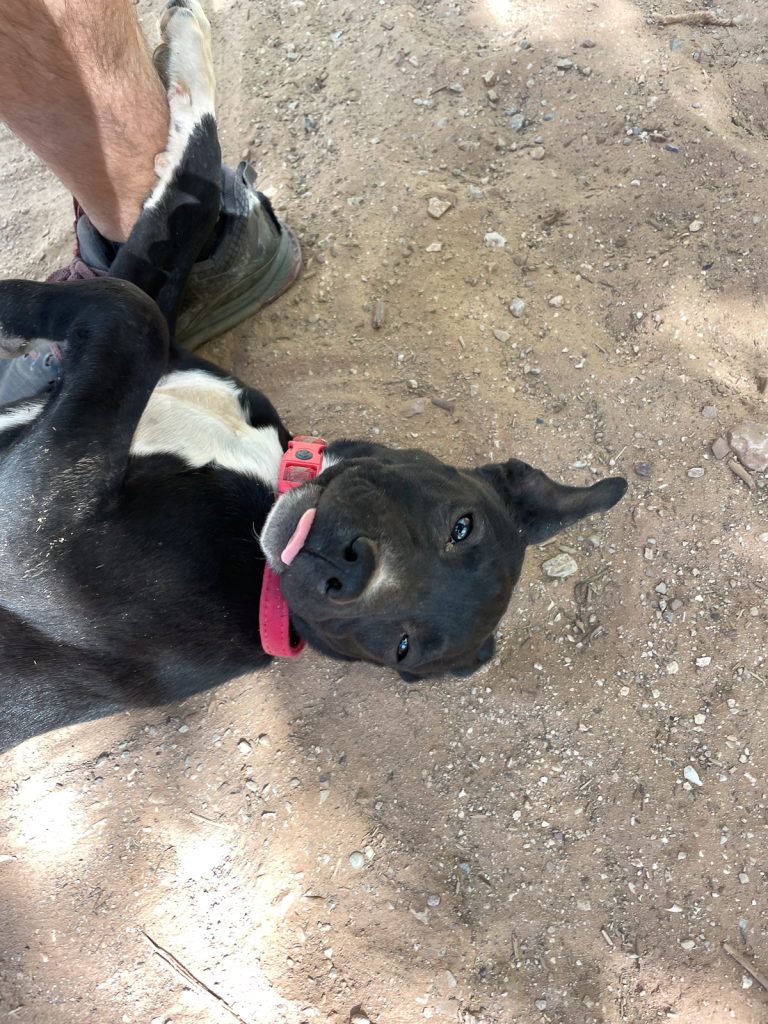
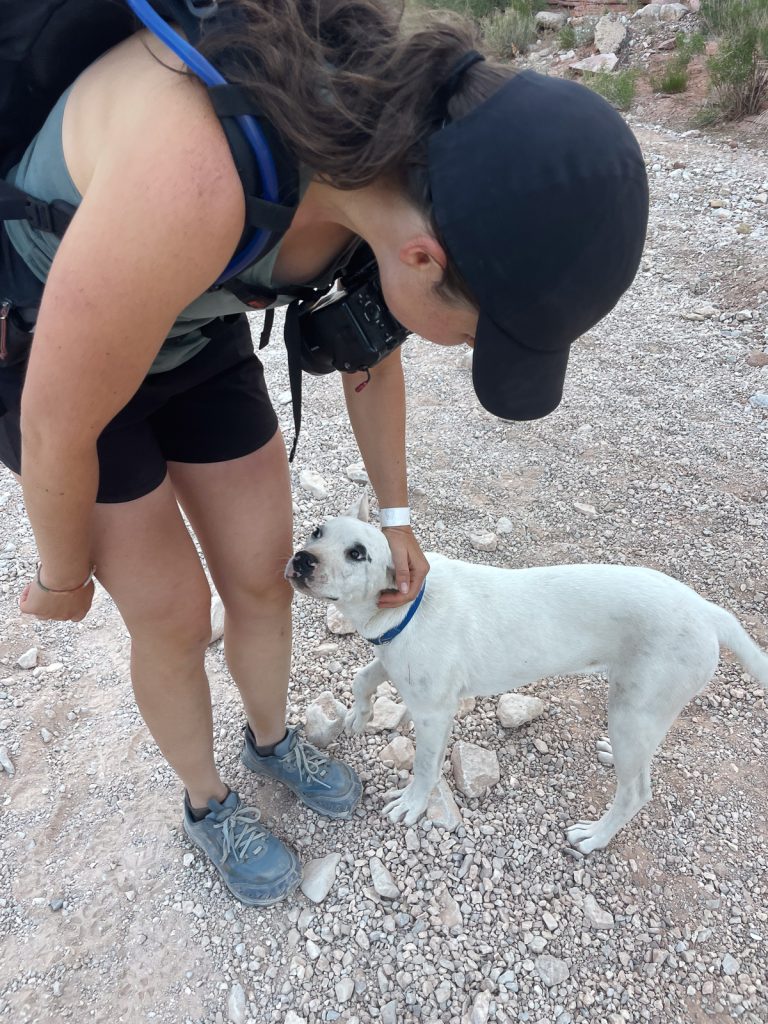
While everyone talks about how beautiful the waterfalls are, one thing we did not expect was how beautiful the actual trail would be. We really enjoyed this part of the hike! And it didn’t hurt that we got to meet some adorable Havasupai pups along the way!
Supai village (Mile 8)
Around 8 miles in you’ll reach Supai Village. This is where the Havasupai people live and is one of the most remote villages in the United States. The village gets their mail and supplies flown in by helicopter or carried in by mules. Getting to experience such a remote village was a really neat part of the experience for us.
However, there are a couple important things to know about the village. First, you are required to wear a mask in the village. We were told to wear one when we checked in, so we wore it the entire walk. At the minimum, you are required to wear it indoors. Please be respectful of this rule.

Also, you cannot take any photos or videos of the village or locals. So while we don’t have any photos to share from this part of the hike, we can give you some insight into what it’s like!
In the village you’ll find homes, community buildings, a store (where you can buy snacks), a restaurant, the lodge, a post office (where you can mail a postcard that has a special “mailed by mule” stamp), and the helipad, if you choose to take the helicopter in or out. You’ll likely see locals out and about, including kids playing and dogs wandering the streets. Make sure to to be friendly and say hi!
After leaving the village you’ll walk through a tree covered area for a little bit before reaching some pit toilets and the start of the waterfalls. This is when things start to get really good! For the best views, stick to the path to the left of the toilet. While not the official trail, it takes you closer to the falls and river and is more scenic!
A+K Tip: We highly recommend bypassing the waterfalls and going straight to the campground first, to pick your campsite. You can then explore them later!
Fifty Foot Falls (Mile 9)
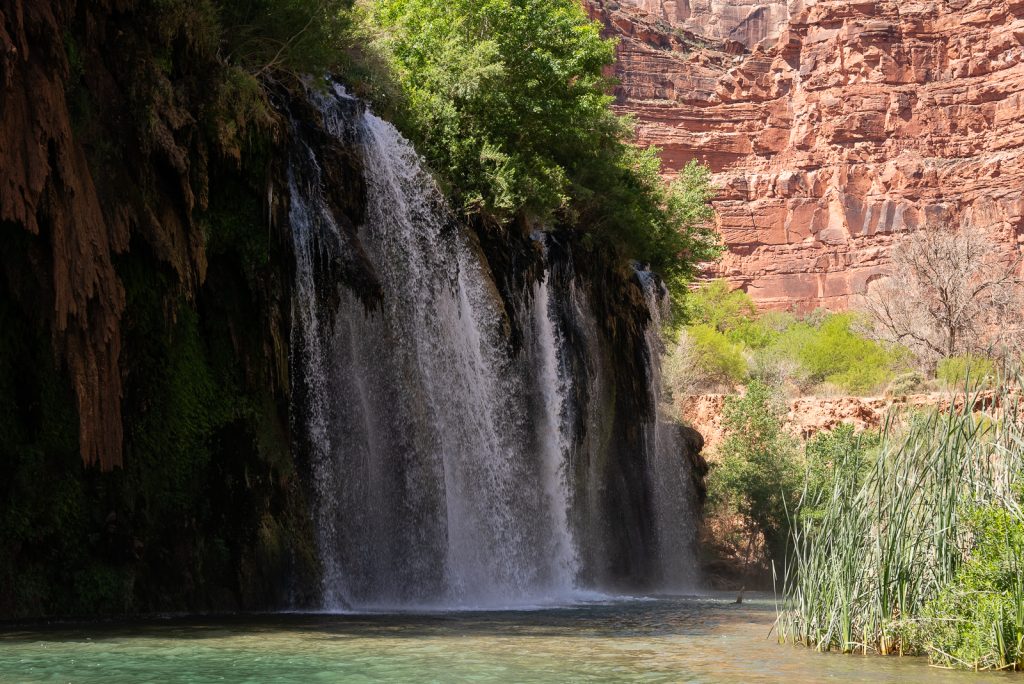
The first waterfall you’ll come across on the Havasu Falls trail is Fifty Foot Falls. However, it’s not viewable right from the trail. To get to it, you’ll need to follow a trail and get a bit wet.
The trail down to the falls starts to the left of the pit toilets. You will see a flat, open area and want to take a path to get below this. Once down at the bottom, you’ll want to go towards the left, to a path that says “trail.” Shortly after getting on this trail you’ll see a sign for Fifty Foot Falls, letting you know you’re on the right path.
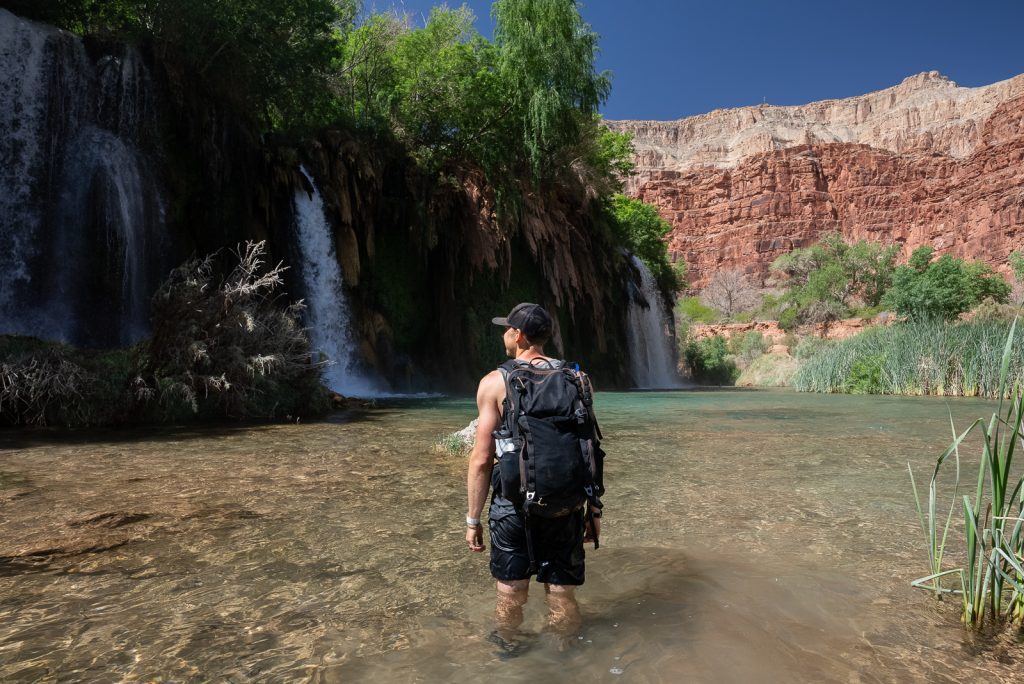
After walking down this a bit you’ll notice that the trail ends and the water begins. This is when things get a bit interesting. To get the rest of the way, you will have to walk through the water. It’s not too deep at first, but once you get to the open area right by the falls, it can be stomach deep. The falls themselves are very wide, giving you lots of areas to swim and explore. Depending on where you want to go will determine how much further you’ll walk through the water.
While not the tallest of the falls, we thought Fifty Foot Falls was so beautiful (and worth the adventure to get to), with its many streams of water cascading down. Plus the chance to go behind some falls! The benefit of Fifty Foot Falls is that they are the warmest to swim in, since the water is pretty shallow. So it makes for a good spot to swim before the hottest part of the day!
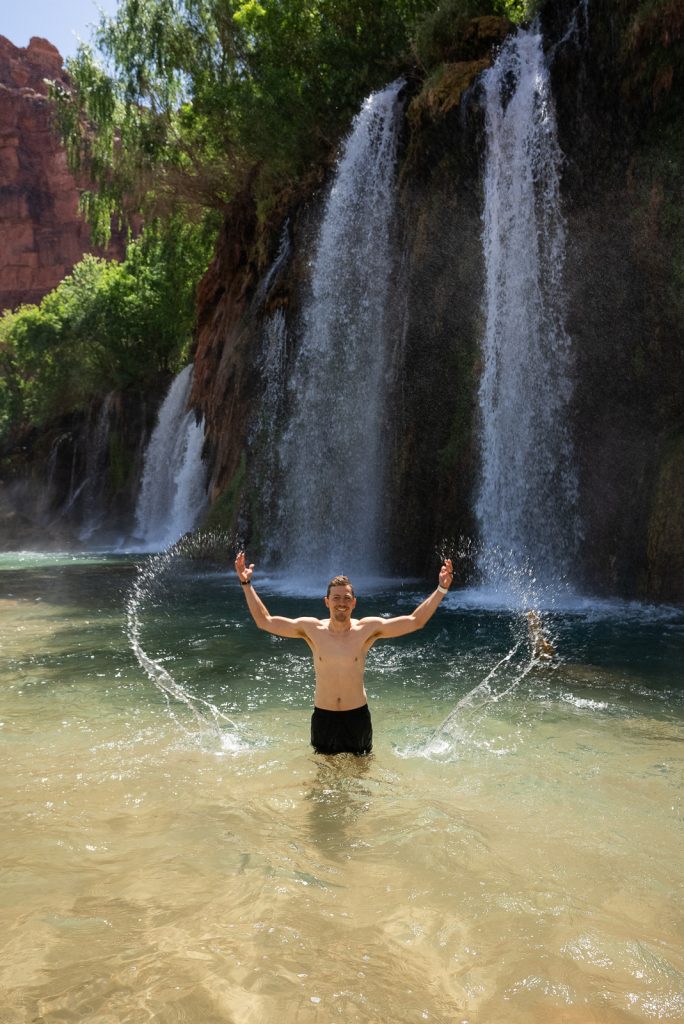
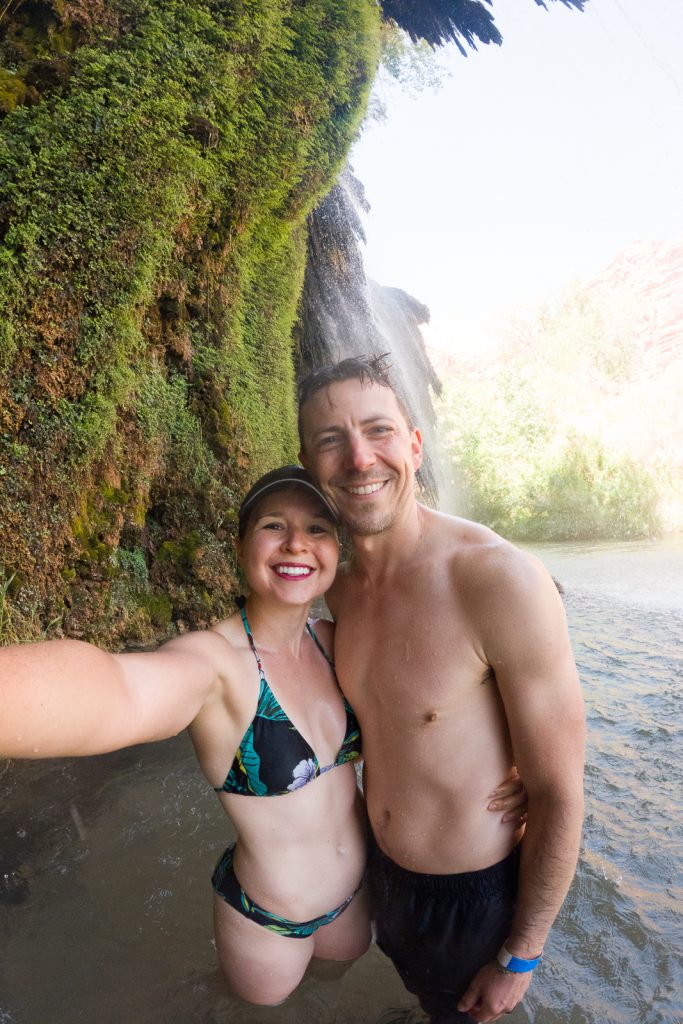
However, the downside is that there aren’t many places to set your stuff down or sit and relax. We found a small patch of land to put our backpack on and we saw others hang their bags on trees. There is a more open, dry area on the far side of the falls you could go to as well.
A+K Tip: Secure your electronics before walking through the water. It can be hard to see where you’re stepping and our camera may have gone for a little swim when Adam tripped. Thankfully it was (mostly) fine.
Navajo Falls (Mile 9)
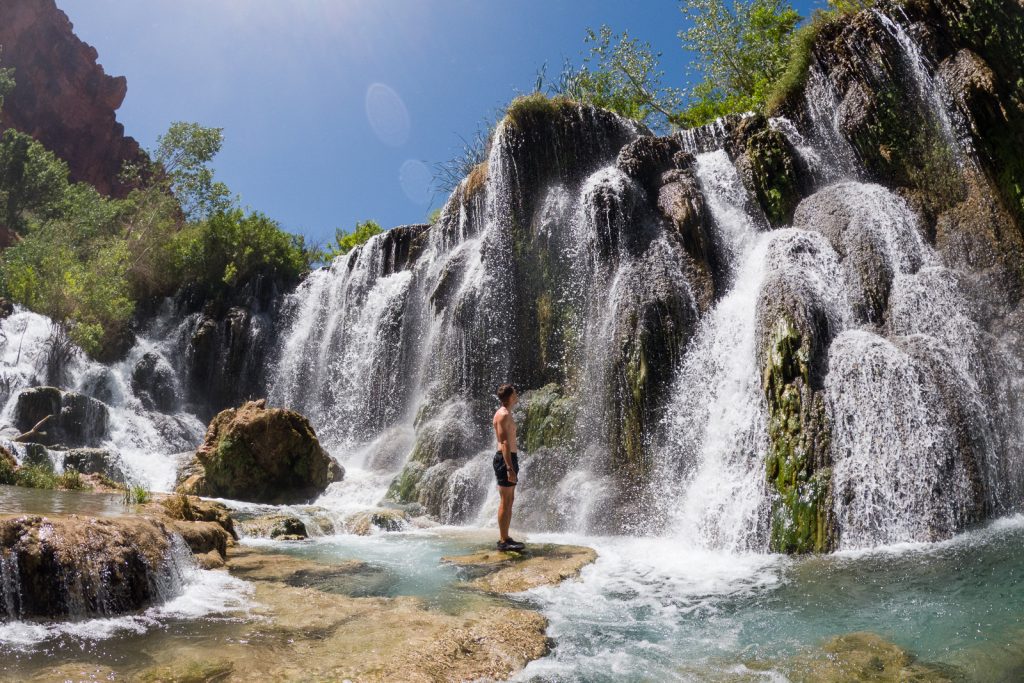
The second waterfall along the Havasu Falls Trail is Navajo Falls. Unlike Fifty Foot Falls, this waterfall can be seen from the trail. To access it, you can either go to the same open, flat area that is just past the restrooms and follow the path down and to the right. You’ll see a sign for the falls shortly after! There is also a path that leads down from the trail that you can take.
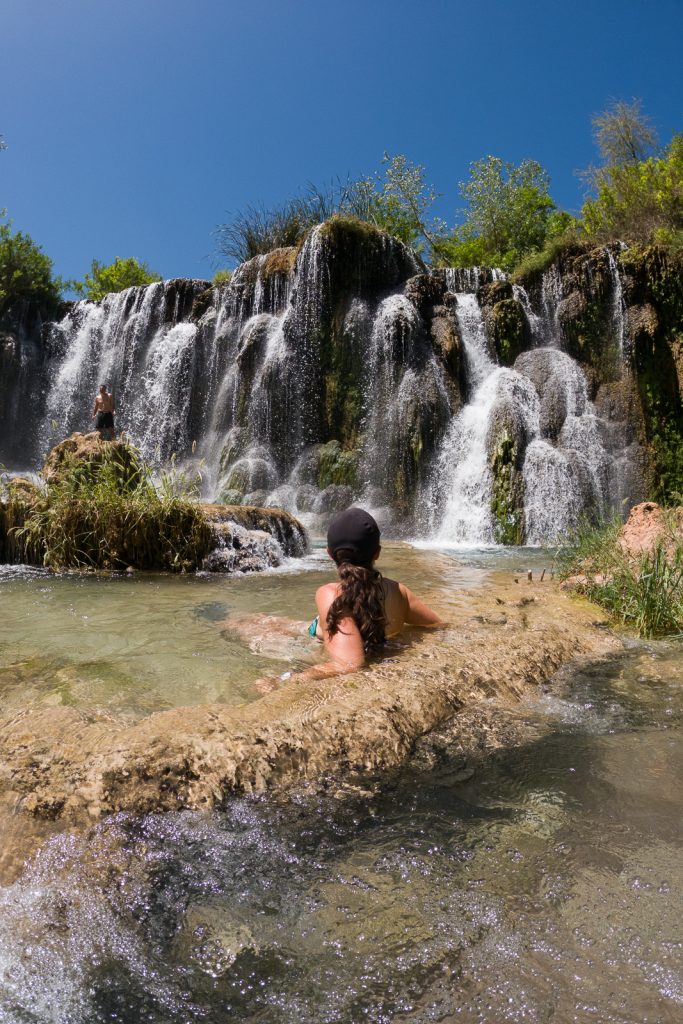
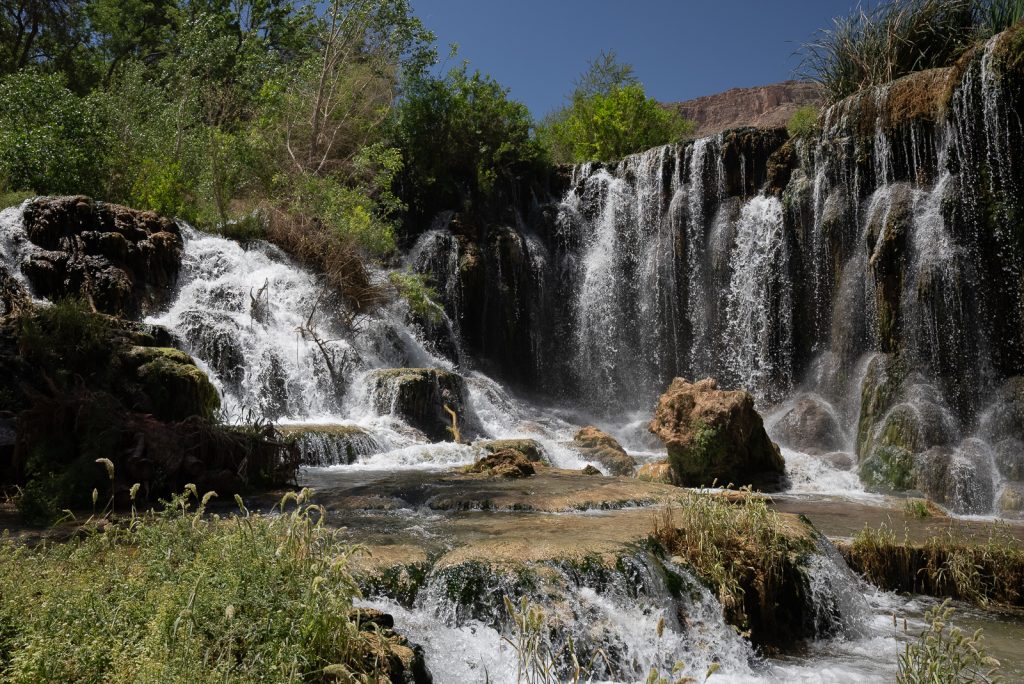
Similar to Fifty Foot Falls, Navajo Falls is a wide stream of multiple falls that tumble down the rockface. It is gorgeous! There are multiple different pools you can hang out in, plus a more open swimming area. And you can easily get right up to the falls as well!
Due to our camera swimming incident, we had a bit less time than we hoped at Navajo Falls, but we would’ve loved to hang out here for hours and swim, plus soak in the pools.
Fry bread stands (Between miles 9.5-10)
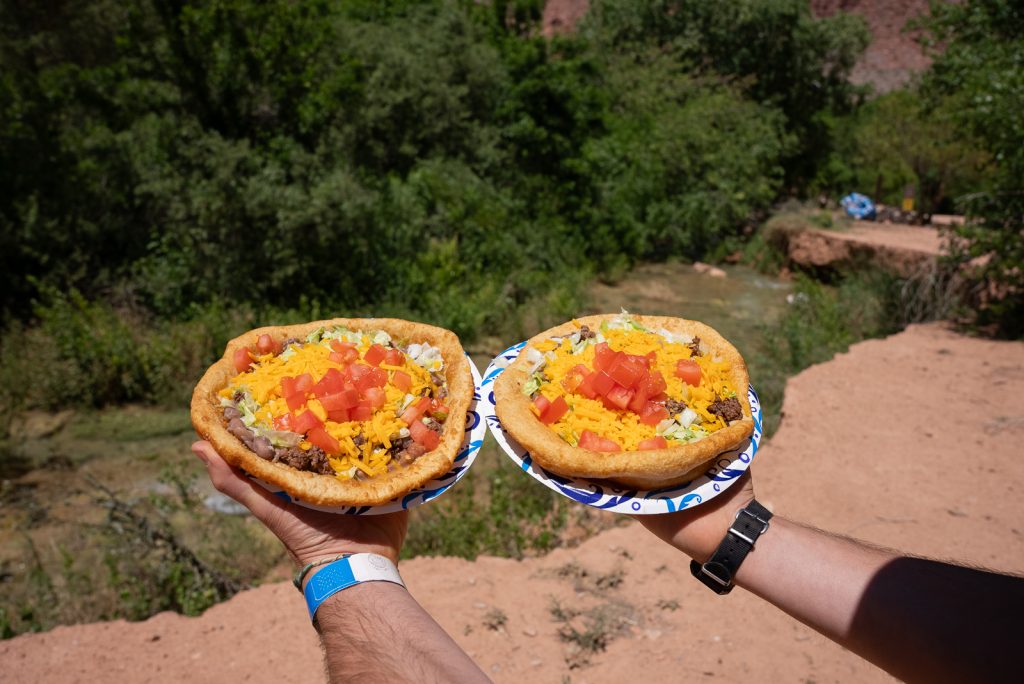
Between Navajo Falls and Havasu Falls you’ll encounter a few things: a very steep hill, the mule drop off area, and two fry bread stands.
Being able to enjoy a fresh fry bread, which is a Native American fried dough (with either sweet or savory toppings), was such a treat on our Havasu Falls hike! There are two fry bread stands along this section of the trail, but during our visit, only one was open. We hear the hours aren’t super reliable and since they have to fly in ingredients, they can sell out, so don’t necessarily count on getting fry bread (pack enough food).
Both fry bread stands are cash only, so bring plenty of cash! The stand we went to (close to the mule drop off area) was $18 for an Indian Taco, which is fry bread piled with beans, cheese, lettuce, tomato, and ground beef. The bean and cheese or sweet options were more affordable. They also serve cold drinks like sodas, water, gatorades, and frozen lemonades.
Havasu Falls (Mile 10)
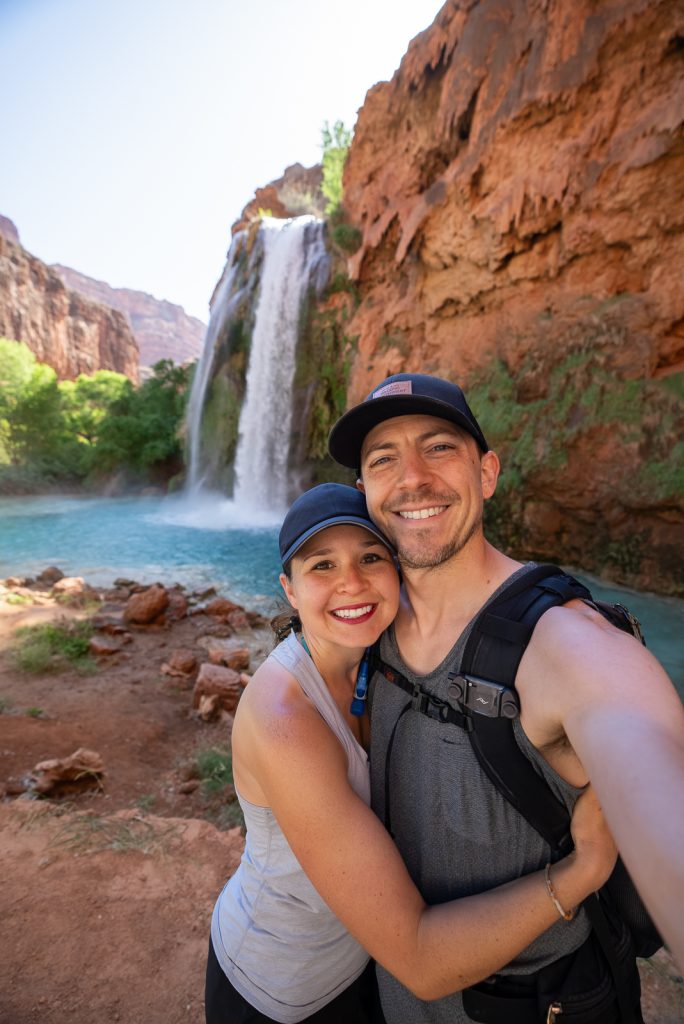
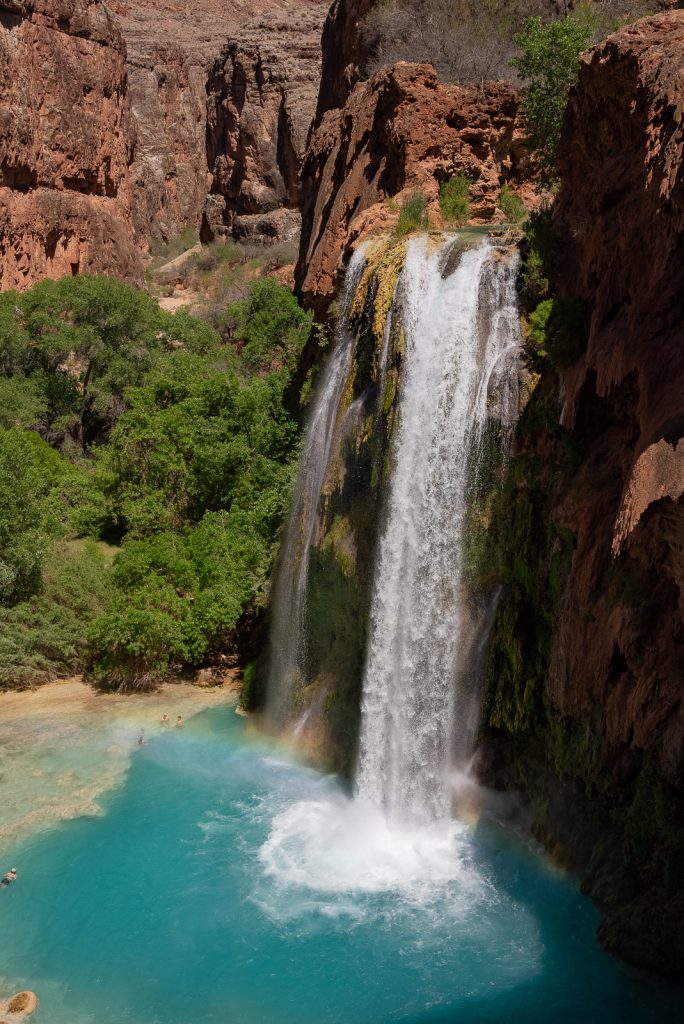
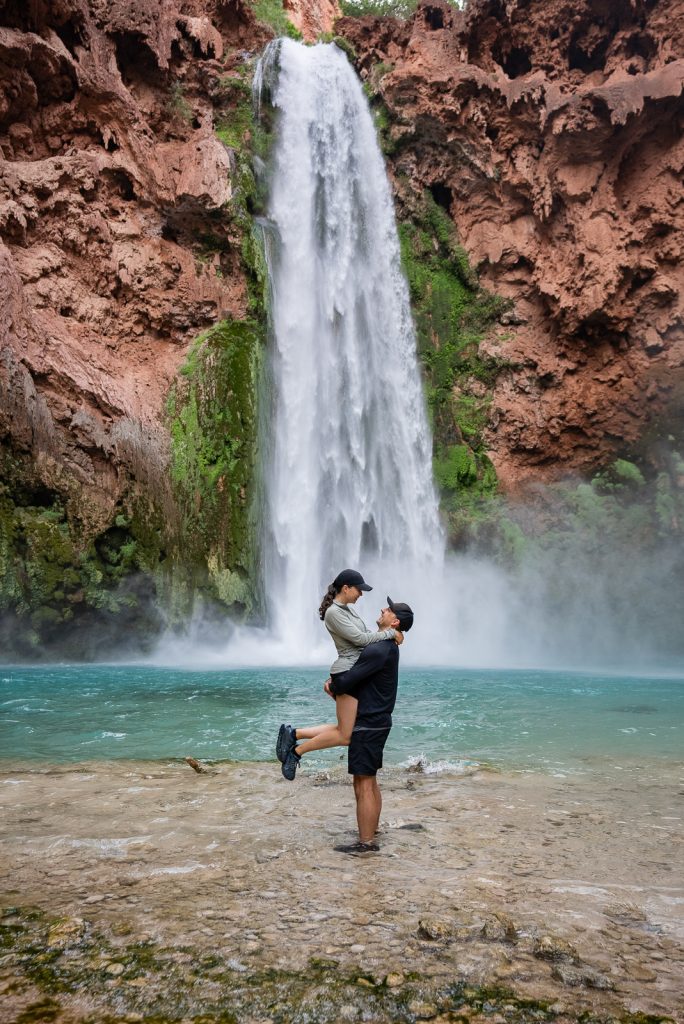
You have made it to the namesake of the hike…Havasu Falls! Just before you go down a steep hill to the campground you’ll hear the roar of the water. Make sure to look over to the right as you descend the hill to see its bright blue waters plummeting down below. After so many years of seeing Havasu Falls in photos, it was surreal to see it in real life. And we can confirm the water is truly THAT blue!
To get to the base of Havasu Falls, you’ll continue to follow the trail down towards the campground and turn right. You will have to descend a steep section, but it’s short and not too difficult. Once at the base, there are many areas to sit out and relax, including a handful of picnic tables, lots of empty ground, plus some different pools. Out of all of the waterfalls, this one has the most space for people to enjoy it. It is the busiest of them all, but even mid-day, we didn’t find the crowds to be that bad.
Havasu Falls Campground (Miles 10-11)
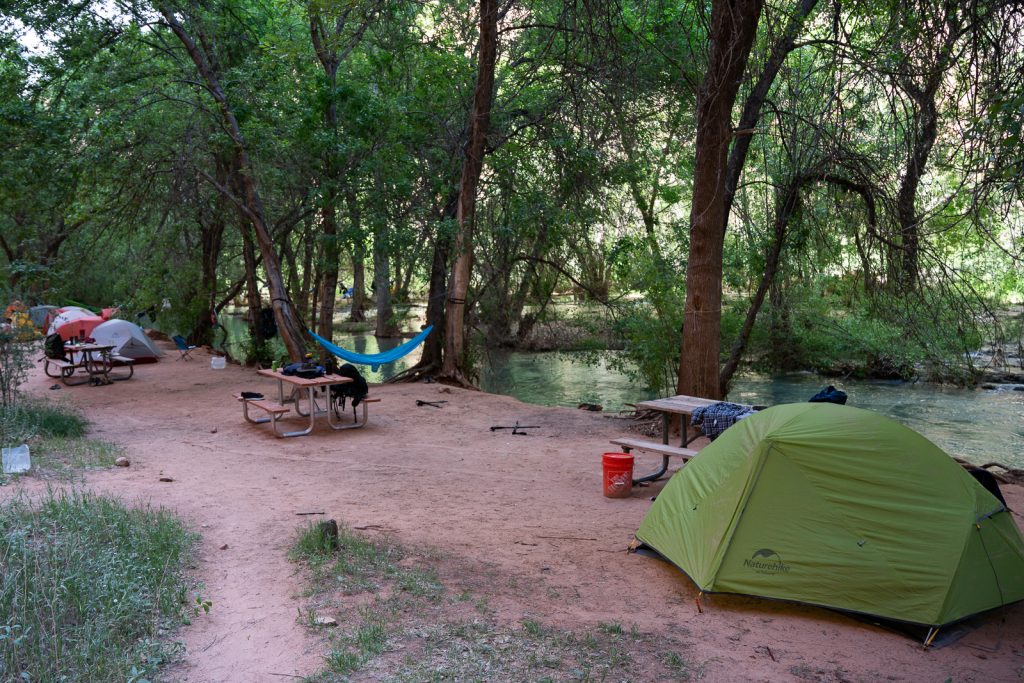
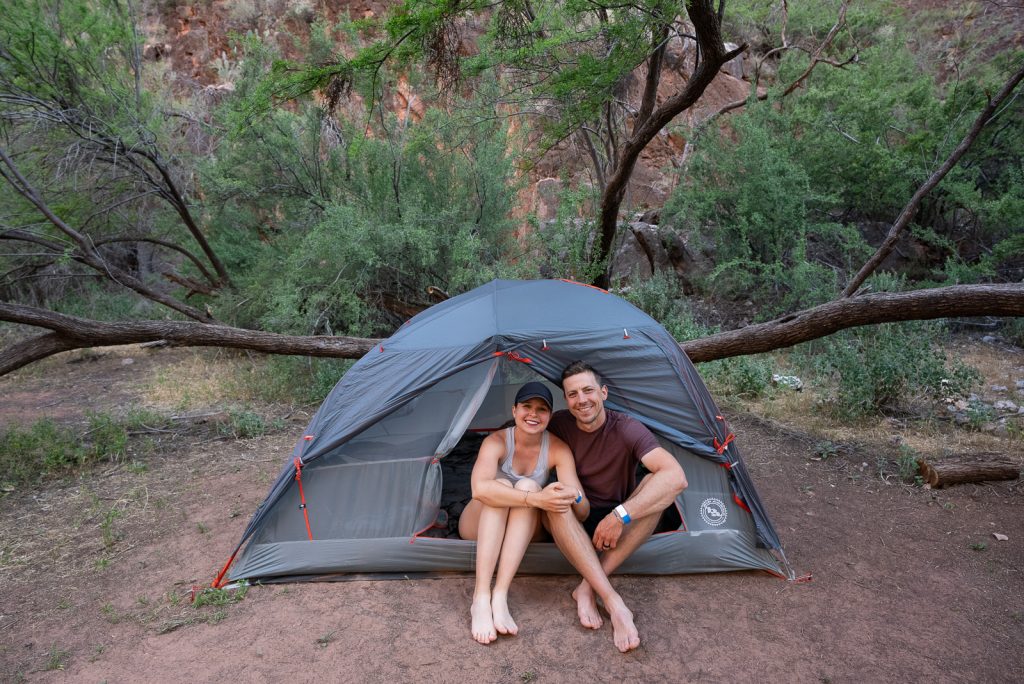
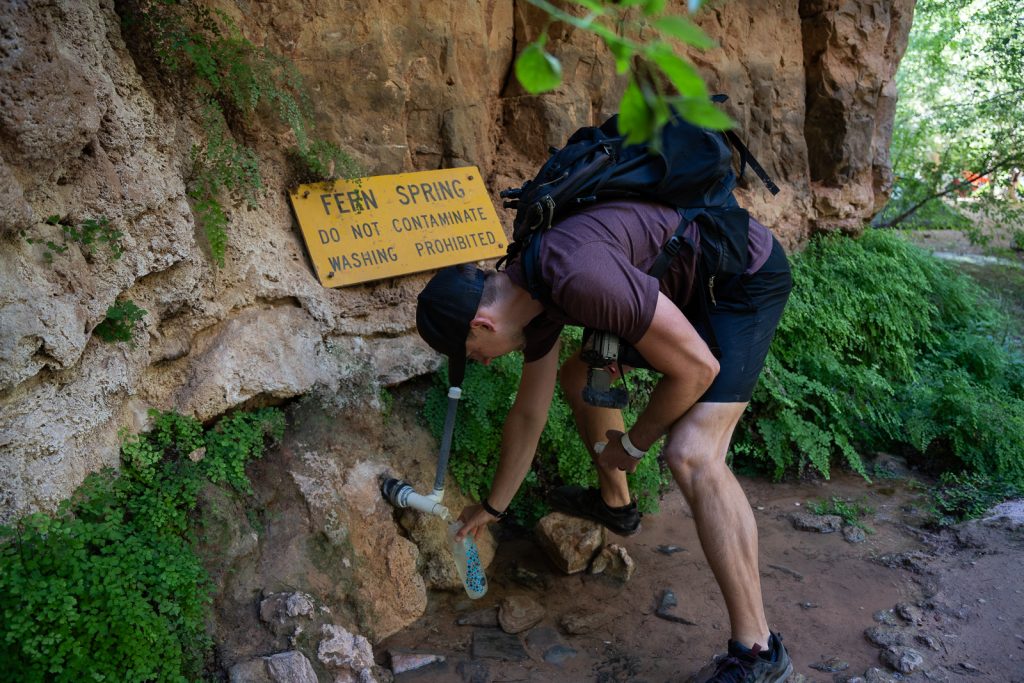
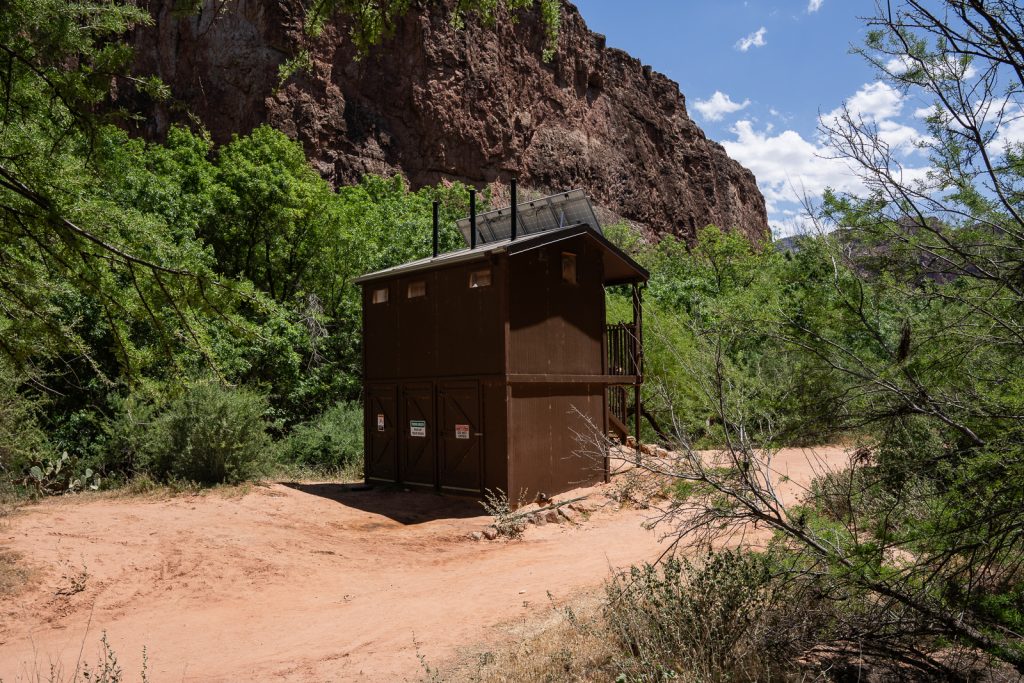
The Havasu Falls Campground begins a short walk from Havasu Falls and extends for one mile along Havasu Creek. This is the only area you’re allowed to camp along the hike. In the campground you’ll find four different sets of pit toilets dispersed throughout. There is also a spring for freshwater close to the beginning of the campground. This is the only area to get water without needing to filter it, but you can also filter water from the creek if that is easier.
Even though you have a reservation, the campground is first come, first served, with no formal campsites. You just camp wherever you can find a spot. Some campsites will have a picnic table, some will be along the river, some are tucked into a little nook, and some are wide open, with zero privacy. Many people agree that the best sites are between the second and third bathrooms, which have many sites along the river.
We reached the campground around 11 AM, after starting the hike at 6 AM. Instead of spending time at the waterfalls along the way, we headed straight to camp to find a spot, which we highly recommend.
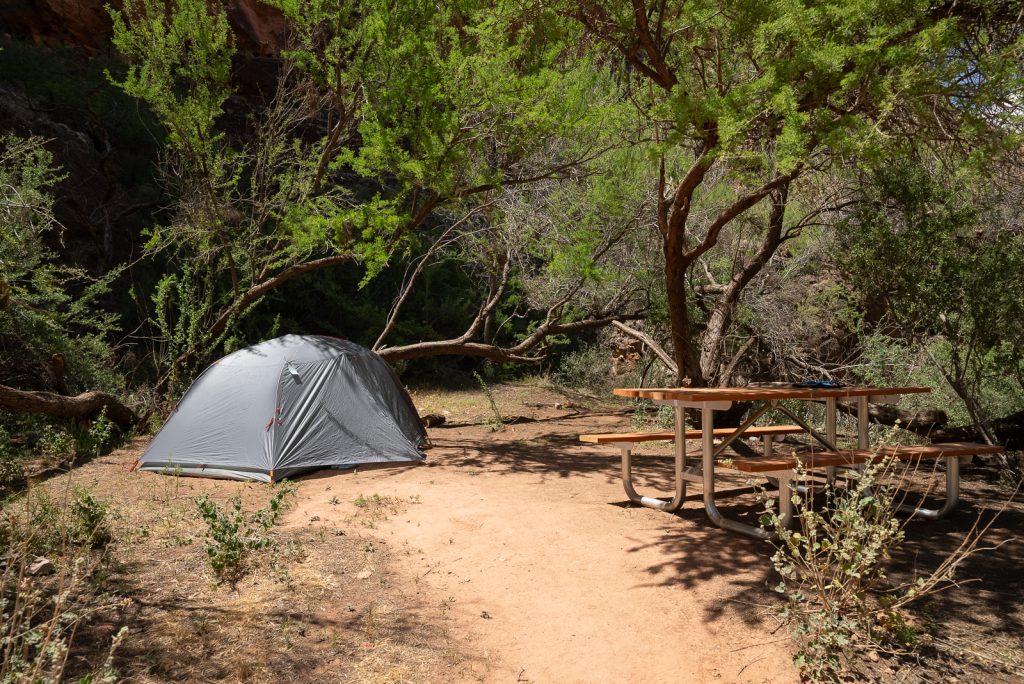
Our strategy for finding a campsite was to walk the entire campground and see our options. While the river spots are heavily coveted, we couldn’t find one with a picnic table (which was something we hoped to have, since we didn’t pack chairs). So we ended up choosing a spot that was tucked into some trees, with a picnic table, just behind (on the left side) of the third bathroom.
While it wasn’t a super scenic spot (and sometimes smelled from the toilet), it was pretty private and no one could camp right next to us. For us personally, we enjoy some solitude when we camp. And with up to 300 campers a night, it can be hard to find that at Havasu Falls. So sacrificing a scenic spot for a bit more solitude was worth it for us.
Don’t get a spot you love? Don’t worry! One strategy many people use is to move campsites on their second day. You can see on people’s tent tags what day they leave, so if a good spot is opening up the next morning, you can move to it then.
Looking for more detail on the camping experience? We share more about what to expect when camping at Havasu Falls (+ helpful tips) in this post!
Mooney Falls (Mile 11)
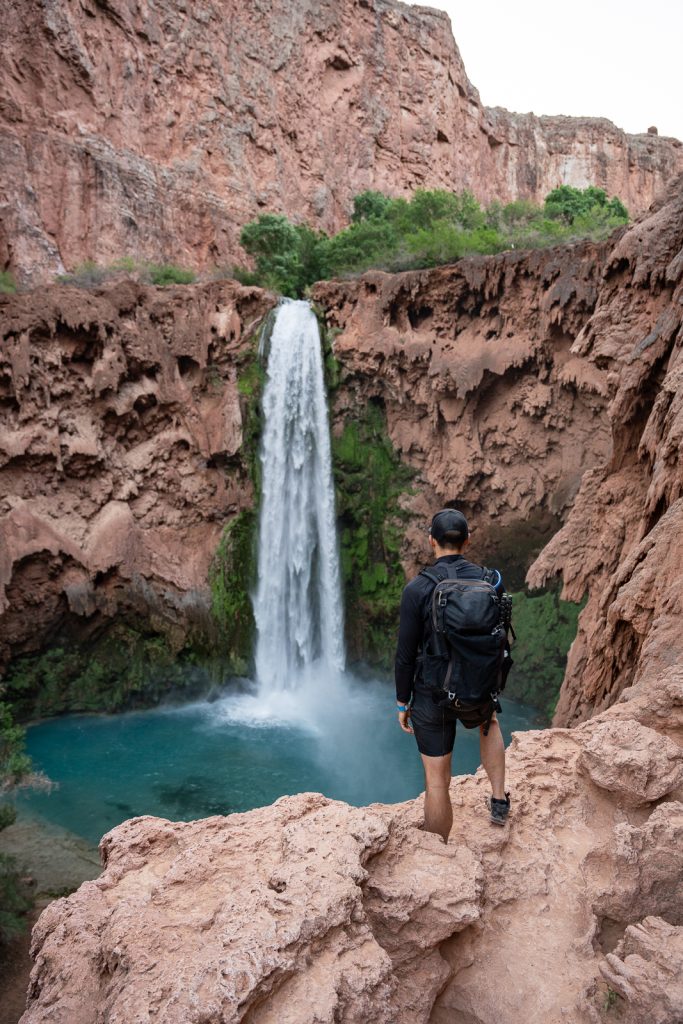
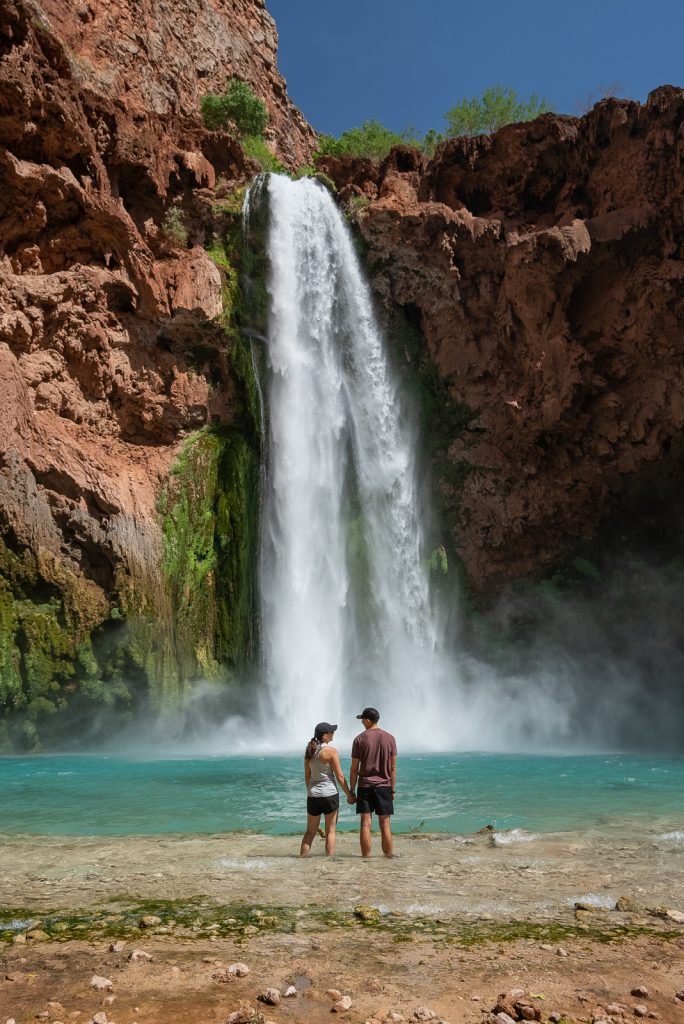
Just minutes past the third bathroom at the campground is the fourth waterfall: Mooney Falls. This is the tallest and most epic of all of the waterfalls. And getting down to the base of it is quite the adventurous (and sketchy) journey that requires a 200 foot descent through caves and along a wet clifface, using rock steps, chains, and ladders to help you.
To begin this journey, you will follow a trail that leaves from the overlook area. Soon, you’ll reach a sign that basically warns you that you are descending at your own risk.
From here, you will pass through two small tunnels that were built by miners. At first, the tunnels look super steep, but they do have rock steps inside and we felt perfectly safe. They can be dark though!
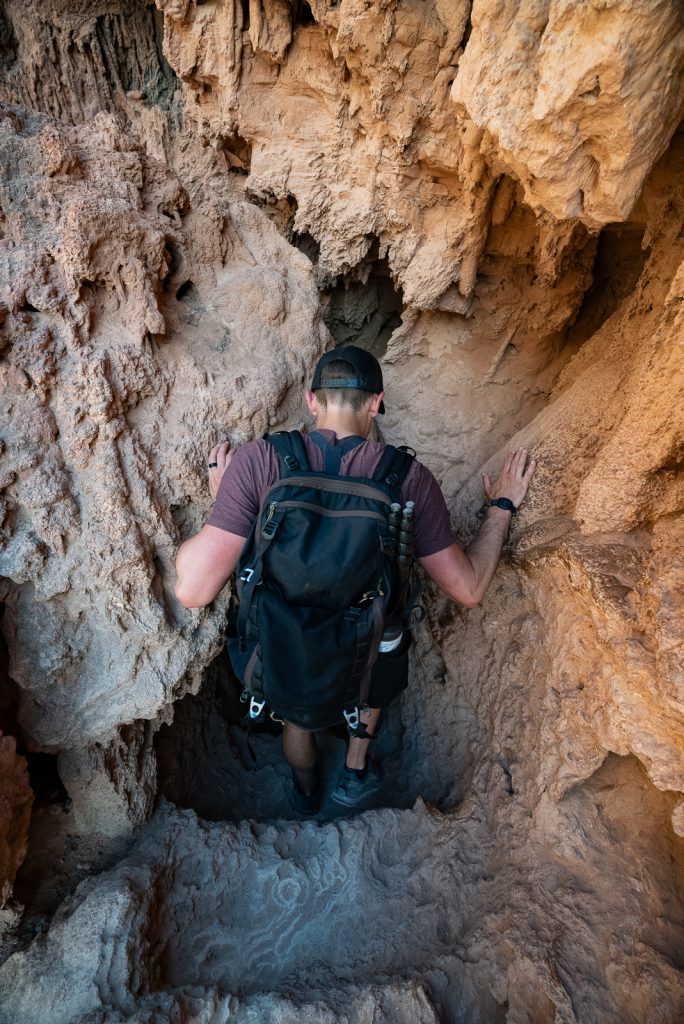
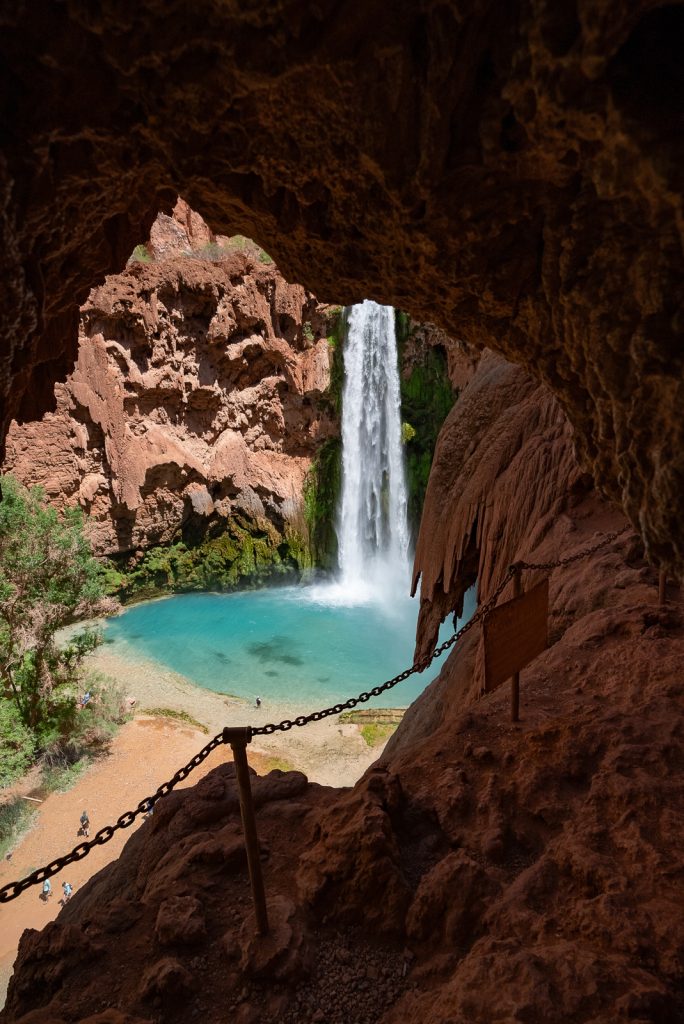
After exiting the second tunnel you will come to the part of the descent that is NOT for everyone. This is when you have to begin climbing down the steep cliff wall, with random steps and chains to help you, before climbing down two ladders at the end. All while being blasted with mist.
We’re not going to lie. We were very nervous about this descent. And we both agree it was pretty scary. It is tricky to climb backwards down a cliff, with little idea of where to put your feet next. Here are some tips to make sure you have a safe experience:
- Some of the steps are pretty big, which can be hard for those who are a bit shorter. Have someone that is slightly less nervous go first and guide you with where to put your feet.
- Take your time and maintain three points of contact at all times!
- Some people say that gardening gloves really help (there are a bunch left that you can use if you forget to bring your own), but that is a personal preference.
We thankfully survived this descent (twice!) and luckily, going back up is way easier and actually kind of fun!

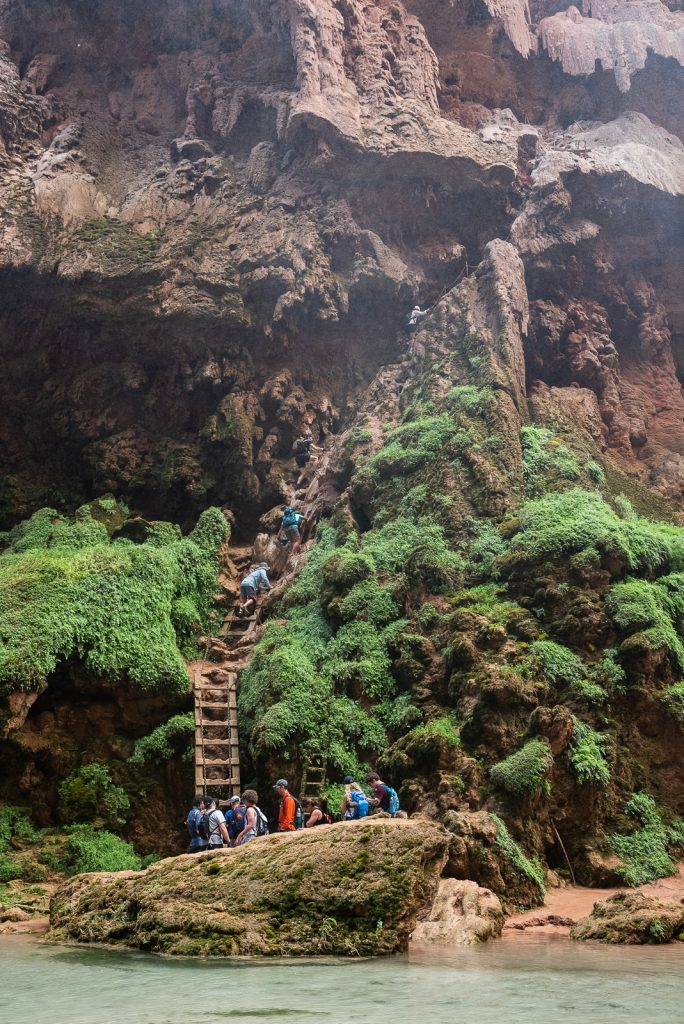
A+K Tip: Go to Mooney Falls early or late in the day! People take turns going up and down, so if there are a lot of people trying to go, there can be a line. We heard that one morning at 10 AM there was a line of 25 people trying to go down!
Don’t want to go down to the bottom? That is 100% okay! We are big believers in only doing things you feel safe doing and you can still see Mooney Falls from above. There is an overlook at the end of the campground with great views of the falls. You could also hike some of the trail down, until after the first tunnel, which isn’t too scary.
Mooney Falls to Beaver Falls (Miles 11-14)
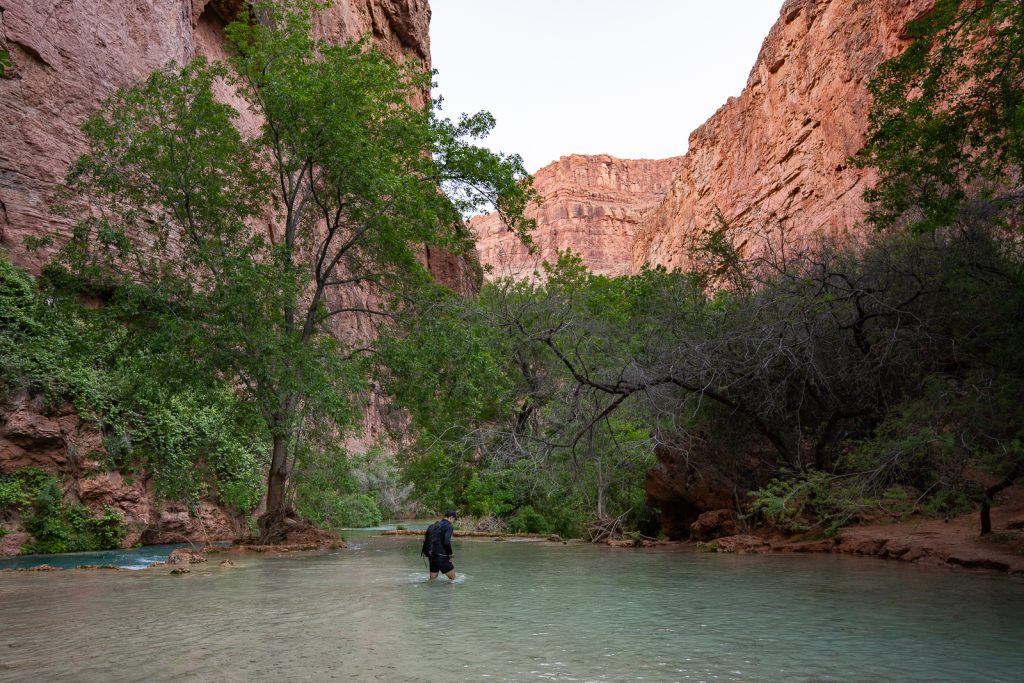
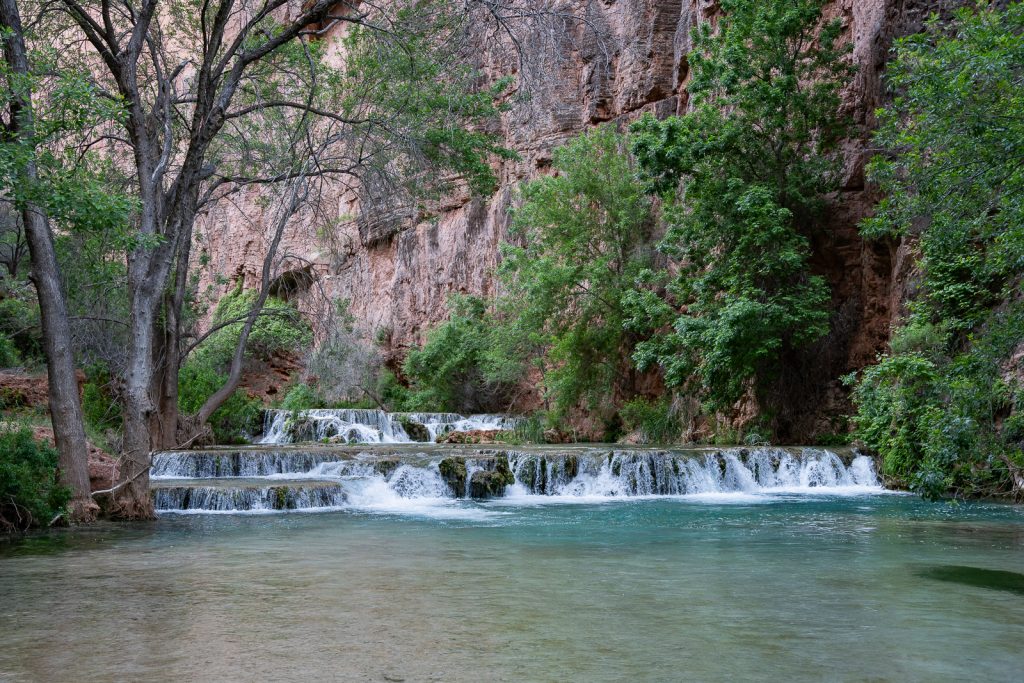
Once you make it to the bottom of the Mooney Falls descent, you can cross the creek to a more open area to hang out. We will say, although Mooney is SUPER epic, it was hard for us to hang out here for too long because the cold mist was insane and kept blasting us. And the water at the falls is pretty intense, which makes it not the best swimming spot.
We suggest hanging out for a little bit, but make sure to save time for Beaver Falls! Beaver Falls is the final major waterfall on the Havasu Falls trail and is well worth the extra 2.5-3 mile (one way) trek to get to.
To get to Beaver Falls, you will want to cross the creek back towards the Mooney cliff (that you just climbed down). There will be a trail to the right. It’s very easy to follow at first, but once you’re a few minutes away from Mooney, there are a few trail options and it can be confusing. While they do interconnect, for the most direct way, you will want to stay closer to the middle of the canyon wall and the creek.
Along this stretch of the hike you will encounter beautiful smaller waterfalls, quite a few creek crossings (that can be waist deep!), tons of lush jungle terrain, and a few fun features…like ladders!
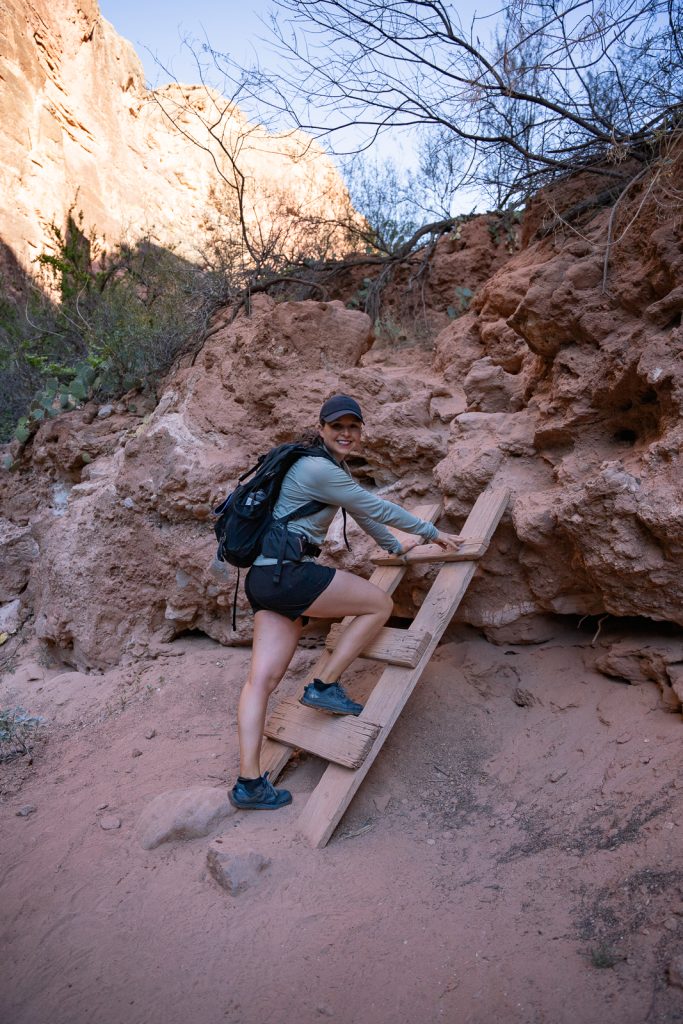
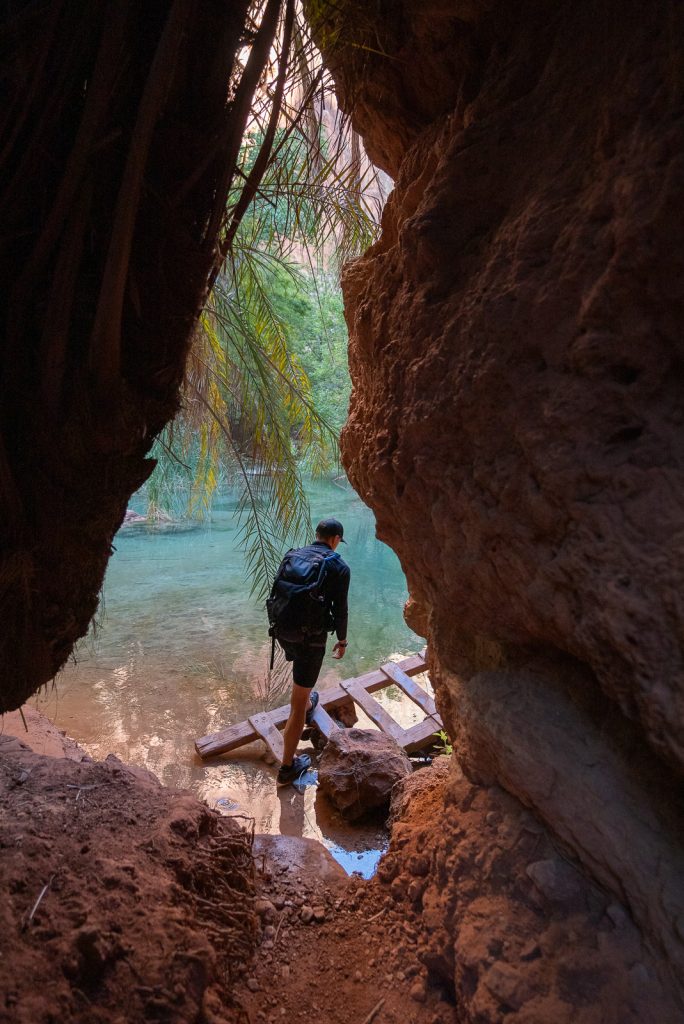
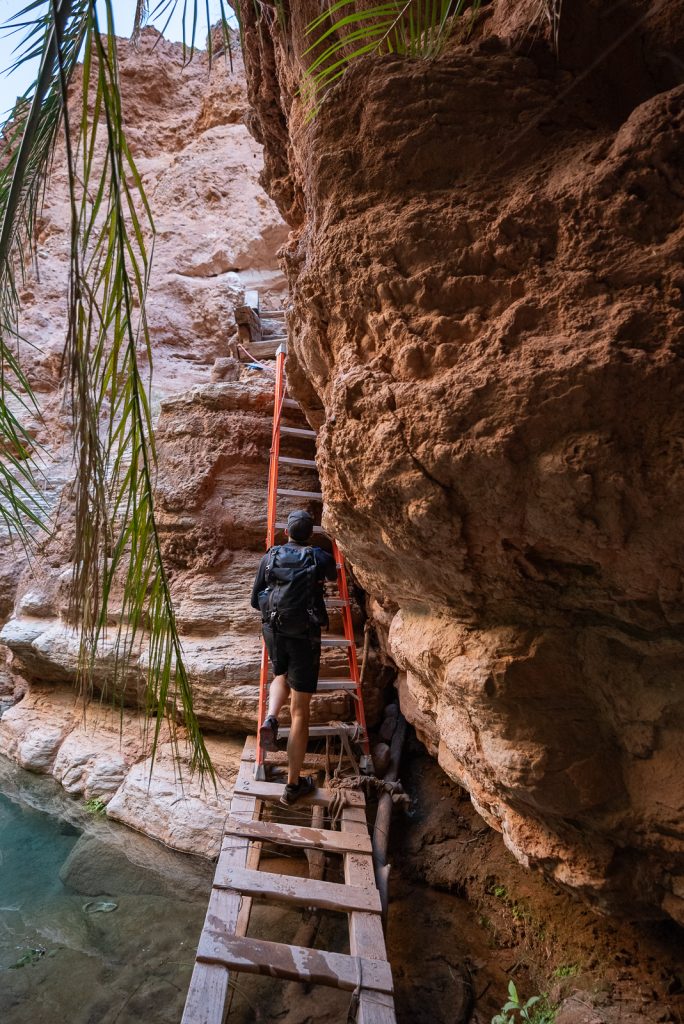
Closer to the end of the hike you’ll come to two wooden ladders back to back, plus an area with a metal household ladder propped up against a rock. Despite how much the descent down Mooney freaked us out, we actually loved this section of the Beaver Falls hike. It felt much more secure to us and wasn’t nearly as long.
Shortly after this, you will reach an overlook of Beaver Falls (with a sign, to let you know it is in fact Beaver Falls). And after tackling a couple more ladders, you’ll make it down to the base!
Beaver Falls (Mile 14)
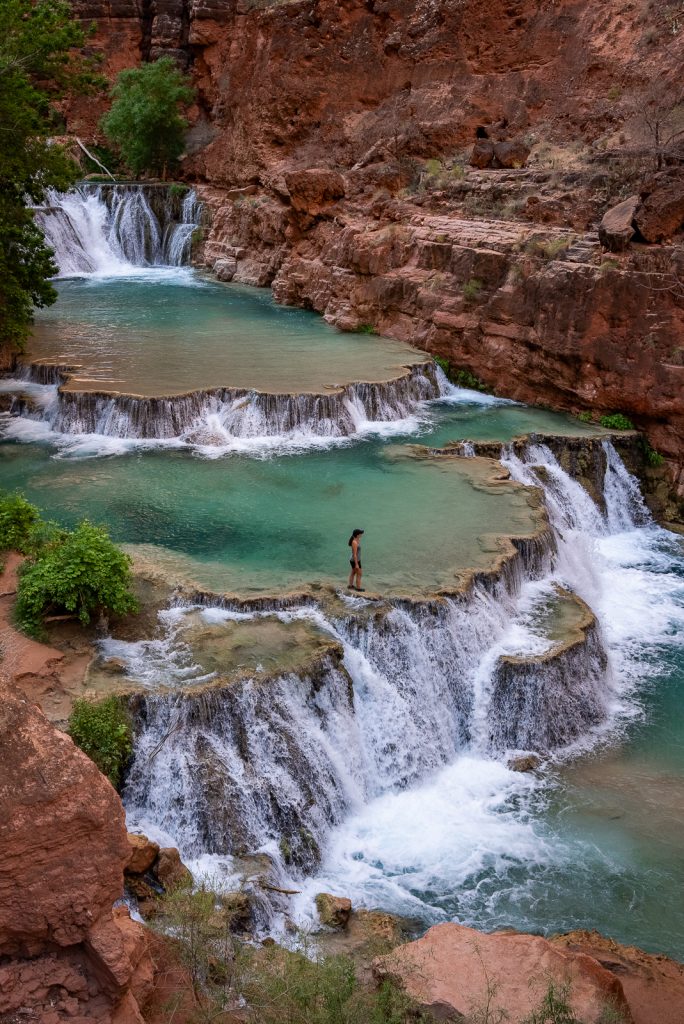
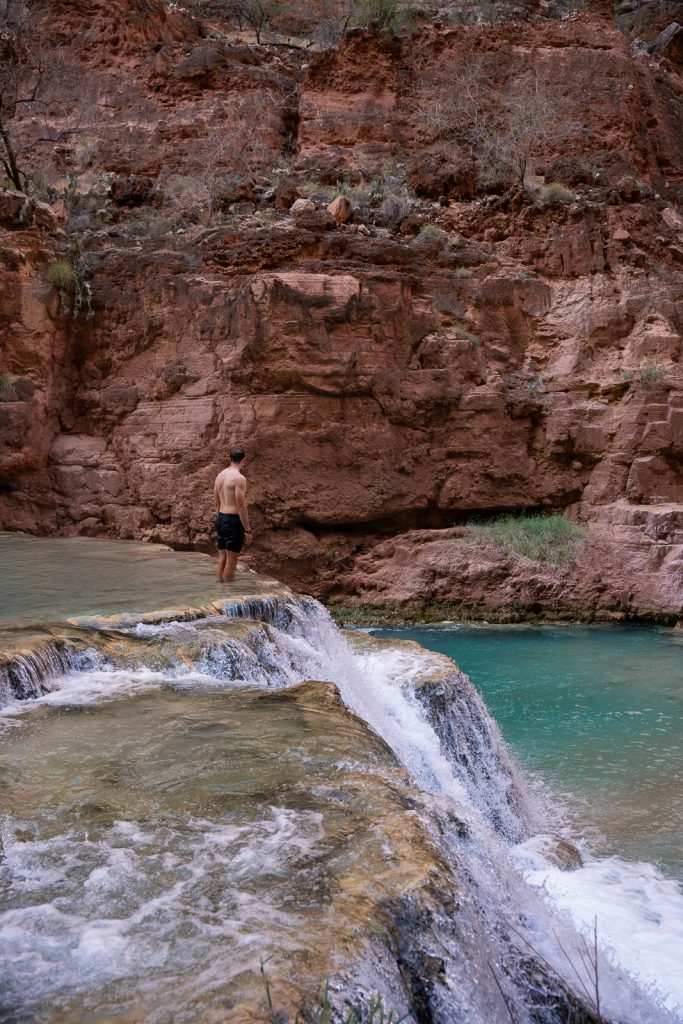
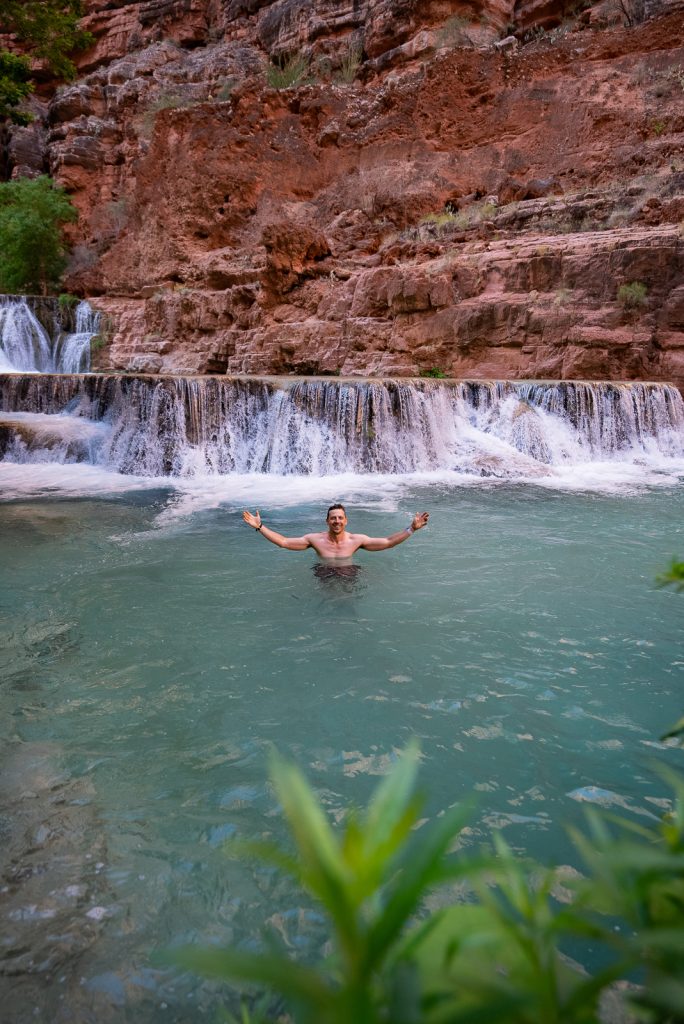
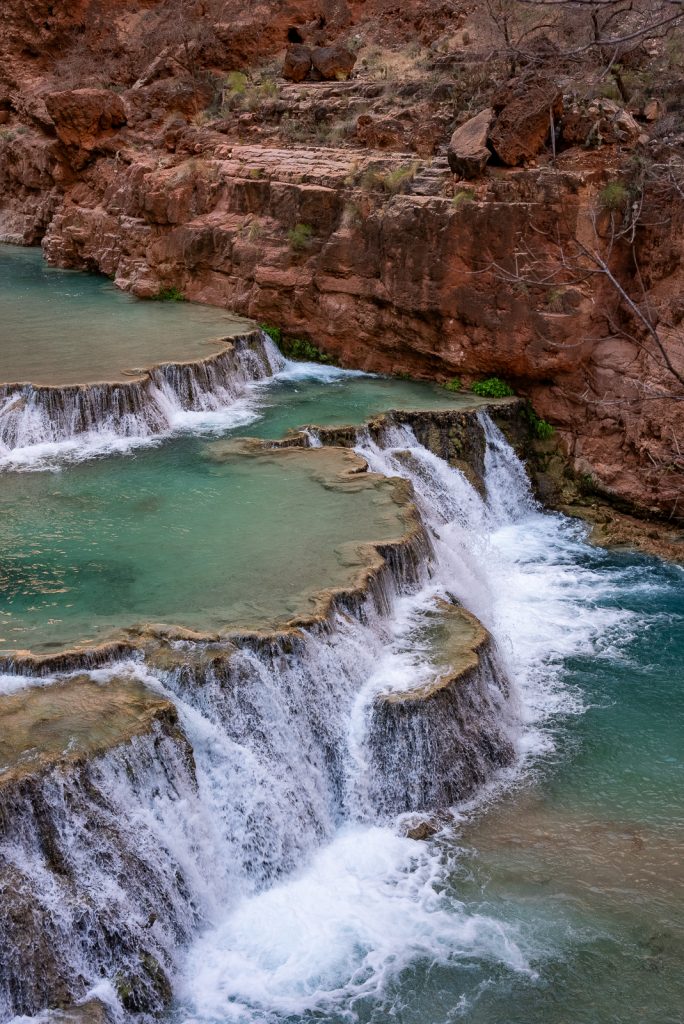
Beaver Falls may be the most magical of all of the falls along the Havasu Falls trail. You won’t find a tall waterfall here, but what you will find are levels of cascading falls, with pools between them. It is such a beautiful sight!
At the falls you can find different areas to hang out, plus multiple pools to swim in, including some spots down the creek a bit. We hiked to Beaver Falls on the way to The Confluence, so it was pretty early when we arrived, and we had it all to ourselves for a bit. And despite the water being a bit chilly, we got to enjoy a quick swim.
To learn more about the hike to Mooney Falls and Beaver Falls, check out our detailed guide, where we share tips for the shoes to wear, what the trail experience is like, and more!
The Confluence (Miles 14-20)
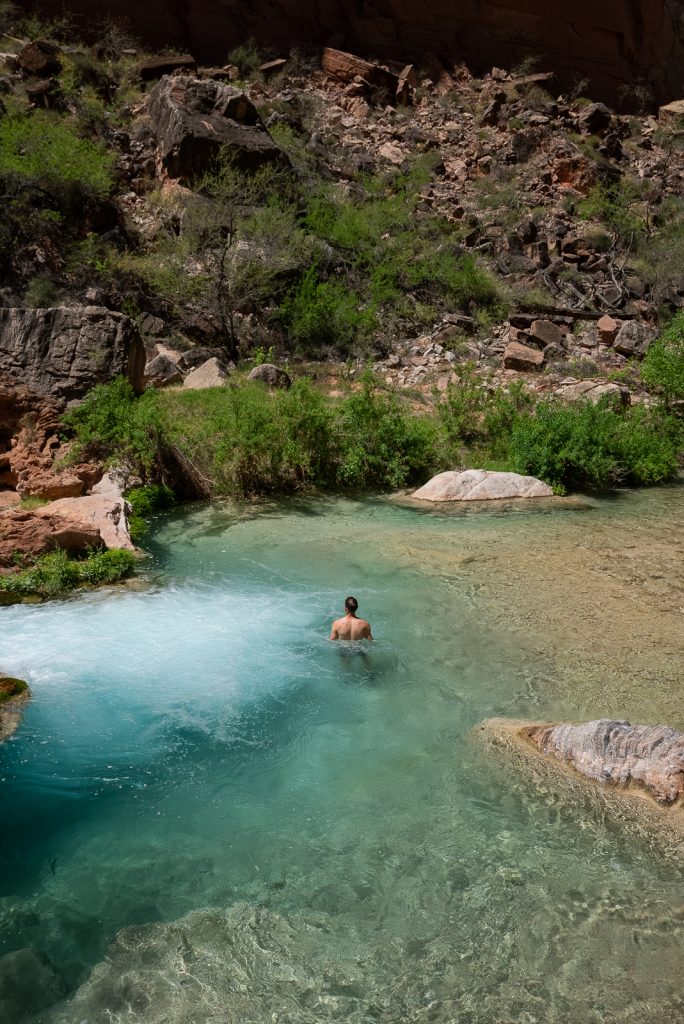
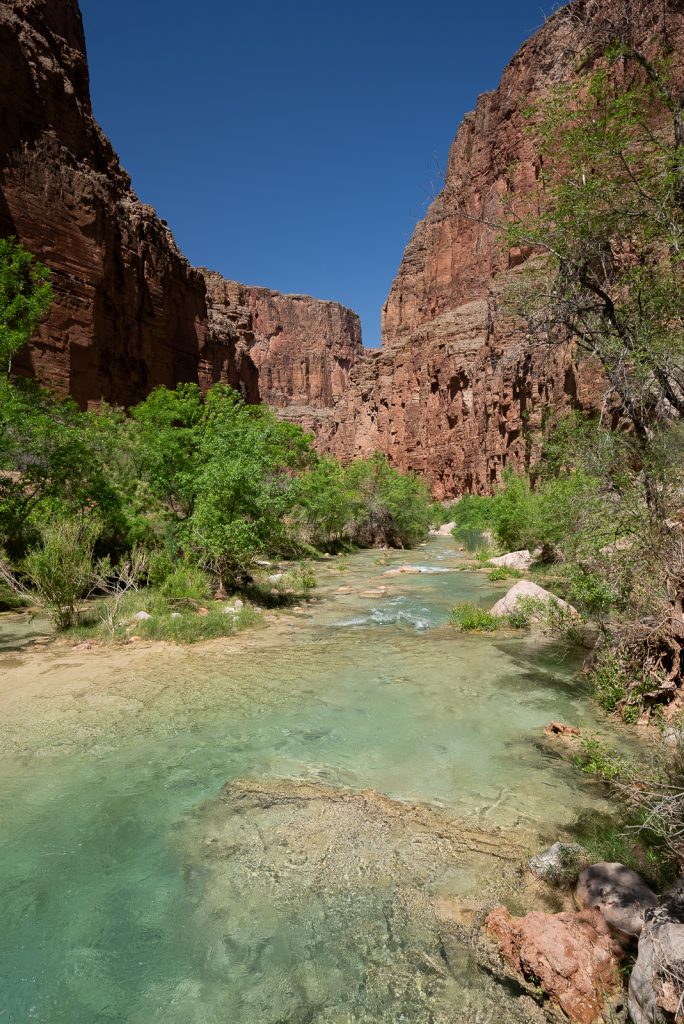
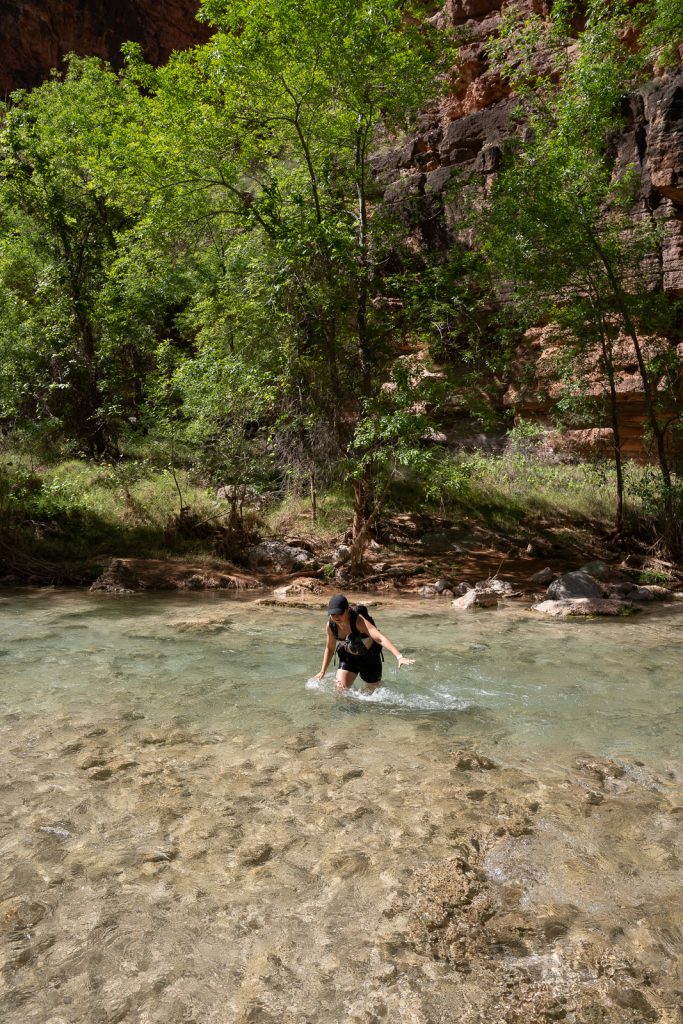
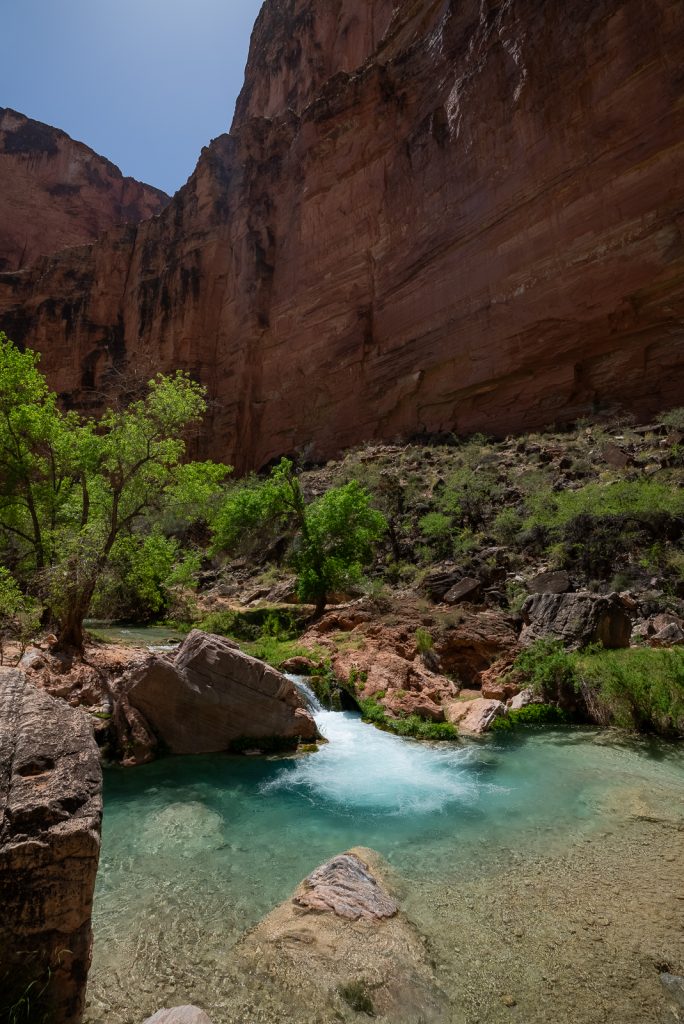
If you’re up for an extra adventure, then we suggest hiking to The Confluence! This is where Havasu Creek and the Colorado River meet, giving a cool contrast of the clear, blue water of Havasu Creek, with the murkier, green or brown water of the Colorado River.
And along the way you’ll get to wander through the steep walls of the Grand Canyon, see much more of Havasu Creek than most visitors, admire bighorn sheep, enjoy solitude (only a dozen or so people do this daily), and swim in gorgeous blue swimming holes.
But it’s definitely not an experience for everyone! The hike to The Confluence is roughly 16-18 miles round trip from the campground, with the exact mileage being hard to nail down since AllTrails struggles to find a GPS signal in the canyon. Whatever the true mileage is, it makes for a LONG day of hiking that requires an early start and a sense of urgency throughout the hike.
You need to start this hike no later than 7 AM and be past Beaver Falls by 10:30 AM or it will be very difficult to make it back before dark. We personally started around 6 AM, made it to The Confluence around 1 PM (which included time at Mooney Falls, Beaver Falls, stopping for lunch, filming our experience, and a swim break), and then got back to the campground around 4 PM.
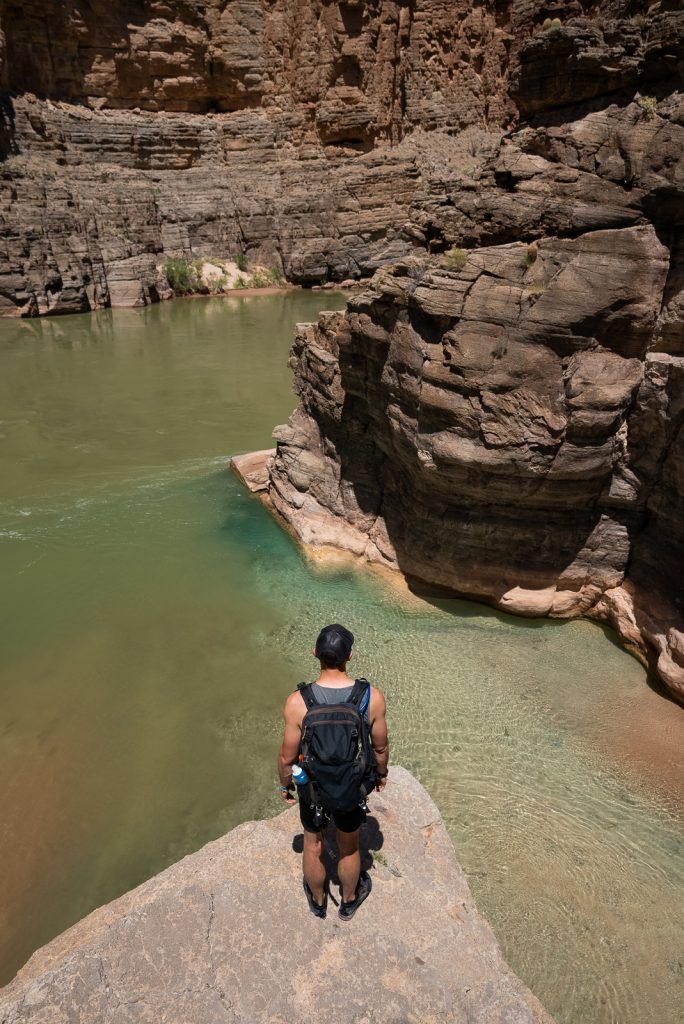
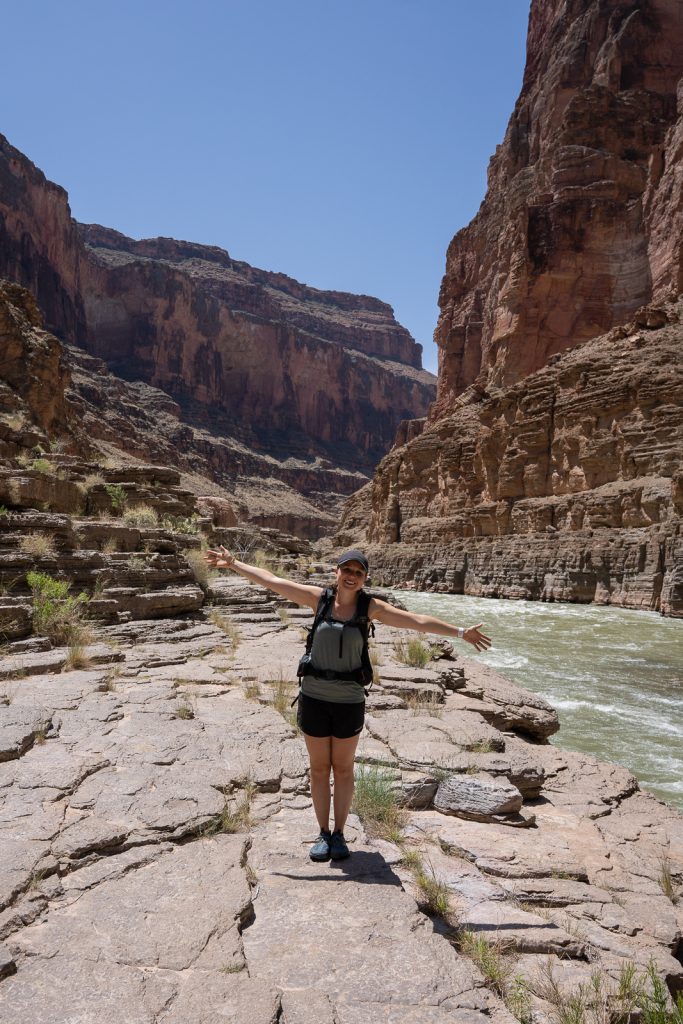
Do we think the hike to The Confluence was worth it? For us, 100% yes! It was the highlight of our time in Havasupai. However, we love to hike and enjoy being active, plus more remote experiences. If your goal is to just relax on your trip, we wouldn’t suggest it. But if you love adventure, we highly recommend it!
Still unsure if The Confluence is for you? For more information about the hike, plus our top tips from our experience, check out our detailed guide to hiking The Confluence.
The hike out of Havasupai
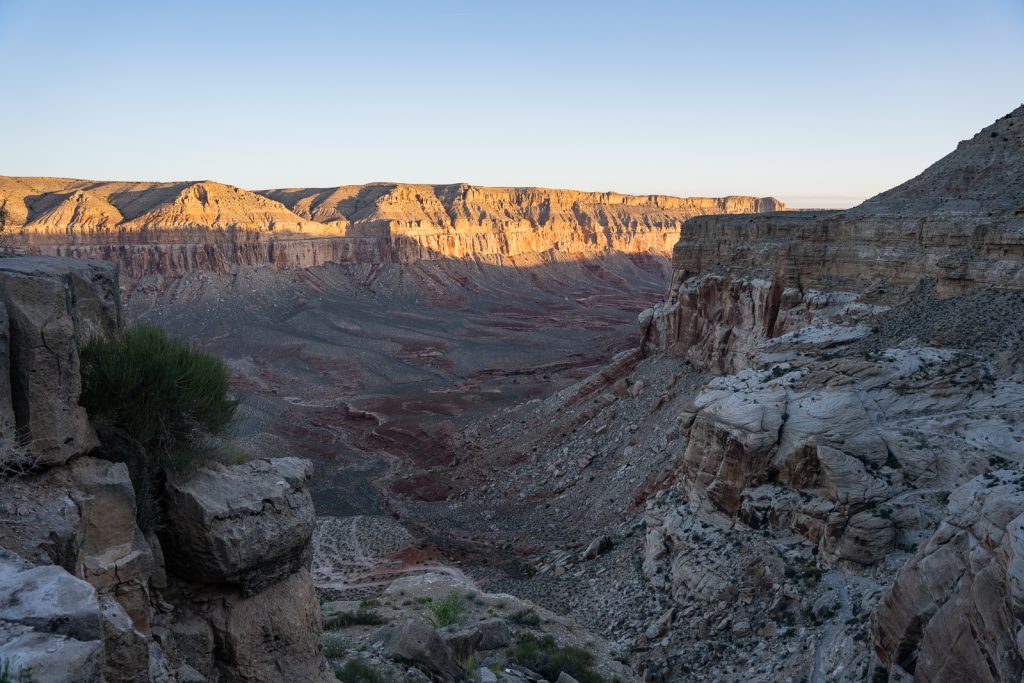
After three fun days of exploring Havasupai and its waterfalls, it’s unfortunately time to head out. To get back to the trailhead and parking lot, you will follow the exact same trail as you did coming in.
As hard as it may be we’d recommend starting your hike back as early as possible to avoid the heat and sun. The trail has little cover from the sun and the most difficult part of this part of the adventure is at the very end, when you reach all of the switchbacks up to the trailhead. Ideally you’re at or finished with them before the temperature or the sun is too high.
During our trip to Havasu Falls, we woke up at 2:30 AM, packed up, and hit the trail by 3:30 AM. After about 2 hours of hiking by headlamps, the sun finally began to rise and we could see where we were walking. We reached the Hilltop trailhead by 7:45 AM and while the sun was on the canyon walls, the sun didn’t hit the trail during our hike back.
Even if you do not want to start that early, you are required to start hiking out no later than 2 PM.
Other ways to experience Havasu Falls
If you want to experience the gorgeous blue waters and waterfalls of Havasupai, but camping and backpacking aren’t for you, then you do have some options!
Stay in the lodge
Besides camping at the Havasupai Campground you can stay in the Havasupai Lodge near the campground. This costs $2,277 per room, for up to 4 people. The rooms have two queen sized beds, outlets, a bathroom, and access to wifi. We hear that some rooms have refrigerators and microwaves, but not all do, so do not plan on that.
While the lodge provides comfort, it also makes accessing the falls a bit more of a journey. You will be between 1-1.5 miles (one way) from the first three waterfalls and even longer from Mooney and Beaver Falls. If you plan to visit the further falls, we’d suggest camping instead.
Fly in a helicopter in and out
If you don’t want to hike in, out (the most common), or both, you can also ride in the helicopter from the trailhead to Supai Village. This will still require a 1-2 mile hike to the campground with your gear, depending on where you camp.
The helicopter costs $300 per person one way, plus $50 per bag. They do take credit cards, but there is an extra fee and their wifi isn’t reliable, so we suggest taking cash.
And while the helicopter is an option, it isn’t a 100% reliable one. The helicopter only runs Sundays, Mondays, Thursdays, and Fridays, tribe members get priority, and it is weather dependent.
If you want to take the helicopter out, you will want to head to the helipad in Supai Village around sunrise on your final morning to get in line. As we mentioned, tribal members get priority. So even if you’re second in line, if 10 tribal members come up wanting a ride, they will jump you in line. We have heard that some people have waited until 1 PM for a ride back.
Personally, we highly suggest being prepared to hike in and out and not relying on the helicopter.
Have mules carry your gear in
Another option to make the hike a little easier on you is to hire a pack mule to carry your gear. Reservations are made here and cost $400 for 1 pack mule. The mules can carry up to 4 bags and each bag cannot weigh more than 32 pounds. People suggest putting your gear in a duffel bag to protect it from the elements.
Important to know: There have been reports of the mules being mistreated in the past. While we do not fully know the current situation, we do not support any abuse to animals and therefore personally wouldn’t feel comfortable utilizing the mules.
Havasu Falls Itinerary Options
All reservations for Havasu Falls are for 4 days, 3 nights. And in our opinion, this is the perfect amount of time! It gives you the chance to explore at a slower pace or take on some long adventures, like The Confluence. Below are two itinerary options, both with and without The Confluence.
Havasu Falls Itinerary without The Confluence
Day 0: If possible, check in at the Grand Canyon Caverns Inn the day before your hike, so you can start early on Day 1
Day 1: If you didn’t check in already, check in at the Grand Canyon Caverns Inn as early as possible. A good chunk of your day will be spent hiking the 10 miles to Havasu Falls. We suggest getting an early start! Instead of stopping at the falls along the way, head straight to the campground to find a spot. Once you set up, you can spend the rest of the day hanging out at camp or checking out some of the waterfalls.
Day 2: We suggest spending this day checking out Mooney Falls and Beaver Falls. You could spend the majority of the day between the two, plus the hike to get to and from them. If you do not want to make the Mooney descent, spend time at Fifty Foot, Navajo, or Havasu Falls instead!
Day 3: For your final full day, explore Fifty Foot, Navajo, and Havasu Falls. Grab some fry bread (if they are open), go for a swim, take a nap, read, or whatever else your heart desires!
Day 4: Get up bright and early and hike back to the trailhead.
Havasu Falls Itinerary with The Confluence (What we did)
Day 0: If possible, check in at the Grand Canyon Caverns Inn the day before your hike, so you can start early on Day 1
Day 1: If you didn’t check in already, check in at the Grand Canyon Caverns Inn as early as possible. Make the 10 mile hike to the campground, set up your gear, and then go explore a waterfall or two! Depending on where you camp, Havasu Falls may be the most convenient to explore, or you could head to Mooney Falls.
We personally chose to visit Mooney Falls on the first day, mostly because we knew we would be a bit rushed the next day with The Confluence. And we wanted to have enough time to enjoy it. We spent about an hour or two down by the falls and then headed back up to camp and read, cooked, and relaxed for the rest of the day.
Day 2: Hike to The Confluence! We suggest doing this your second day because while you may be tired from the hike in, since the hike out involves much more uphill, we think it’s better to take a rest day on Day 3. This will be an all day activity, so start early!
Day 3: Our third day at Havasu Falls was a chill day. We had a slower morning at camp and then hopped between Fifty Foot Falls, Navajo Falls, and Havasu Falls. We swam, ate fry bread, read, and relaxed.
Day 4: Get up bright and early and hike back to the trailhead.
Frequently Asked Questions about the Havasu Falls Hike
How difficult is the hike to Havasu Falls?
Difficulty is a tough topic to comment on, since everyone’s perception of difficulty varies.
The Havasu Falls hike, from the trailhead to the campground, is about 10 miles with around 2,400 feet change in elevation. You’ll descend 2,400 feet on your way to the campground, which may seem like a lot, but over 10 miles isn’t too bad overall. The steepest parts are the switchbacks at the beginning and the hill from near Navajo Falls to the campground. Which you then have to climb up on the way back.
We hike hundreds of miles and complete several backpacking trips every year, so we personally didn’t think this was a very difficult hike, minus the sketchy descent to Mooney. But for someone who doesn’t hike as much, the length (plus carrying a heavier pack) will likely be the most difficult part of this. We think it is very doable for most people though!
In fact, it is many people’s first backpacking trip. And we think it’s a pretty good one to be your first, as there are some luxuries, like pit toilets, fresh water, and access to a village, that most backpacking trips do not offer.
Do you need a national parks pass?
Even though the hike is in the Grand Canyon, it’s not located within Grand Canyon National Park (minus part of The Confluence hike). A National Park pass is not needed, even for that portion. The only permit you need is the Havasupai permit.
Is there drinking water along the trail?
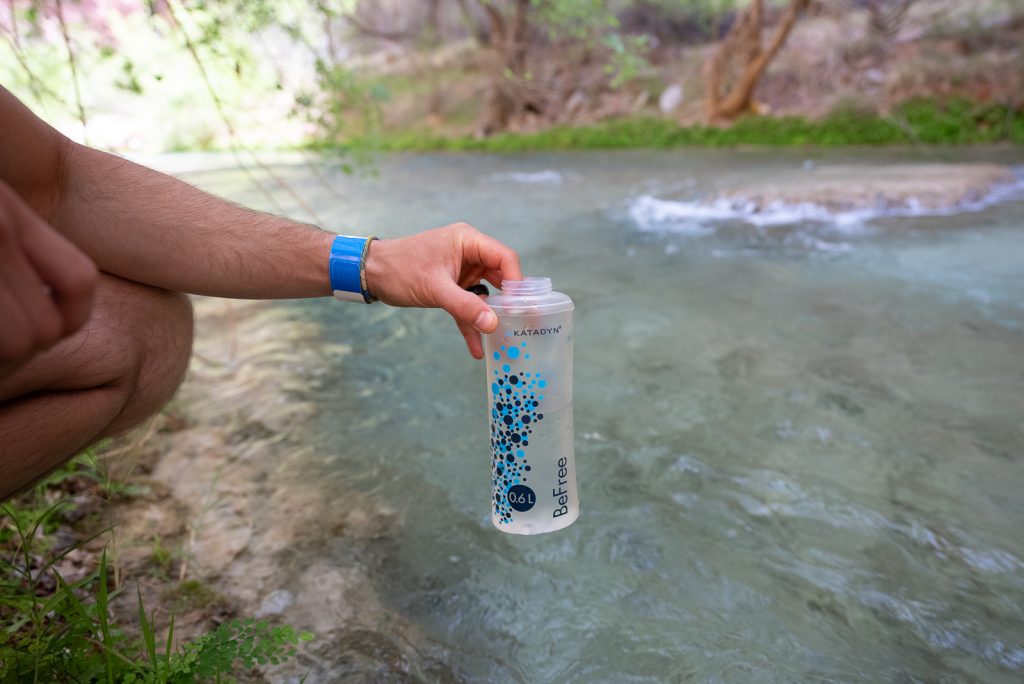
There is NO drinking water along the trail until you get close to Supai Village. After about 7 miles you’ll meet Havasu Creek and can filter and drink that water. And at the campground there is a freshwater spring called Fern Spring towards the beginning of the campground, plus the creek you can filter from.
We brought a CamelBak 3 liter bladder, a Katadyn Water Filter Bottle, another 24 oz water bottle, and Sawyer water filter (as a backup for the Katadyn).
Is the Havasu Falls hike kid and dog friendly?
Dogs are not allowed on the Havasu Falls hike and kids are not recommended. It is of course up to the parent if they should bring their child, but do consider the circumstances. There isn’t much water readily available at most times, it can be very hot or cold, you’re miles and hours away from medical assistance, and you’ll be carrying a lot more gear than normal. We saw maybe 5 kids total during our trip, most of which were at least 8 years old, if we had to guess.

What kind of shoes should I wear?
You’ll be hiking many miles on dry, rocky, and sandy terrain and also crossing through many streams where you’ll get your feet soaked. We wore Altra Lone Peak trail runners with wool socks the entire time (even in all of the water crossings AND swimming) and highly recommend them for this hike. They are lightweight and dry very fast (they were always dry by the morning)! And we saved a lot of time not having to take our shoes on and off for water crossings.
Some people choose to wear hiking boots out (we recommend Lowa Renegade GTX) and then bring a second pair of shoes for the falls, like Chacos or Tevas. While this option works fine, it will increase the amount of gear you have to bring. One nice-to-have item we did bring with us were cheap, small flip flops for hanging out around camp.
To see everything we brought on the trip, plus other recommendations, check out our full Havasupai packing list, which includes a downloadable list that you can save to your phone or print.
Is there cell service on the hike?
For the majority of the hike there is no cell service, at least on our Verizon phones. We found a strong enough signal to send messages around Supai village and near Fifty Foot and Navajo Falls. But once you leave the area around Fifty Foot and Navajo Falls, it disappears. To conserve your phone battery, keep your phone on airplane mode!
How busy is Havasu Falls?
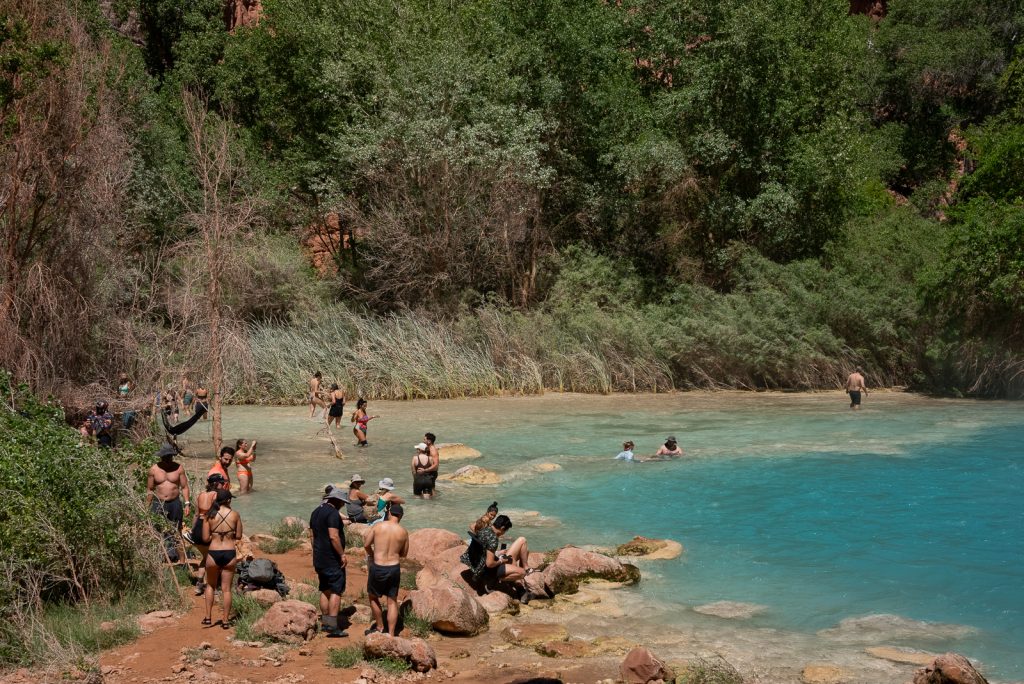
Our biggest concern going into this trip were the crowds. We tend to prefer more remote, secluded backpacking experiences and knowing that up to 300 people (100 per starting day) can be at the campground per day makes us a bit leery.
But honestly, it wasn’t that bad! While the campground definitely had a lot of people, so many people are coming in and out everyday, plus checking out different waterfalls, that nothing ever felt packed. We enjoyed multiple waterfalls all to ourselves (Mooney Falls, Beaver Falls, and Fifty Foot Falls) by starting our days a bit early. And it was pretty easy to get photos without anyone in them.
The busiest spot for us was Havasu Falls mid-day, but that is to be expected, since it’s the namesake afterall. But even so, there was plenty of space to spread out!
Is it safe to leave items during the day?
Generally, yes. While theft has happened in the past (people recently reported having their chairs stolen), for the most part, no one is going to want to lug out more gear than they brought, so theft tends to not be an issue. We recommend bringing all valuables with you on day hikes, putting loose camping gear in your tent, and zipping up the fly of your tent, so no one can tell if you’re inside of not.
Our top tips for hiking Havasu Falls

Fuel up beforehand
The trailhead is over an hour and a half away from the closest gas station. Make sure to fill up on fuel before you head out there! The nearest gas stations will be in Kingman (coming from the west) or Seligman (coming from the east).
Have snacks and drinks in your car
Want to look out for your future self? Have some snacks in the car, plus a cooler with drinks, to enjoy when you finish the hike. It will be a 1.5 hour drive to the nearest restaurant, with better options being closer to 2 hours away. There are sometimes vendors set up at the trailhead, selling snacks and cold drinks. But if you hike out early like us, you will likely miss this.
Join a Facebook group
There are quite a few Havasupai and Havasu Falls related Facebook groups that we suggest joining before you go. These are a good way to read about others’ experiences, ask questions you may have, etc. We joined these three:
- Havasupai and Havasu Falls
- Havasupai~2026
- Havasupai~May (they have specific groups for every month)
Pace yourself
It’s a long 10 miles to the campground or back to the trailhead. Be sure to pace yourself, take lots of breaks, drink lots of water, and eat snacks along the way. There are plenty of spots to stop and rest!
Your GPS or phone will likely lose service
Your GPS will likely struggle to keep track of you, especially when you get deeper into the canyon where the canyon gets narrower with higher walls. It’s a good idea to have the AllTrails map downloaded for the hike. Less so to navigate, as it’s pretty obvious where to go on the stretch from the trailhead to the campground, but more so to track your progress.
Want to get 30% off an AllTrails Plus membership? Use our code aplusk30 (you must redeem this code on the website, not the app)!
We use AllTrails Plus on every single hike and it is the most helpful hiking tool out there! Some of the features we love are offline maps (so we can navigate even without cell service), wrong-turn alerts, and its 3D maps feature, so we can get a feel for trails before we hike.
Watch out for the pack mules
You’ll likely encounter a line of pack mules on the trail. They have the right away, so make sure to move to the side and let them pass.
Bring lots of water
There is no water at the trailhead or until you get close to Supai village, so make sure to show up with full water bottles and Camelbak bladders.
Start early
We can’t stress this enough. Start early! We recommend starting every day of your adventure early, except any days that you just plan to chill.
The sunlight is limited
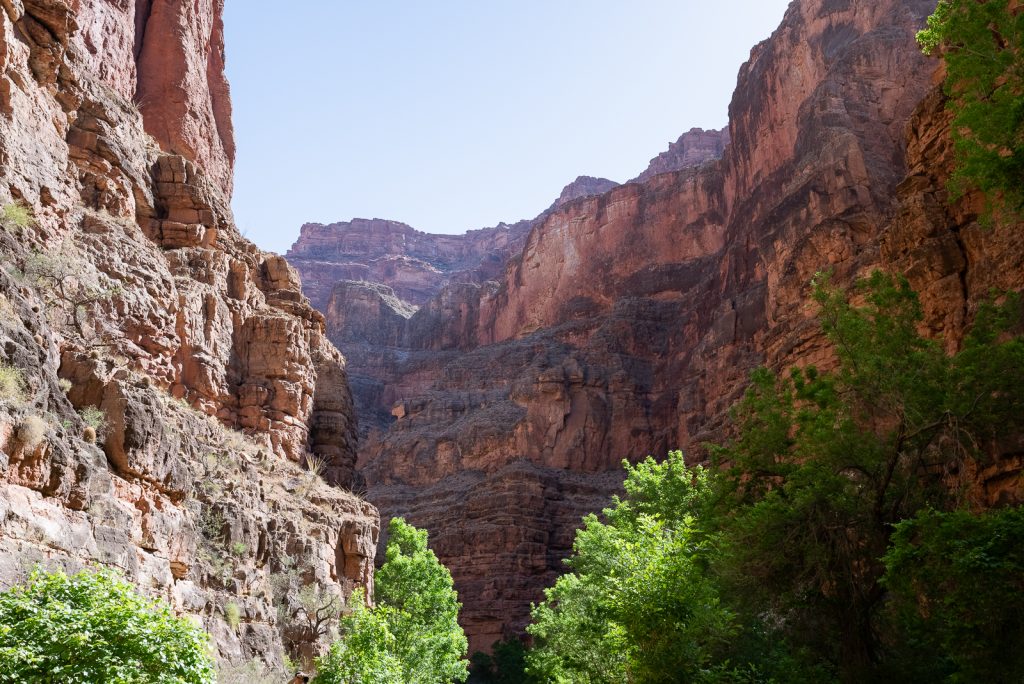
One thing to keep in mind for all waterfalls is the sunlight. Due to the canyon walls, the sun dips behind them well before sunset. Beaver Falls, for example, was completely shaded by 3 PM during our visit. We suggest getting to the falls earlier in the day to have maximum sunshine (and warmth) for swimming.
Respect others
Please show respect to other campers and hikers. This includes not being overly loud at camp, taking turns on the Mooney Falls descent, not flashing your headlamp into someone’s tent at night, or playing music.
Be safe
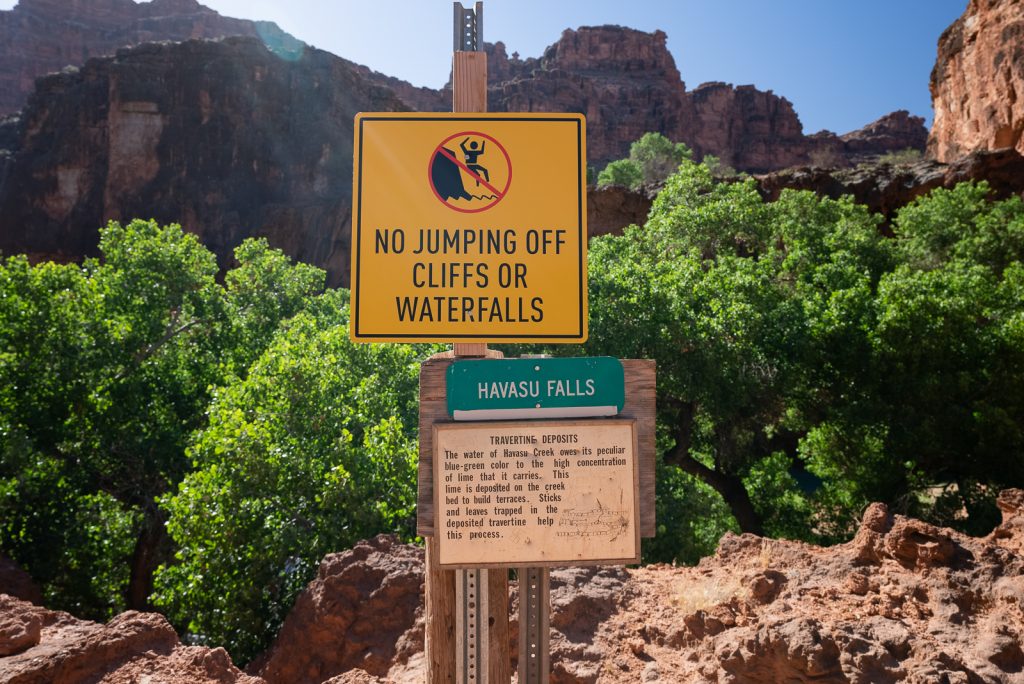
Remember that you are very far from medical services. Stay hydrated, eat enough food, and don’t take any unnecessary risks. When you’re at the waterfalls it can be very enticing to want to jump into the pools on a hot day. But diving and jumping from rocks is against the rules and not recommended. If you jump and land on a rock under the water, it can be very dangerous.
You also don’t want to get too close to the falls, specifically Havasu Falls and Mooney Falls. The waterfalls are extremely powerful here and even the pool of water that they crash into is very turbulent. People have died from the current and undertow.
Final thoughts: Is hiking Havasu Falls worth it?

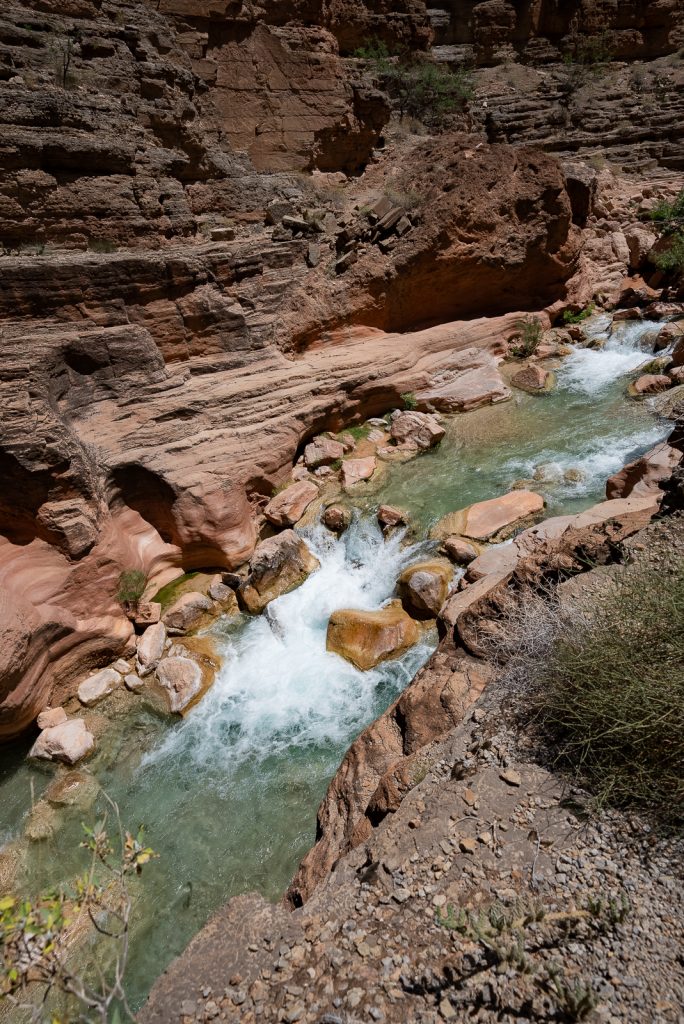
From our experience, 100% yes! We were hesitant to spend so much money on one backpacking trip, plus be around so many people, but we truly had an incredible four days in Havasupai. It is a bucket list trip and rightfully so. There’s gorgeous canyon scenery, epic waterfalls, insanely blue water, wildlife, starry nights, and fun day hikes.
Being able to visit this special place is a (maybe) once in a lifetime experience that we will cherish forever. And we hope that you have just as magical of an experience as well!
Check out these other resources for Havasu Falls:
Ready to experience the Havasu Falls Trail for yourself?
Pin this guide to hiking Havasu Falls to plan your adventure!