
Last updated on February 24th, 2026
In this guide we’re sharing everything you need to know about hiking the Narrows, one of the most unique and fun adventures in Zion National Park!
During our May 2018 visit to Zion National Park, the #1 thing we wanted to do was hike the Narrows. How often do you get to hike through water with 1,000 foot canyon walls towering over you? The answer, for us at least: not often!
So with the proper gear in hand (or should we say, on foot!), we boarded the shuttle and entered the very cold, ankle to thigh deep water and had the most epic time hiking the Narrows!
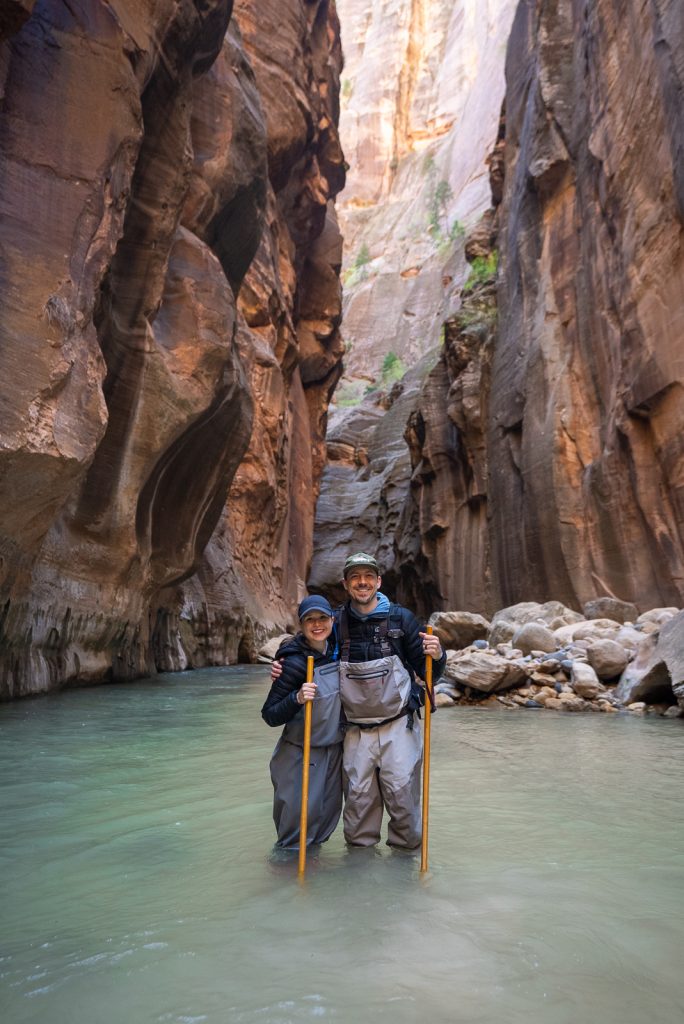

To this day, the Narrows is still one of our favorite and most memorable hiking adventures. So much so that we recently did it again in April 2025, but this time, rocking full waders and getting chest deep in water!
But unlike some of the other best trails in Zion National Park, hiking the Narrows requires some special planning, preparation, and gear to fully enjoy. And in this guide we’re sharing everything you need to know. Including safety warnings, the two route options, when to do the hike, what to bring, and so much more! The Narrows may require a little bit more planning to hike. But it’s a must-do adventure when visiting Zion National Park!

Before embarking on your adventure, please review the Leave No Trace principles to ensure you leave every place better than you found it, so that others can enjoy these beautiful places for many years to come!
These seven principles include planning ahead and preparing, hiking and camping on durable surfaces, disposing of waste properly (pack out what you pack in!), understanding campfire rules and always fully extinguishing your fires, respecting wildlife, and being considerate of other visitors.
- About The Narrows
- Safety Warning for Hiking the Narrows
- How to hike the Narrows (Route Options)
- How to get to the Trailhead (Bottom Up Route)
- When to hike The Narrows
- What to Bring to The Narrows
- Things to know before hiking The Narrows
- Our Experience at The Narrows
- Where to eat before or after hiking the Narrows
- Other things to do in and around Zion National Park
Want to Learn More as you explore?
We highly suggest downloading the Guide Along – Zion & Bryce Canyon or the Utah Bundle (totally worth the cost!!) audio tours to navigate you on the road. Even when you don’t have service it knows where you are and provides commentary and history about the area. As well as alerts you when to stop for specific sights. These guides are fun to listen to and the narrator feels like a fun friend in the car with you!
About The Narrows


Zion National Park is the 2nd most visited national park in the United States and the most visited of Utah’s Mighty Five. It is home to steep orange and red cliffs, slot canyons, and the Virgin River, which winds through the park.
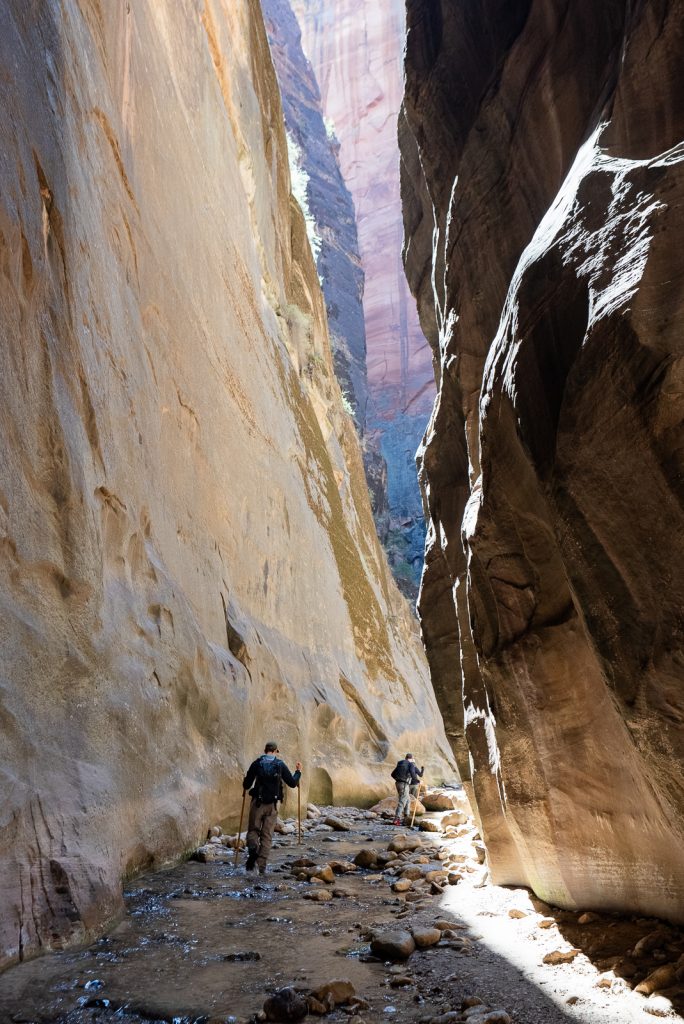
And along the North Fork of the Virgin River lies a 15 mile stretch called the Narrows. This is the narrowest section of Zion Canyon, with walls of the canyon sometimes reaching 1,000 feet high and as narrow as 20-30 feet wide.
The Narrows are accessible through either Zion Canyon or at Chamberlain’s Ranch (we will cover the two route options below!). And regardless of which route you take, you’ll get the unique and fun experience of walking through the river, with crazy canyon walls surrounding you.
Safety Warning for Hiking the Narrows
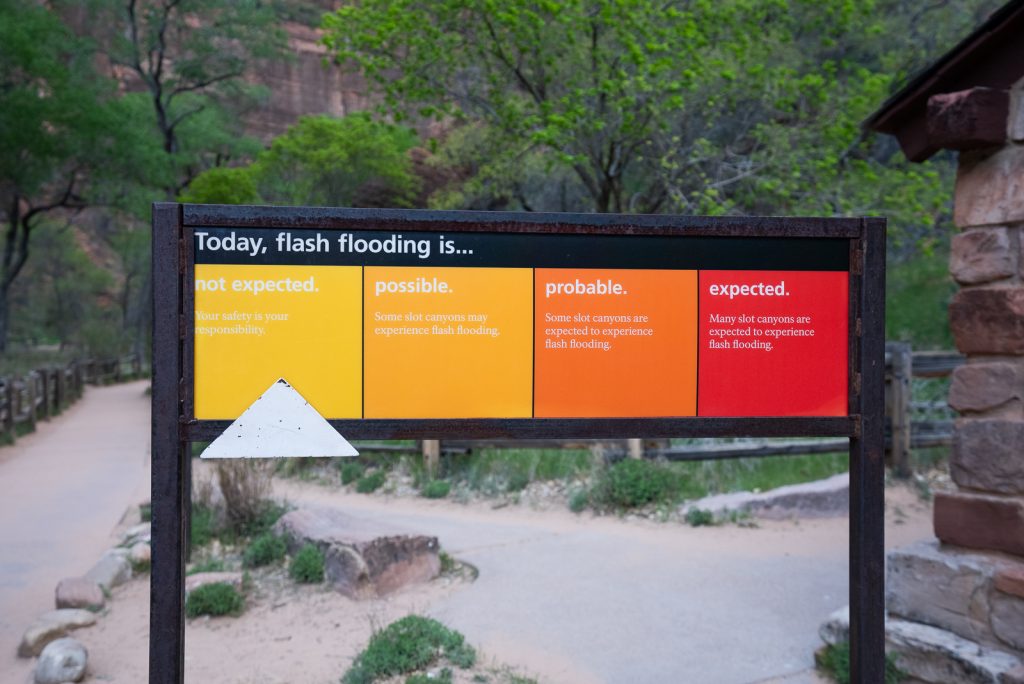
Before we go any further, we want to stress some very important safety information when hiking the Narrows.
As with all slot canyons, the Narrows are very susceptible to flash floods because the surrounding terrain is mostly rock face, which does not absorb water. The rainwater will flood into the canyon and conditions can get extremely dangerous and deadly very quickly. Make sure to check the weather reports before your visit and set out on your hike. Do NOT hike the Narrows if there is rain or storms in the forecast. Even rain miles away can flood the slot canyon.
The summertime has the highest chance of flash flooding, with more frequent thunderstorms. But it can happen anytime of the year, so always be prepared and check the forecasts. The National Park Service will close the Narrows if there is flash flooding, if the flow rate is over 150 cubic feet per second (CFS), and also sometimes during the spring when the snow is melting.

Always check the current conditions before you go. But at the end of the day, while the park will close the Narrows if deemed dangerous, your safety is your responsibility. So please do your research.
WARNING: Currently there are high levels of Toxic Cyanobacteria Bloom in the Virgin River. While you can still hike the Narrows, do not drink the water, dunk your head, or enter with open wounds. You can find out more information here!
How to hike the Narrows (Route Options)
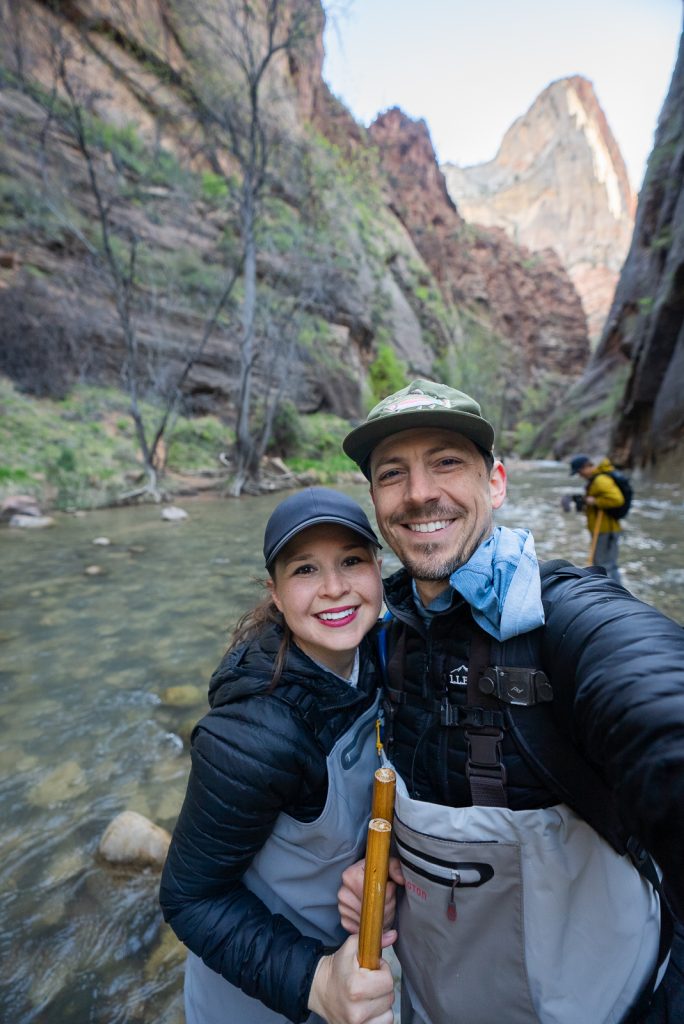
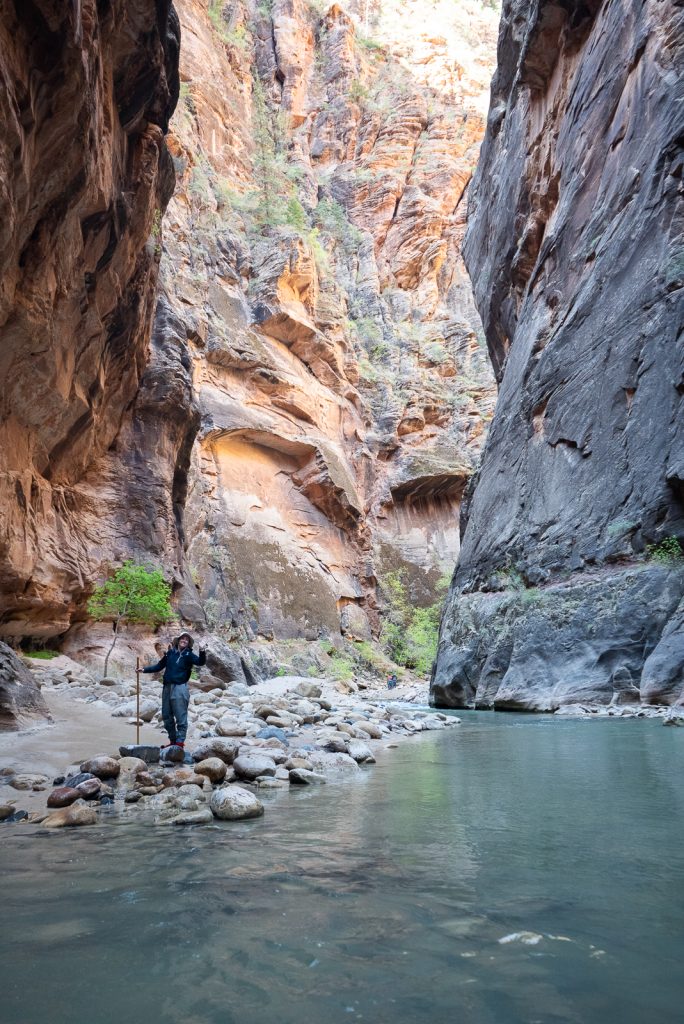
As we mentioned above, the Narrows are located on the North Fork of the Virgin River. Which is the river that runs through the park. But you do have two options of where to start this hike.
Hiking the Narrows from the Bottom Up
The most popular way to hike The Narrows is to start from Zion Canyon, by riding the park shuttle to stop #9, the Temple of Sinawava. This is called hiking the Narrows from the bottom up and does not require a wilderness permit.
To hike from the bottom up, you start along a riverside path, before entering into the Narrows and can go up to 5 miles each way, to Big Spring and back, without a permit.
However, one of the best things about hiking the Narrows is that you can hike as little or as much (within 5 miles each way) as you want! The AllTrails map above shows as far as you’re able to go as a day hike, without a permit. On the route above, the first mile is on a paved riverside walk. Once this ends, you will enter the river and walk in the water the rest of the way!
We highly recommend hiking 3-4 miles (one way) into the Narrows to the famous Wall Street section. Which has more towering walls and narrow passageways! This map by Zion Guru is SUPER helpful to understand what you will see along the way if hiking from the Bottom Up.


Hiking the Narrows from the Top Down
Another option is to hike from the top down. To go this route, you will start from outside the park at Chamberlain’s Ranch. Which is an hour and a half drive from the park.
This route requires a permit, which can be difficult to obtain during the peak season. And if the Virgin River’s flow is too high they don’t issue the permits. You can learn more about obtaining a permit for hiking the Narrows here.
Hiking the Narrows from the top down is about 16 miles. It can either be done as one long day hike or can be turned into an overnight camping trip and split into two days.
In addition to a permit, you will also need some sort of transportation to take you outside of the park to the start of the trail at Chamberlain’s Ranch. Once finished, you’ll end at the Temple of Sinawava shuttle stop and can take the park shuttle back to the visitor center.
If going with a group, you can park one car at the Chamberlain’s Ranch trailhead and one at the visitor center. Or if you only have one car, you can hire a private shuttle, like Red Rock Shuttle. They’ll take you to Chamberlain’s Ranch, and leave your car at the visitors center.
While hiking the Narrows from the top down is a more challenging and longer experience, it is also a lot more secluded and gives you the chance to see portions of the Narrows that many visitors have not seen. We’d love to try this someday!
For this guide we will focus on hiking from the bottom up. As that is the most popular and accessible option, and the only route we have done.
How to get to the Narrows Trailhead (Bottom Up Route)
To hike the Narrows from the Bottom Up, you will need to be able to get to the start of the trail at the Temple of Sinawava, located down Zion Canyon Scenic Drive. Depending on when you visit, here are the different ways you can get to the trailhead.
Hiking the Narrows Between December and early March
During this time frame, private vehicles are allowed to drive down Zion Canyon Scenic Drive. So you’ll be able to drive to the trailhead yourself to complete the Narrows. However, this is the timeframe where snowmelt and higher water levels can become a problem. As well as very cold water temperatures.
Before you attempt to drive yourself, check the park website to make sure that the date you are visiting does not require the park shuttle vs. your own vehicle. The dates that Zion Canyon Scenic Drive becomes a shuttle-only road can change every year.
Hiking the Narrows Between mid-March and November
During this time frame, Zion Canyon Scenic Drive is only accessible by the park shuttle (no private vehicles allowed), Zion Lodge guests (only to the lodge and then the shuttle is required further down the road), and pedestrians, and bikes. Here’s a rundown of each option you can consider to get to the trailhead during this timeframe.
Shuttle
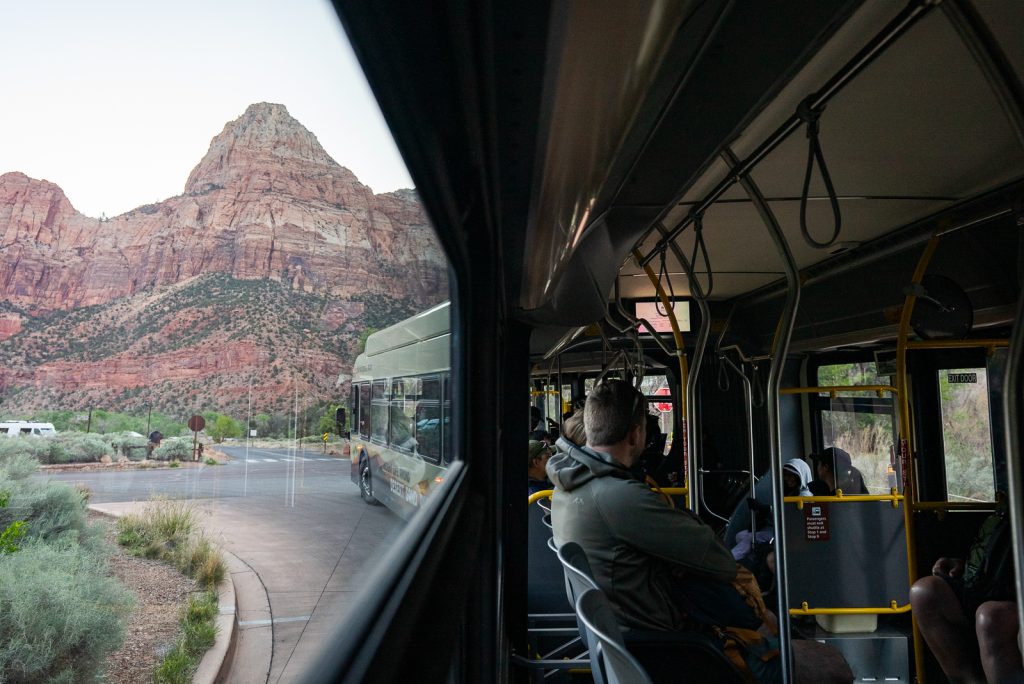
Zion has a FREE park shuttle that can take you to the Narrows trailhead. It runs everyday starting at 6 AM or 7 AM, depending on the month. You can see the full schedule here! The shuttle is first-come, first-served and while we had zero issues getting on a shuttle at 7 AM in mid-April, on our first trip to Zion around Memorial Day, we had to wait in line for an hour. In order to beat the shuttle crowds (and the crowds in the Narrows), we highly recommend taking the first shuttle.
If you’re like us and wondering “do I wear my gear on the shuttle?” The answer is yes! We all wore our waders and boots on the shuttle, so we wouldn’t have to carry it. And then we wore it on the shuttle ride back as well!
Bike
Another option to get to the Narrows is by bike. The perk of this option is that it can be free (if you own a bike). And you’ll get to go at your own pace! If you do not have a bike, we highly recommend renting an eBike for this. As it’ll make the trek a lot faster and you’ll have more energy for the hike.
For traditional bike rental options in Springdale, check out Zion Cycles and Zion Outfitter. And for eBikes, check out Outta Here Bikes and Ride Zion.
There are bike racks at the trailhead, so make sure to bring a lock!
Walk
You technically can walk to the Narrows, but this is quite a commitment. As it is 9.8 miles (one way) to the trailhead from the Visitor Center.
If you do not want to deal with the shuttle crowds and do not want to ride a bike or walk, we suggest checking out Kanarra Falls as an alternative to the Narrows. This hike is located outside of the park. And while it’s a bit smaller than the Narrows, it has the added bonus of waterfalls too! There is a permit required, so check out our guide to Kanarra Falls for everything you need to know!
What to expect when Hiking The Narrows
This is based on our BOTH of our experiences hiking the Narrows, both in May 2018 and April 2025.
After picking up our gear the night before, we headed into the park early to head onto one of the first shuttles of the day. During our second time hiking the Narrows in mid April, there was no line for the shuttle around 7 AM. However, during our first visit, the shuttle line was CRAZY long. It was Memorial Day weekend and while the crowds hadn’t been too bad until this point, we waited for the shuttle for at least an hour.


Once on the shuttle, it’s a scenic ride to the Temple of Sinawava. There are toilets here, so make sure to use them before hitting the trail. You will walk along the river for about a mile, along a paved pathway, and then the trail ends at the river. And then it’s time for the adventure to begin!
As soon as you step in the water, it’s a weird sensation in either the neoprene socks and/or waders. The neoprene socks are like wetsuits for your feet, and although the water was a bit shocking to feel at first, the socks worked wonders to keep our feet comfortable! While our feet were definitely wet, the socks kept them from being freezing cold. The waders also kept us nice and dry and whenever we went into deep water, we got a fun suctioning feeling on our legs.
Having the canyoneering shoes and walking stick helped big time in the with keeping our balance. When the water is shallow, you can easily see through it and see where to step. But the deeper sections make it difficult to know where to put your feet.


Speaking of the depth, during our visit in late May, the water was between ankle and calf deep most of the time. Only a few areas were thigh and waist deep! But during our visit in mid April, we had multiple hip deep sections and even a chest deep section. Which was SO much fun! To see how deep it may be, we suggest asking the rangers at the Visitor Center beforehand and reading AllTrails reviews. This will help you know what gear to rent AND how to pack your items. Our backpacks had to be lifted at some points to ensure they didn’t get wet.
Both times our goal was to make it to Wall Street, which is 3 miles in (from the trailhead, not the start of the water portion). Along the way you will see crazy canyon walls, SUPER clear water, a small waterfall, and some trees and greenery.


About 3 miles in, you have the option to hike down a side canyon, called Orderville Canyon. We highly recommend this! It’s WAY less busy than the rest of the Narrows and is a gorgeous slot canyon. You will walk through some water here as well (but it wasn’t deep for us) and end at a small waterfall.
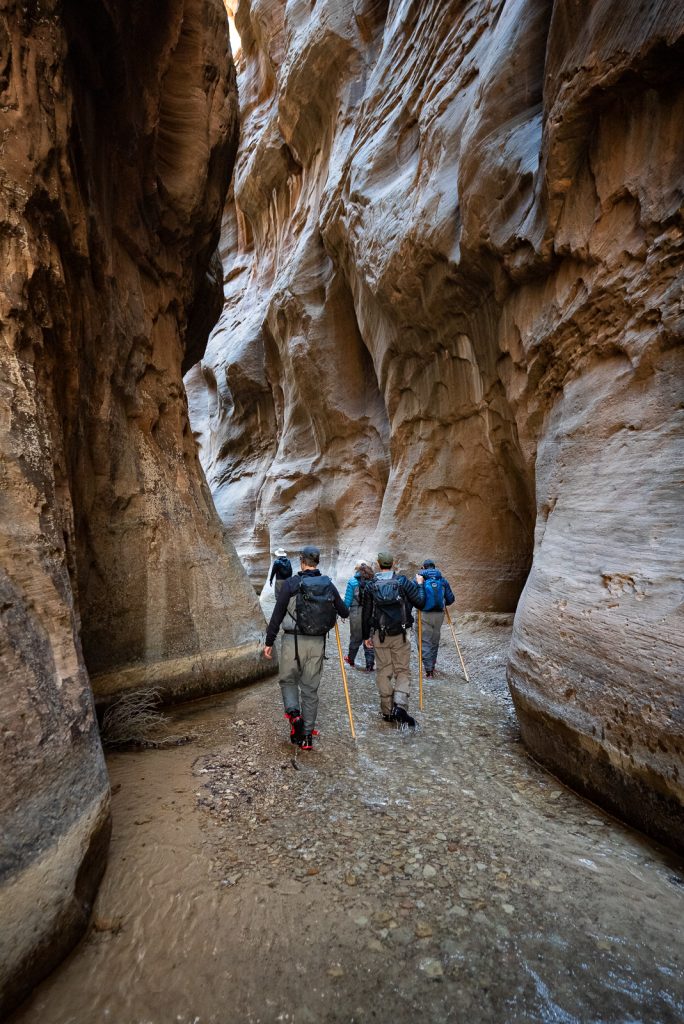
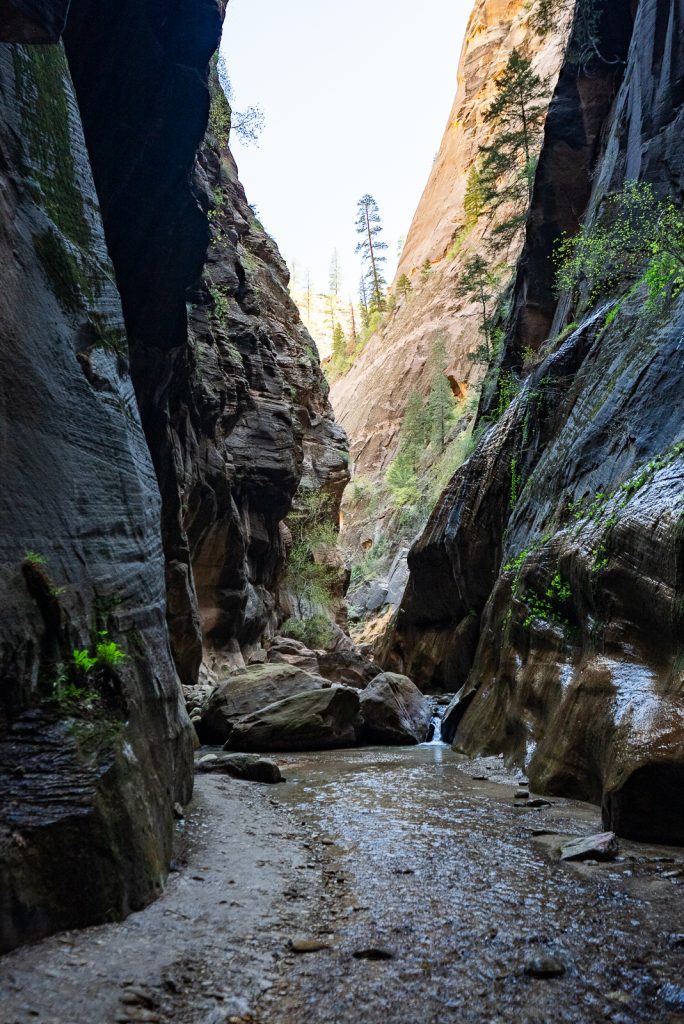
No matter how far you choose to go, you’re in for a treat! Whenever you feel ready to turn around, just go back the same way you came. It will be a lot busier in the afternoons, so be prepared to battle some crowds as you get closer to the trailhead. Once finishing, you’ll make the 1 mile hike back along the Riverside Walk Trail and then hop onto a shuttle! Since it will be busier out, you may have to wait for a shuttle. But they do have a covered waiting area to get you out of the sun.
When to hike The Narrows

Between flow rates, snowmelt, crowds, and other conditions, there are a few important things to consider when deciding when to hike the Narrows.
Spring
In the spring, the Narrows can be closed because of the high flow rate due to the snowmelt. So make sure to check the current conditions so you’re not bummed when you show up and find out that you cannot do the hike.
The most popular time to hike the Narrows is late spring and during the summer. This is when the water level has dropped and when the water and air temperatures are warmest. We hiked the Narrows during Memorial Day weekend in 2018. So while it was technically still the spring, it was at the later part of the season. The water was still very cold, but totally manageable!
Summer
Summer is the most crowded time of the year and for good reason! The days are long, the shuttle runs later, and both the air temperature and water temperature are warmer. However, summertime also brings a higher chance of flash floods due to afternoon thunderstorms. Which can make hiking the Narrows extremely dangerous.
Fall
Fall is a fantastic time of year to experience the Narrows! The temperatures drop a bit and the crowds aren’t as wild. Plus you may even get to see some fall colors on the hike!
Winter
Winter can be a tricky time to hike because of the cold temperatures, possible snow covering the road, which can cause it to close, and less daylight. If you decide to hike in the winter, make sure to wear the proper gear, like waders.
What to Bring to hike The Narrows
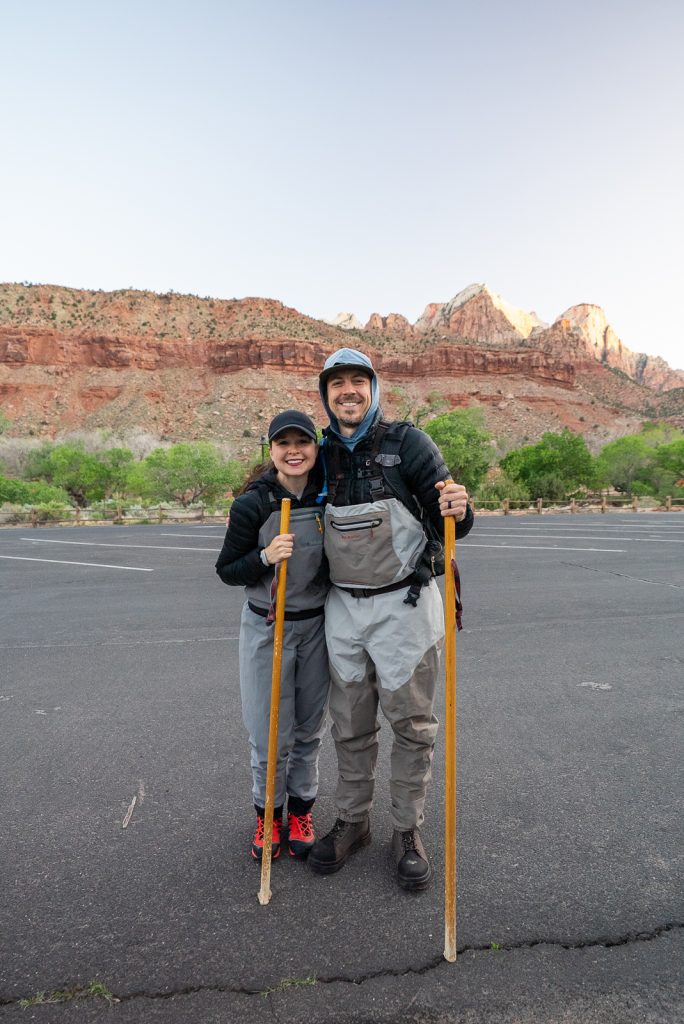

As always, we recommend having the 10 essentials on you when doing any hike. But here are a few key items we want to point out that will especially help you during this hike!
Gear
To have a great experience in the Narrows, you will need to rent some gear. The gear items you need depend on when you visit, but at the minimum the three necessities are neoprene socks, canyoneering boots, and a walking stick. During our first hike in May 2018, we just rented those items. But in the winter and early spring, waders are recommended. I got these for our most recent hike in April 2025 (Adam wore his fishing waders) and were so glad to have them on!
Your feet will still get wet from the neoprene socks, but they will not be nearly as cold as wearing regular socks. And with the waders on, our pants underneath stayed dry!
We rented our gear from Zion Outfitter and were able to pick up our items the night before so we could get started early. You can also rent gear from Zion Guru and Zion Adventures! If you decide to not rent gear, make sure you wear sturdy footwear. Hiking in the Narrows is like walking on slippery bowling balls and you’ll want to make sure you have the best grip possible!
Water
Make sure to pack water! We love our Camelbak bladder for hikes because it stores a ton of water and it’s easy to drink from while moving. However, make sure to drink carefully, as there is nowhere to use the restroom once you’re on the trail. Especially for the ladies, as privacy is very limited.
Layers
Even in the summer, the Narrows can be quite cool, as the sun can be blocked by the tall canyon walls. Make sure to pack layers!
Water Protection
It is safe to say you might slip and fall into the water at some point in your hike. Be sure to have some sort of waterproof solution for your electronics and other items that could be damaged by water. We have this dry bag for kayaking and other water activities.
Snacks
There are a handful of areas, depending on the water level, where you can sit on some rocks and enjoy a packed lunch or snacks. Make sure to pack out all of your trash!
AllTrails
We’d highly recommend downloading the AllTrails map before you go. While the Narrows are super straightforward, as there is really only one route, there is not much cell service in the area and it’s helpful to track your progress on the trail. You will need an AllTrails+ membership to download maps, which is $35.99 a year and so worth it!
Want to get 30% off an AllTrails Plus membership? Use our code aplusk30 (you must redeem this code on the website, not the app)!
We use AllTrails Plus on every single hike and it is the most helpful hiking tool out there! Some of the features we love are offline maps (so we can navigate even without cell service), wrong-turn alerts, and its 3D maps feature, so we can get a feel for trails before we hike.
Things to know before hiking The Narrows

Ready to conquer the Narrows? There are a few final things to know before hitting the trail.
Restrooms
There are restrooms as soon as you get off the shuttle at the Temple of Sinawava. Make sure to use these beforehand, as there is nowhere to use the restroom while in the Narrows. As of April 2025, these were porta potties, but they do have regular toilets that just happened to be closed. We have heard the porta potties sometimes run out of toilet paper, so make sure to bring some! Or for the ladies, get a Kula cloth!
You will get wet
The BEST part of the hike is that you will get wet! Although, we do realize not everyone may enjoy this, so if walking through cold water, potentially thigh deep, doesn’t sound fun to you, you may want to skip this hike.
Start early!
While the water (and air) may feel extra cold starting in the morning, you’ll have a much more pleasant experience hiking the Narrows if you start early. Not only will you beat the crowds, but if you’re visiting in the summer, starting early will be your best bet to avoid thunderstorms.
Dogs are not allowed
Dogs are not allowed on trails (minus the Pa’rus Trail) at Zion National Park. Learn what we do with Kona when she cannot join us!
Other things to do in and around Zion National Park


There are so many more things to do in Zion National Park! For more ideas, read our 2 day Zion National Park itinerary and see our list of the 12 best hikes in the park!
And for a fun adventure similar to the Narrows, but outside the park, hike to Kanarra Falls! This is a mini version of the Narrows hike, but with the bonus of having capacity limits (150 people a day) and a fun ladder and waterfall! Permits cost $12 per person and dogs are not allowed. This is a great hike to combine with Kolob Canyons! Watch our experience here and learn more about the hike in our Kanarra Falls hiking guide.
Looking for more things to do in Utah?
- 10 Day Utah National Parks Road Trip Itinerary
- 15 Best Things to do in Arches National Park
- The BEST Things to do in Moab
- How to Hike the Corona Arch Trail in Moab
- Visiting Island in the Sky at Canyonlands National Park
- The Best Things to do in the Needles District of Canyonlands National Park
- The Best Things to do at Capitol Reef National Park
- 3 Days in Zion and Bryce Canyon National Parks
- How to hike to Observation Point at Zion National Park
- Hiking the Narrows at Zion National Park
- How to hike to Kanarra Falls near Zion National Park
- Hiking the Fairyland Loop Trail at Bryce Canyon National Park
- How to Hike the Peek-a-Boo Spooky Slot Canyons
- Hiking to Lower Calf Creek Falls in Southern Utah
- How to Hike Wire Pass to Buckskin Gulch in Southern Utah
- Things to do in Kanab, Utah
- Visiting the Toadstool Hoodoos Near Kanab, Utah
- Visiting the Great Salt Lake: Things to do at Antelope Island State Park
- All of our Utah Vlogs
- All of our Utah Guides
Ready to hike The Narrows?
Pin this guide to hiking the Narrows to help plan your trip!

© 2023 Adventures of A+K. All Rights Reserved. Website built with love by Dreamworthy Design. – Stock Photos provided by our partner Depositphotos