
Last updated on March 9th, 2026
Heading to Yosemite? We’re sharing everything you need to know about the Four Mile trail, Panorama trail, and Mist trail. Which when combined together, make for the best day hike in Yosemite! Ready to hike? Keep on reading!
Back in 2017 we visited Yosemite National Park for the first time. And even years (and a second visit) later, it is still one of our favorite National Parks we have been to! We will never forget the moment we entered the park for the first time, very early in the morning, and exited a tunnel to the most EPIC sunrise and view of the Yosemite Valley. We couldn’t stop gasping at how beautiful it was!

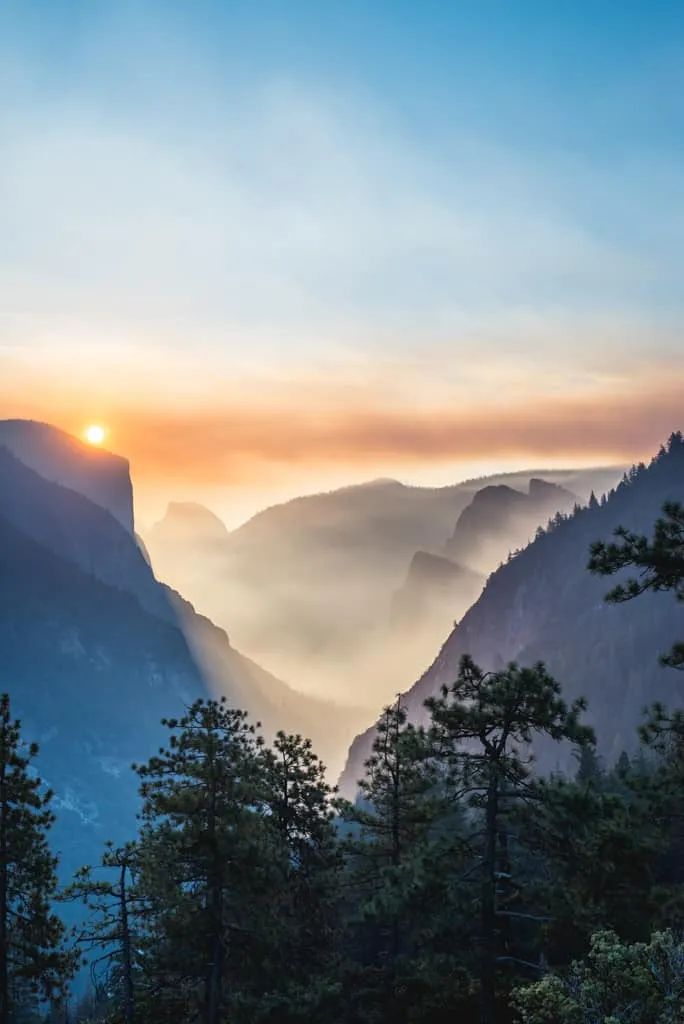
During this first trip, we spent a total of two days in Yosemite and saw quite a bit of what the park had to offer. But hands down our favorite thing we did during the trip was hiking the Four Mile trail, Panorama trail, and Mist trail. This trail combination definitely makes for a very long day hike, but man, it’s soooo worth it! You get to see so many iconic sights in the park, like El Capitan, Half Dome, Vernal and Nevada Falls, Yosemite Falls, as well as some lesser known gems.
And the best part? Despite visiting during the busy season (early August), the majority of the hike was pretty empty, which is a huge win!
Want to experience the Four Mile trail, Panorama trail, and Mist trail for yourself? We’re sharing everything you need to know before, during, and after the hike!
Before embarking on your adventure, please review the Leave No Trace principles to ensure you leave every place better than you found it, so that others can enjoy these beautiful places for many years to come!
These seven principles include planning ahead and preparing, hiking and camping on durable surfaces, disposing of waste properly (pack out what you pack in!), understanding campfire rules and always fully extinguishing your fires, respecting wildlife, and being considerate of other visitors.
Check out all of our Yosemite National Park resources
- Plan the Ultimate California National Parks Road Trip! (3 itineraries)
- Where to stay in Yosemite National Park
- How to spend one day in Yosemite National Park
- The PERFECT 2 day Yosemite Itinerary
- The Ultimate Yosemite National Park itinerary: Options for 1-6 days!
- The 22 BEST hikes in Yosemite National Park
- The Best Day Hike in Yosemite: Four Mile, Panorama, & Mist Trail
- See more California National Park guides
- About the Four Mile Trail + Panorama Trail
- When to hike the Four Mile trail and Panorama Trail
- How to get to Yosemite National Park
- Getting to and from the Four Mile trail and Panorama Trail
- Highlights of the Four Mile Trail and Panorama Trail
- Packing List for the Four Mile trail and Panorama trail
- Where to Stay in Yosemite
Want to Learn More as you explore?
We highly suggest downloading the Guide Along – Yosemite (totally worth the cost!!) audio tours to navigate you on the road. Even when you don’t have service it knows where you are and provides commentary and history about the area. As well as alerts you when to stop for specific sights. These guides are fun to listen to and the narrator feels like a fun friend in the car with you!
About the Four Mile Trail, Panorama Trail, & Mist Trail
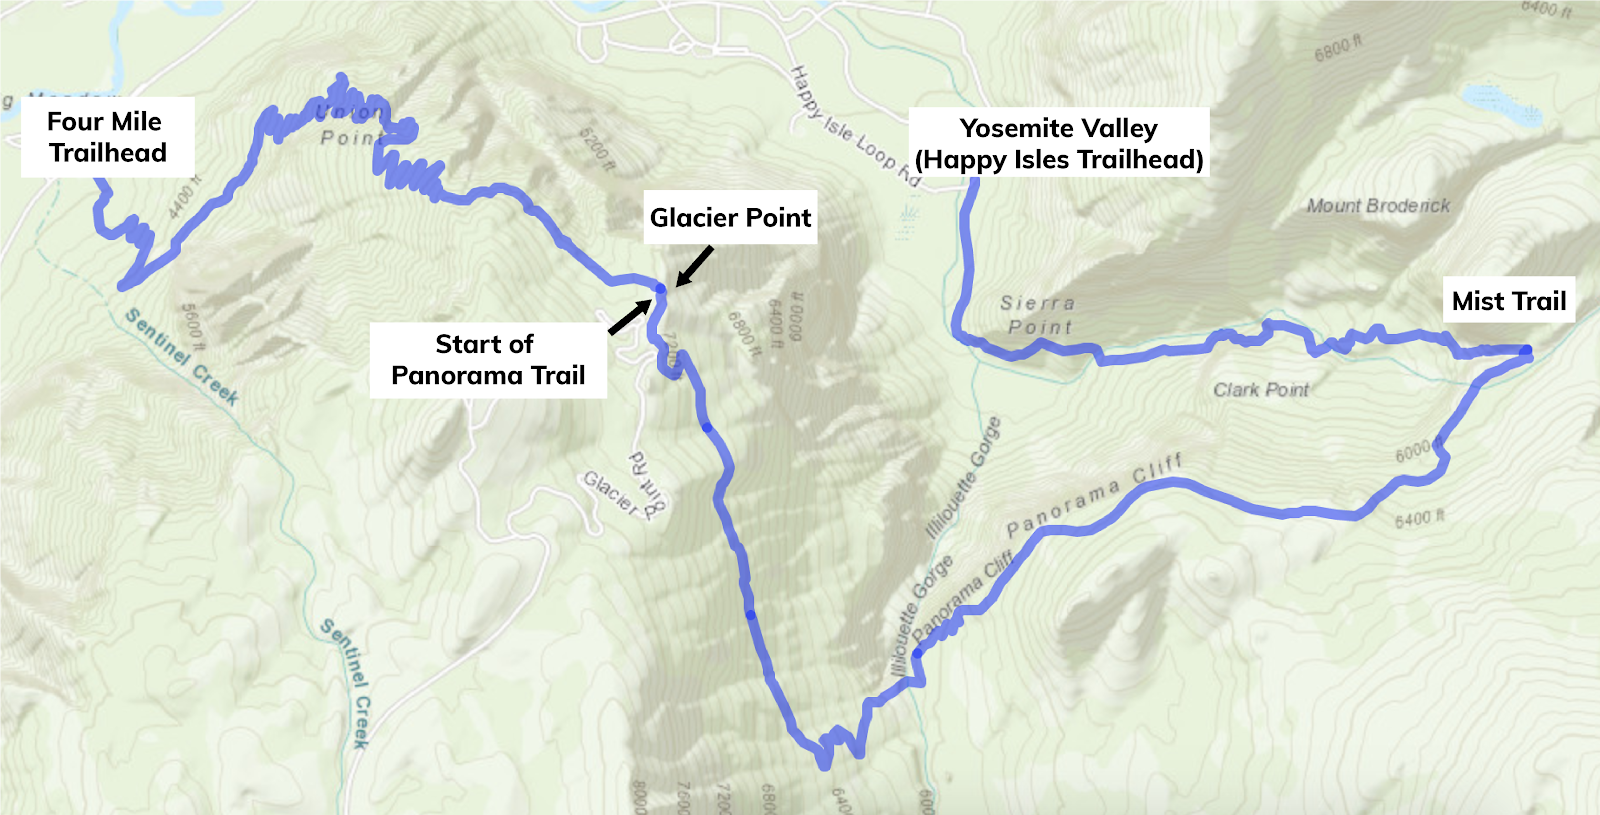
The Four Mile trail, Panorama trail, and Mist trail is a combination of three trails, with the Four Mile trail and Mist trail being doable on their own, and the Panorama trail connecting them.
Together the hike is around 13.7 miles and gains 4,435 feet of elevation gain. And it will likely take anywhere from 9-12 hours (start EARLY!), depending on your speed and how often you stop. So it is a DOOZY and only for those that have a lot of hiking experience. Thankfully, the hardest, uphill part of the trail is first. So once you reach Glacier Point, it’s a much easier trek down, although a bit long.
While you could do this hike in either direction, we suggest starting with the Four Mile trail and ending at the Mist trail. The mist will feel SO good after a long day!
If this seems too long for you, you can do just the Four Mile trail OR the Mist trail by themselves. Or drive up to Glacier Point instead of hiking the Four Mile trail and start from there. To learn more about these hikes individually, check out our guide to the best hikes in Yosemite National Park!
Want to get 30% off an AllTrails Plus membership? Use our code aplusk30 (you must redeem this code on the website, not the app)!
We use AllTrails Plus on every single hike and it is the most helpful hiking tool out there! Some of the features we love are offline maps (so we can navigate even without cell service), wrong-turn alerts, and its 3D maps feature, so we can get a feel for trails before we hike.
When to hike the Four Mile trail and Panorama Trail

While Yosemite National Park is open year round, this trail combination is not accessible year round. The Four Mile trail opens typically in late May for the season and closes in November or December. So to hike this route in its entirety, you can only do this hike during that timeframe. In our opinion, the best time to do this hike is in late May (right after it opens) or June, when the waterfalls will have the most water flowing.
We personally hiked the Four Mile trail and Panorama trail on August 6th. And the weather was perfect (minus quite a bit of wildfire haze, something that is common in the summer), plus the waterfalls were still raging!
However, we had seen photos from previous summers where there was less waterfall flow. To prepare yourself for how much or little water there will be during your trip, we recommend creeping on Instagram and AllTrails beforehand to see up to date trail photos.
Getting to and from the Four Mile trail, Panorama Trail, & Mist Trail
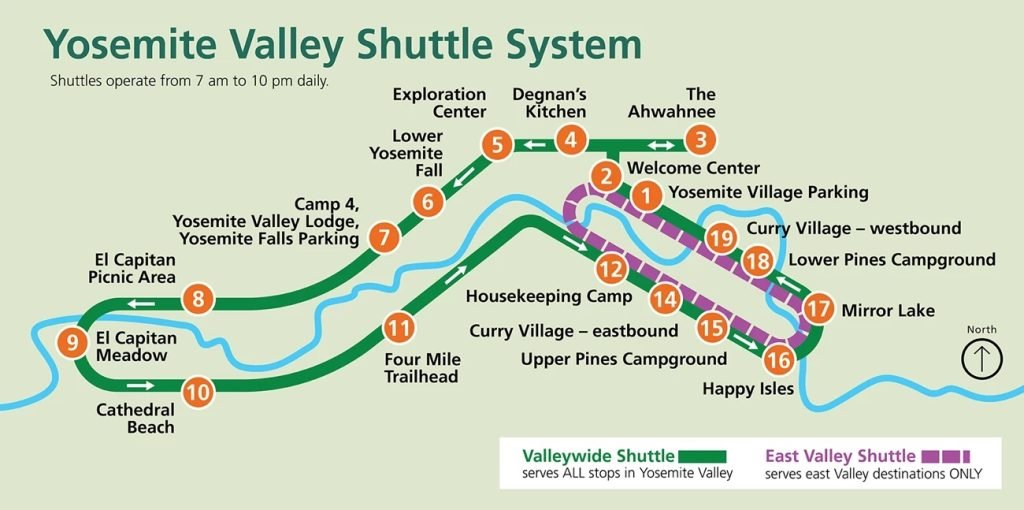
The difficult part of hiking the Four Mile trail, Panorama trail, and Mist trail is that they start and end in different areas. But thankfully, Yosemite has a free shuttle system! This makes it much easier to get around without the hassle of parking at every place you want to visit. The Yosemite Valley Shuttle System runs year round from 7 AM-10 PM (every 12-22 minutes), with many stops along the valley. We will reference the stops below so you know where to get on and off!
Starting at the Four Mile trailhead:
There are a few areas you could park if you start at the Four Mile trailhead. We parked along Southside Drive (arrive early to snag a spot!), which is right by the trailhead and shuttle stop #11. Which means you can get dropped off at your vehicle using the shuttle system at the end!
You could instead park at the Yosemite Falls trailhead (Lodge Day-use parking on the map, by stop #7) and walk to the trailhead, which is a little less than a mile. Similar to above, the shuttle would drop you off right by your car at the end of the day, saving you from having to walk more after a long day of hiking.
If you want to do this hike in reverse order, you could park at the parking lot for the Mist Trail and after finishing your hike, you will hop on the shuttle at stop #11 and ride to stop #15 to get back to your vehicle.
One important thing to note is that there are no restrooms at the Four Mile trailhead. There are some toilets by the Swinging Bridge picnic area and also at Glacier Point.
Starting at Glacier Point:
If you want to skip the Four Mile trail portion of the hike, you will want to start at Glacier Point. To get to Glacier Point, you’ll need to take the paid Glacier Point shuttle. This shuttle will pick you up at 8:30 AM by the Yosemite Valley Lodge and shuttle you up to Glacier Point. While this shuttle is typically round trip, you can go just one way for $28.50 per adult. We highly recommend getting your tickets in advance.
While technically you can drive up to Glacier Point and park there, we would not recommend doing this, as you’ll have to be back to Yosemite Valley before 1:30 PM to catch the last shuttle back up to Glacier Point to get your car.
Ending at the Happy Isles Trailhead:
Assuming you start on the Four Mile Trail, your journey will end at the Happy Isles Trailhead, which is right by stop #16 on the Yosemite Valley shuttle. After the hike, just walk over to the shuttle stop and wait for a shuttle to take you back to your car (or close to your car).
Warning: during our trip, we waited a very long time for the shuttle. We aren’t sure if there was a shuttle delay or what happened, but we waited in quite a long line to finally catch a shuttle back.
Highlights of the Four Mile Trail and Panorama Trail

Four Mile Trail (Yosemite Valley to Glacier Point)
The Four Mile trail begins near the base of Sentinel Rock and climbs up to Glacier Point. During the uphill trek, which to be honest, is a bit challenging, you have incredible views of El Capitan, Yosemite Valley, and Yosemite Falls. And then right before you reach Glacier Point, Half Dome suddenly appears, which is the BEST hiking reward ever!
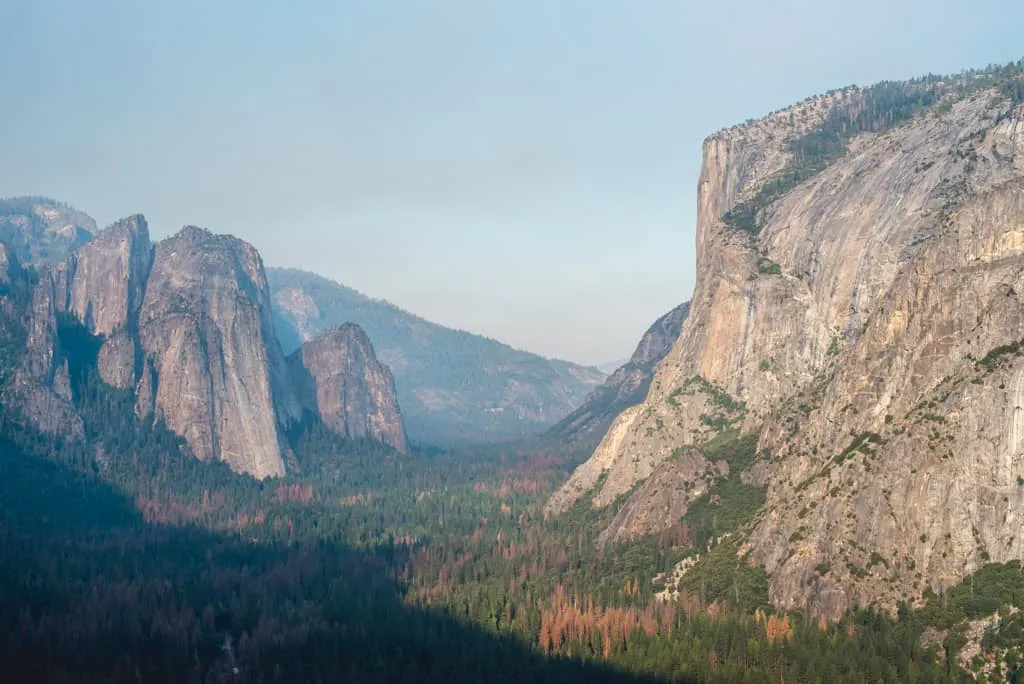
While we loved the views from this hike, what we especially loved was how few people we saw. We started the hike right after sunrise, which was around 6 AM during our trip, so we likely hit the trail close to 7 AM. The early start was a bit tough, but it was well worth it because we maybe saw 3 people on the way up, which is a stark contrast to the hundreds you’ll see when you get to Glacier Point.
Glacier Point
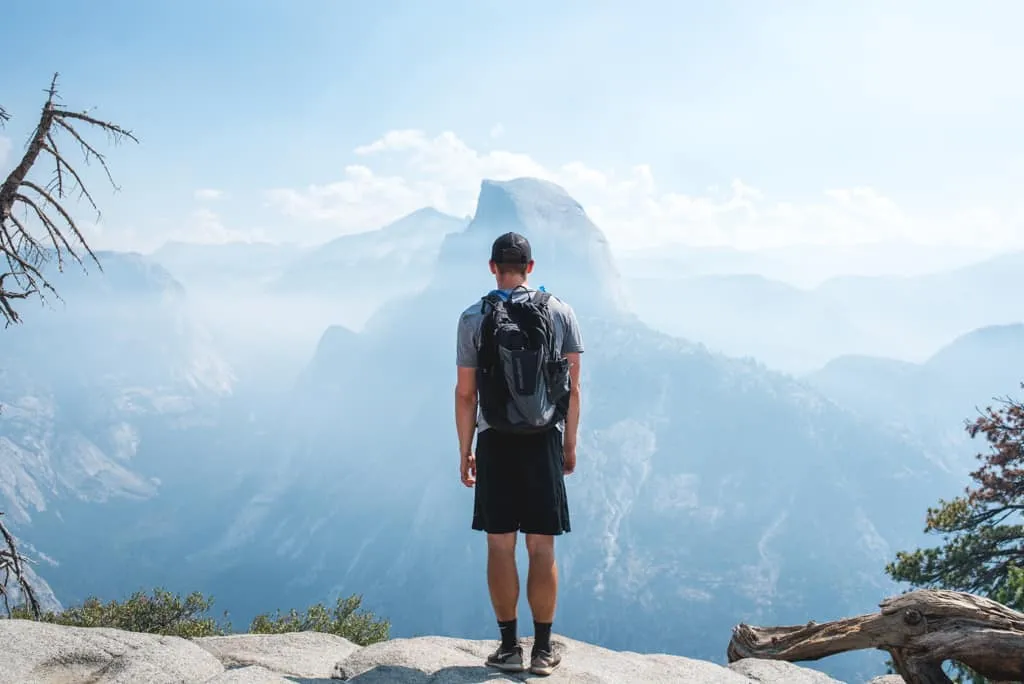
Despite the crazy crowds at Glacier Point, the views at Glacier Point are UNREAL! Even with the wildfire smoke that was present, making the sky a bit hazy, the view of Half Dome from Glacier Point is absolutely jaw dropping.
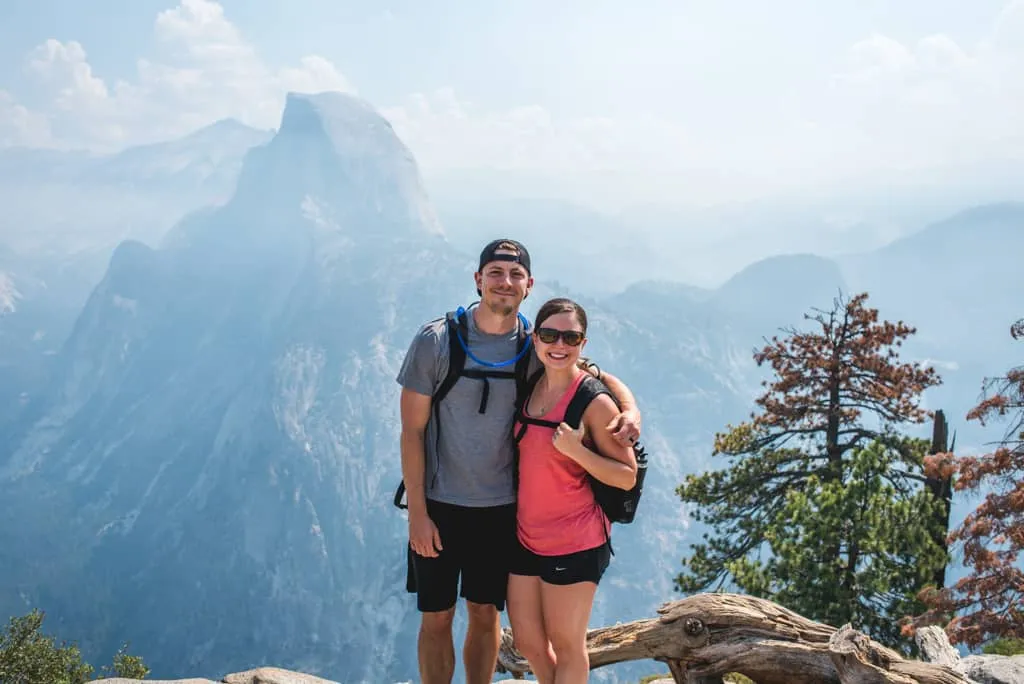
At Glacier Point, there is a snack stand, gift shop, and restrooms. So if you need to grab some additional snacks or water, this will be your last chance to do so.
We spent probably an hour here taking a million photos and resting a bit before continuing onto the Panorama trail.

Panorama Trail (Glacier Point to Mist Trail)
Once you leave Glacier Point, the crowds immediately disappear again. While we saw more people during the Panorama trail portion of our day than the Four Mile trail, it was still very little compared to Glacier Point (and the waterfalls…which we will share more about in a minute!).
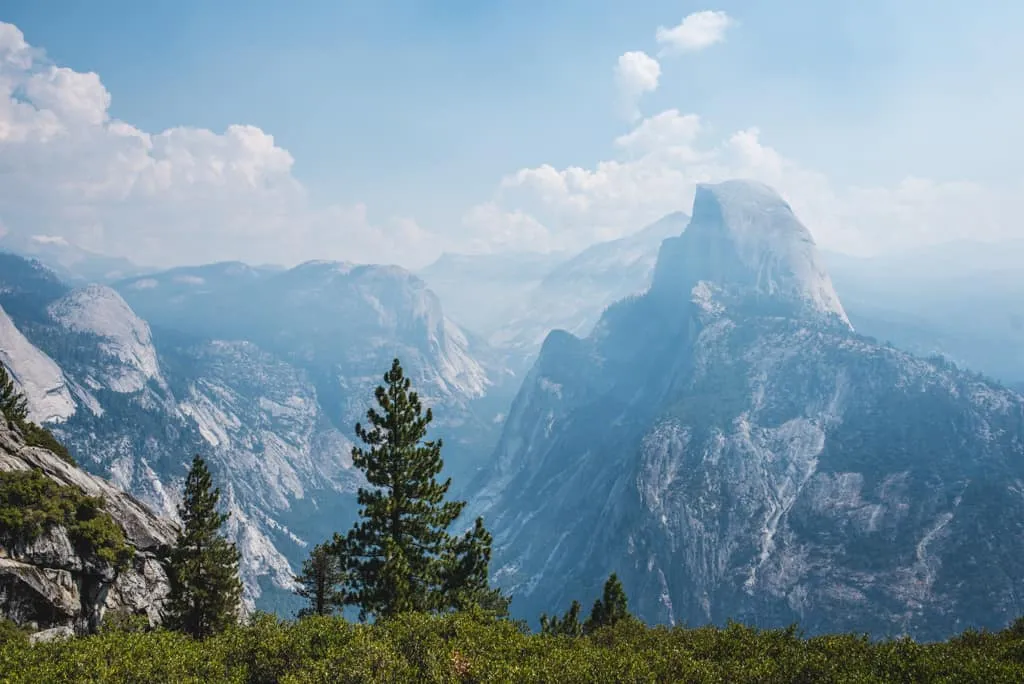
The Panorama trail is very exposed, which means you get incredible views the entire time, similar to the Four Mile trail. Prepare to “ooo” and “ahhh” nonstop!
About 2.5 miles into the Panorama trail you’ll reach Illilouette Falls. You get a view of the falls from the trail before eventually crossing a bridge over the Illilouette Creek. There is a great area along the creek with areas to sit and enjoy a picnic lunch!


After Illilouette Falls, you’ll continue on the Panorama Trail towards the Mist Trail. On the way, there is a Panorama Point, which is an unmarked path on your left about half a mile after the Illilouette Creek bridge.
This viewpoint used to have guardrails, but in 1977, part of the point broke off and fell to the valley floor. The NPS eventually removed the guardrails, which were hanging over the valley. While there haven’t been any major rockfalls in this spot since, it’s something to keep in mind. (This is our kind way of saying “don’t get too close to the edge!”…we sound like my mom now!)


After a few more miles on the trail, you’ll intersect with the John Muir Trail. Keep right here, which will take you to the Mist trail and Nevada Falls. You will reach the top of Nevada Falls shortly and there are quite a few spots to sit down and take a break, while admiring the rushing water plunge over the edge.


This is when the hike starts to get super busy again, so enjoy your last few moments of solitude!
Panorama Trail (Mist Trail to Yosemite Valley)
After crossing over Nevada Falls, continue on the Mist trail, which will take you on the side of Nevada Falls and then to Vernal Falls. When you reach Vernal Falls you’ll understand why the trail is called the Mist trail. We got completely soaked by all of the mist from Vernal Falls…it was so fun and very refreshing!
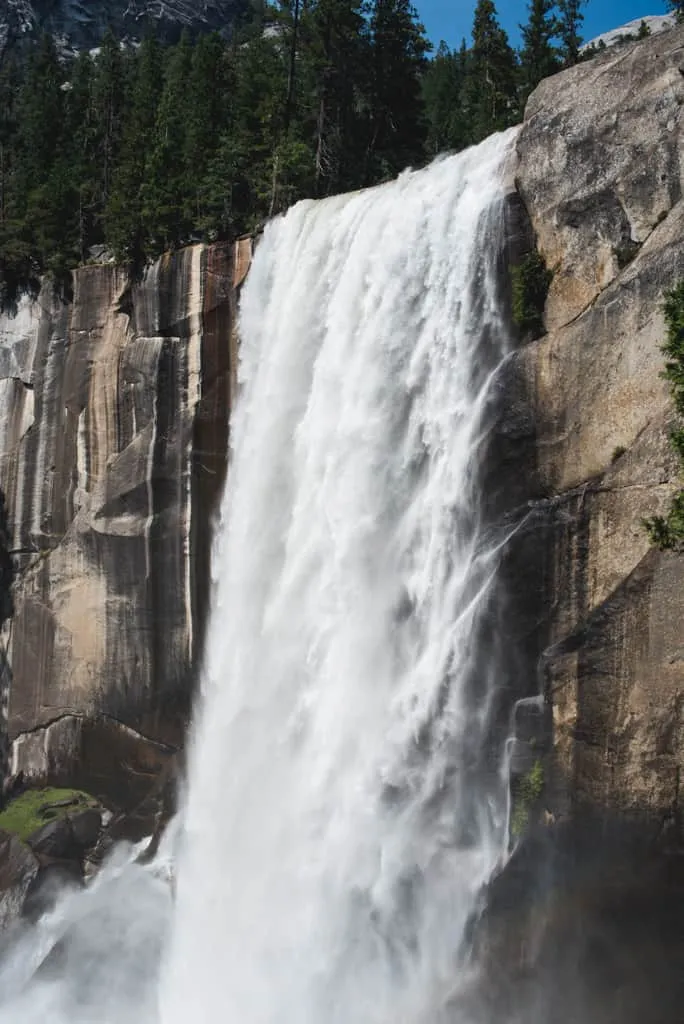

There are tons of stairs to hike down on the Mist trail, so if stairs are hard on you, you can take the John Muir trail instead (you will need to take the left before Nevada Falls like we mentioned earlier). These stairs are also very wet and slippery, so be careful!
The Mist trail eventually meets back up with the John Muir trail right before the Vernal Falls bridge, signaling almost the end of the hike.
Once you reach the Happy Isles trailhead, you’re officially done! Then it’s time to take the shuttle and dream about all of the delicious food you will enjoy to reward yourself—you deserve it after all!
Packing List for the Four Mile trail and Panorama trail
Curious what all you need to bring with you on your day hike at Yosemite? Here’s a list of some must-have items!
Note: Always bring the ten essentials with you! While hopefully you’ll never need to use some of the items, it’s better to be safe than sorry! Some of the items listed below are also on the ten essentials list, but we wanted to extra emphasize them 🙂
Hiking boots
Since this is a very long hike, we highly suggest wearing comfortable hiking boots or shoes! Not only will your feet be more comfortable, but you’ll have better grip on the trail. Adam loves his Altra Lone Peak trail runners and I love my Lowa Renegade GTX Boots (plus have some Lone Peak trail runners as well).
Rain jacket
While the weather may be beautiful when you go, we have learned our lesson to never hike without a rain jacket. We have had many situations where it randomly rained and we got soaked! You may also want a rain jacket for the Mist trail 🙂 Adam wears this jacket and Kathryn has this jacket.
Headlamp
If you plan to start the hike before sunrise or finish after sunset, make sure you pack a headlamp! We like to carry this regardless, just in case something happens and we are out in the dark.
Camelbak Bladder
You will need a LOT of water for this hike. We have a 3L Camelbak bladder that we use to carry all of our water when hiking and it’s a lifesaver! It’s a lot of water, so it weighs a tiny bit more, but we have never run out during a hike. And it fits in our backpacks so we can easily carry it and drink from it while moving! We also love our Katadyn Water Filter Bottle, which allows us to fill up and filter water on the go. This hike does have multiple natural water sources to fill up at.
Sun Protection
Hopefully you’ll hike the Four Mile trail, Panorama trail, and Mist trail on a sunny day. And if you do, you’ll definitely need some sun protection! The trail has a lot of exposed areas, so getting a sunburn is very likely.
We’d highly suggest bringing sunglasses or a hat is also helpful to protect you from the sun. And, of course, sunscreen!
Camera Gear
There is a very good chance you’ll take over 100 photos during your time on the Four Mile trail, Panorama trail, and Mist trail. The photos we took during these hikes are still some of our favorite photos we have ever taken.
While cell phone cameras have come a long way, we love using an actual camera to capture our travels. We have two cameras we use: a Sony a7 III Full Frame Mirrorless Camera (for photos) and a Sony FX3 Full Frame Cinema Line Camera (for filming and some photos).
A tripod would also be handy so you can get photos without having to find someone to take it for you. You can see all of our camera gear here!
Layers
Depending on when you visit Yosemite National Park, the mornings (or entire day!) could be a bit chilly. Make sure to pack layers so you can ensure you’re comfortable the whole day!
Lunch + Snacks
There’s nothing worse than being hangry while hiking all day long. Make sure to bring a lunch (sandwiches are easy!), plus as many snacks as possible. In the rare chance you get lost, you’d want to make sure you had enough food to hold you over.
Some of our favorite snacks are Bobo Bars, Clif Bars, Kate’s Real Food Bars, Nature’s Bakery fig bars, pepperoni and cheese, trail mix, and Chili Roasted Wonderful Pistachios.
Snacks
Besides the bars listed above, we also brought meat sticks and Chili Roasted Wonderful Pistachios.
Offline AllTrails Map
AllTrails is our go-to app for hiking! We not only use it to research trails and read about recent conditions, but also to download offline maps so we don’t get lost! To download offline maps you will need AllTrails+, which costs $35.99 per year. And it is 100% worth it! To get 30% off, use our code aplusk30 (you must redeem this code on the website, not the app)!
Trash bag
There is nowhere to throw away trash along the trail, except for Glacier Point, so we suggest bringing a small trash bag so you can follow the Leave No Trace principles and pack out any of your trash. We often just bring a big ziploc bag, which works well!
Binoculars
While not necessary, binoculars would be a great item to have to watch rock climbers, see people climbing to the top of Half Dome, and to see wildlife from afar!
America the Beautiful Pass
If you’re a National Park enthusiast with a bucket list of parks to conquer throughout the year, consider snagging the America the Beautiful Pass. Priced at just $80 for an annual pass, it unlocks access to over 2,000 federal recreation sites, including National Parks.
Sidenote: Bears at Yosemite
One thing that is very good to know about Yosemite is that there are black bears. We didn’t see any, but it’s not uncommon to spot a bear in the park. Despite this, bear spray is not allowed, so please do not bring it with you! We’d highly recommend reading Yosemite’s advice on what to do if you see a bear beforehand.
Check out all of our Yosemite National Park resources
- Where to stay in Yosemite National Park
- How to spend one day in Yosemite National Park
- The PERFECT 2 day Yosemite Itinerary
- The Ultimate Yosemite National Park itinerary: Options for 1-6 days!
- The 22 BEST hikes in Yosemite National Park
- The Best Day Hike in Yosemite: Four Mile, Panorama, & Mist Trail
- See more California National Park guides
Looking for more things to do in California?
- Plan the Ultimate California National Parks Road Trip! (3 itineraries)
- The Perfect One Day in Sequoia National Park Itinerary
- General Sherman Tree & Congress Trail: The Ultimate Giant Sequoia Hike!
- The 17 Best Things to Do in Sequoia National Park
- 15 Fun Things to Do in Kings Canyon National Park
- The ULTIMATE Guide to visiting Redwood National Park (+ state parks!) in California
- The BEST Hike in Pinnacles National Park (Bear Gulch Cave, High Peaks Trail, & Condor Gulch Trail)
Ready to hike the best day hike in Yosemite?
Pin this Four Mile trail, Panorama trail, and Mist trail guide to help plan your trip!

